5 Managing Device Settings
The Settings menu within the Device Manager allows you to configure the following settings:
- Video Detect: See 5.1 Video Detect .
- Camera Setting: See 5.2 Camera Setting .
- Storage Manager: See 5.3 Storage Manager .
5.1 Video Detect
Configure motion detection and video tampering settings using the Video Detect menu.
5.1.1 Configuring Motion Detection
You can enable and configure motion detection on any connected camera using the Lorex Cloud app. You can also set the sensitivity as well as the active area for motion detection per camera channel.
To enable and configure motion detection:
-
Tap
![icon]() to access the Menu, and then tap Device Manager.
to access the Menu, and then tap Device Manager.
- Tap a device to manage from the list of devices that appear.
- Tap Settings.
- Tap Video Detect, then tap Motion Detect.

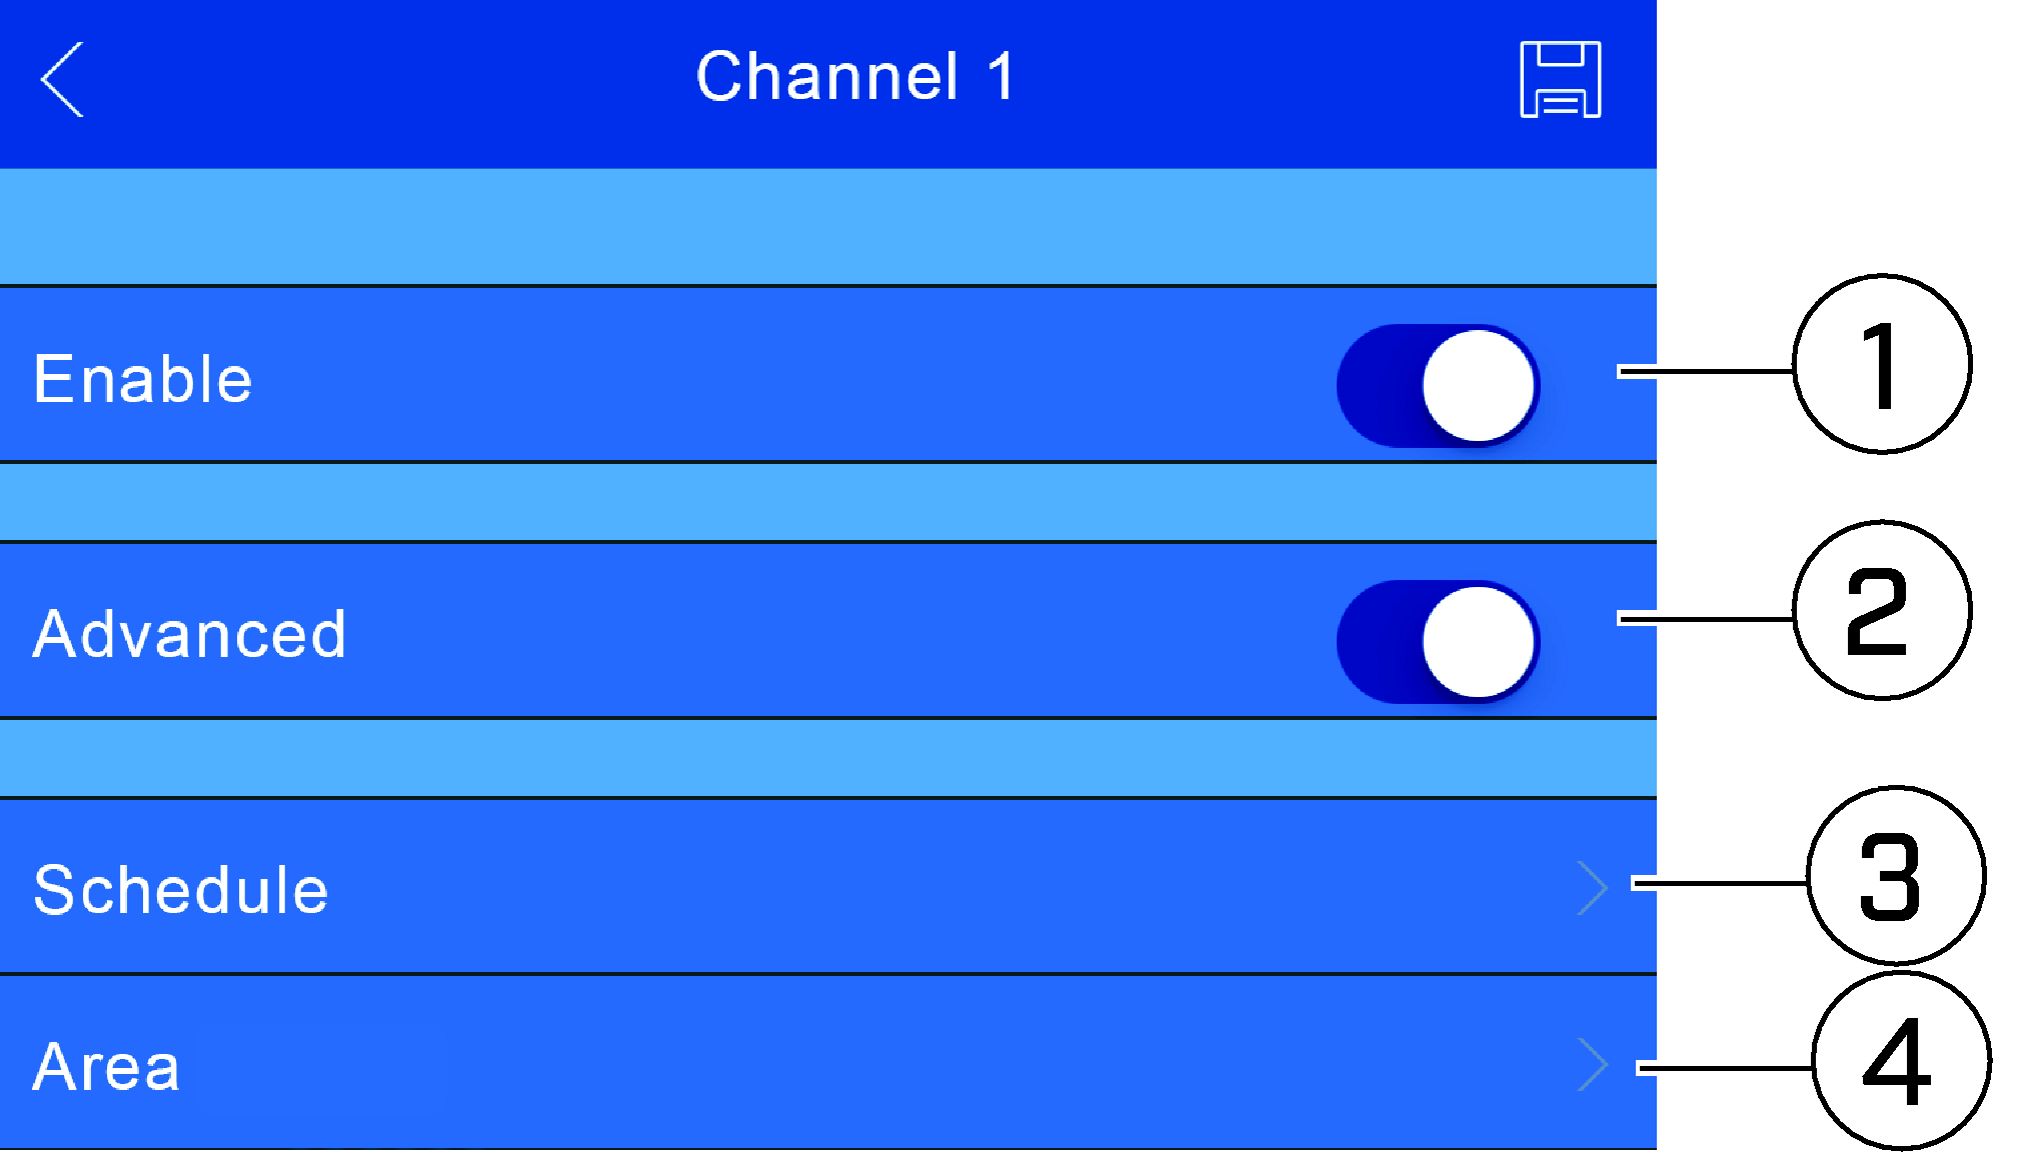
- Channel: Select a channel to configure motion detection for.
- Enable: Tap to enable / disable motion detection on the selected camera channel.
- Advanced Config: Tap to view / hide advanced motion detection configuration options.
-
Period: Tap to configure a schedule for motion detection on the selected camera channel. For example, you may want to disable motion
detection during business hours and enable it outside of business hours.
To configure a motion detection schedule, tap
![icon]() .
.
![Graphic]()
- Date: Tap to select the day you would like to configure motion detection for.
-
(OPTIONAL)
Copy: Tap to copy the schedule created for one day of the week to other days of the week. Tap
![icon]() to save your settings.
to save your settings.
-
Time Period: Configure the time period when motion detection will be enabled. You can configure up to six time periods.
![Graphic]()
- Tap to enable / disable time periods.
- Tap to select the start and end times for motion detection.
-
Tap
![icon]() to save your settings. The motion detection schedule appears.
to save your settings. The motion detection schedule appears.
- Anti-Dither: Fixed at 30 seconds.
- Sensitivity: Tap to select a sensitivity level for motion events. The lower the sensitivity value, the more movement is required to trigger motion detection.
-
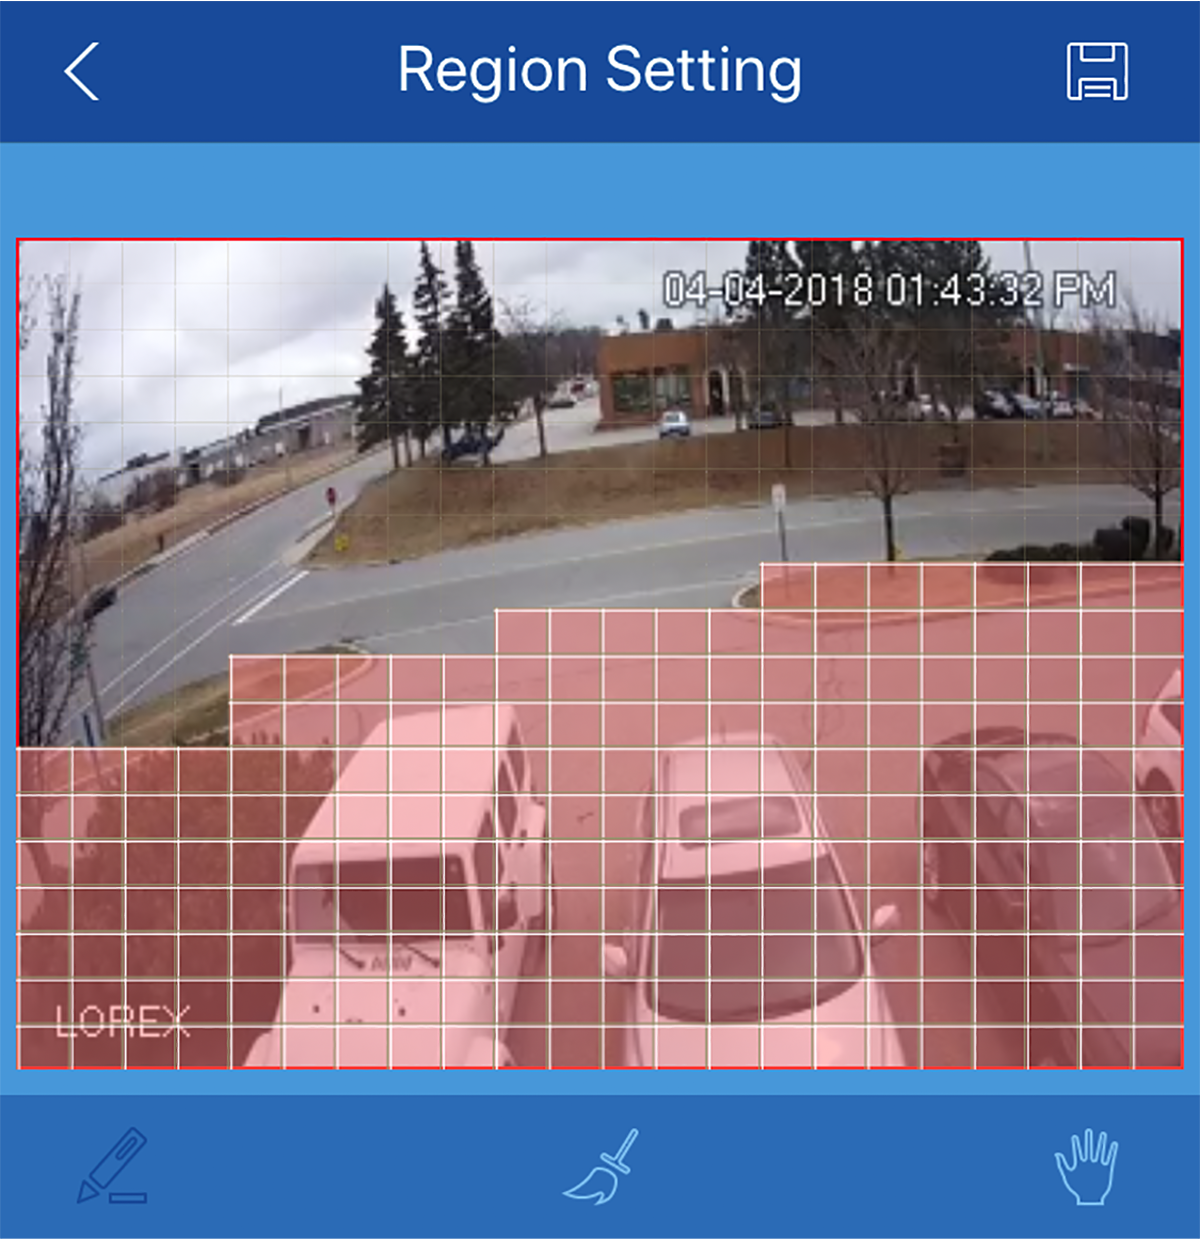
Region Setting: Tap to configure which areas of the camera image will be enabled for motion detection. A red grid will appear over the
camera’s live view, letting you know that motion detection is active for the entire image.
To set a motion detection region:
![Graphic]()
- Tap to add areas to the motion grid.
- Tap to remove areas from the motion grid.
- Tap and pinch the image to zoom in/out.
- Tap to save the motion detection region.
- Record: Tap to enable / disable recording video of the motion event.
- Channel: Tap to select channels that should also record when motion is detected on the camera channel you are configuring motion detection for.
- Delay: Tap to set the amount of time (in seconds) the system will record video after motion is detected.
- Snapshot: Tap to enable / disable saving a snapshot when the camera detects motion.
-
Tap
![icon]() to save your settings.
to save your settings.


5.1.2 Configuring Video Tampering
You can configure how your device reacts to any signs of tampering (i.e., cameras being moved, damaged or blocked out) using
the
Tampering
menu.
To access tamper detection:
-
Tap
![icon]() to access the Menu, and then tap Device Manager.
to access the Menu, and then tap Device Manager.
- Tap a device to manage from the list of devices that appear.
- Tap Settings.
- Tap Video Detect, then tap Tampering .
To configure tamper detection:

- Channel: Use the drop-down to select a camera channel to configure tamper detection for.
- Enable: Tap to view / hide tamper detection on the selected camera channel.
- Advanced Config: Tap to enable / disable advanced tamper detection configuration options.
-
Period: Tap to customize active hours for tamper detection (for example, during hours when your business is closed).
To configure a tamper detection schedule, tap
![icon]() .
.
![Graphic]()
- Date: Tap to select the day you would like to customize tamper detection hours for for.
-
(OPTIONAL)
Copy: Tap to copy the schedule created for one day of the week to other days of the week. Tap
![icon]() to save your settings.
to save your settings.
-
Time Periods: Configure time periods when tamper detection will be enabled. You can configure up to six time periods.
![Graphic]()
- Tap to enable / disable time periods.
- Use the time bars to select the start and end times for tamper detection.
-
Tap
![icon]() to save your settings. The tamper detection schedule appears.
to save your settings. The tamper detection schedule appears.
- Record: Tap to enable / disable recording video in the event of tampering.
- Channel: Tap to select camera channels that should also record when tampering occurs on the camera channel you are configuring tamper detection for.
- Delay: Tap to set the amount of time (in seconds) the system will record video after a tampering event occurs.
- Snapshot: Tap to enable / disable saving a snapshot when the camera is tampered with.
-
Tap
![icon]() to save your settings.
to save your settings.
5.1.3 Configuring Automatic Deterrence (Deterrence Cameras only)
You can set preferences for the automatic warning light triggering on compatible Lorex deterrence cameras.
To configure automatic deterrence through the Lorex Cloud app:
-
From live view, tap
 to access the Menu, and then tap Device Manager.
- From the list of devices that appear, tap the device to which the deterrence camera is connected.
- Tap Settings.
- Tap Video Detect, then tap Deterrence.
-
Tap the channel of the deterrence camera to configure. Do the following:
- Tap to enable / disable automatic warning light deterrence.
- Tap to view / hide advanced deterrence configuration options.
- Tap to set a schedule during which the warning light will automatically turn on. The default schedule is active during the night, between 5pm and 7am.
-
Tap to set the active area for automatic deterrence. The camera image appears with a grid of red boxes over top. The red area
is the active area for deterrence.
-
 : Tap to add boxes to the active area.
-
 : Tap to remove boxes from the active area.
-
 : Tap and pinch the image to zoom in/out.
-
 : Tap when finished.
-
-
Tap
to save your settings.
5.2 Camera Setting
The Camera Setting menu allows you to configure your device’s recording quality (Mainstream and Substream). Your device uses 2 recording streams:
the Mainstream is the high-quality stream used for live viewing and recording, while the Substream is a lower quality stream used for remote viewing and playback. This allows you to record high-quality video locally, as
well as review video remotely with relatively low bandwidth requirements.
To configure recording quality:
Under the selected device’s Settings menu, tap Camera Setting, then tap Video Stream. Select a camera to configure recording quality for.
5.2.1 Configuring the Mainstream

- Channel Name: Select a camera channel to configure recording quality for.
- Main / Sub: Select Main to configure mainstream.
- Encode: Tap to select a video compression type from the list.
- Audio: Tap to enable / disable audio (audio-enabled camera required).
- Resolution: Tap to select a recording resolution from the list.
- Frame rate: Tap to select the number of frames per second mainstream will record at. A higher frame rate provides a smoother picture, but requires more storage and bandwidth.
- Bit rate type: Tap to select a bit rate type from the list. Select CBR (default) to use a Constant Bit Rate, or VBR for a Variable Bit Rate. For VBR, use the Quality drop-down to select a quality level for the video stream.
- Bitrate: Set the bitrate mode (predefined bitrate mode), or enter a custom bitrate between 1024-8192Kbps (user-defined bitrate mode).
-
Tap
![icon]() to save your settings.
to save your settings.
5.2.2 Configuring the Substream

- Channel Name: Select a camera channel to configure recording quality for.
- Main / Sub: Select Sub to configure substream.
- Encode: Tap to select a video compression type from the list.
- Video: Tap to enable / disable video for remote viewing.
- Audio: Tap to enable / disable audio (audio-enabled camera required).
- Resolution: Tap to select a recording resolution from the list.
- Frame rate: Tap to select the number of frames per second mainstream will record at. A higher frame rate provides a smoother picture, but requires more storage and bandwidth.
- Bit rate type: Tap to select a bit rate type from the list. Select CBR (default) to use a Constant Bit Rate, or VBR for a Variable Bit Rate. For VBR, use the Quality drop-down to select a quality level for the video stream.
- Bitrate: Set the bitrate mode (predefined bitrate mode), or enter a custom bitrate between 1024-8192Kbps (user-defined bitrate mode).
-
Tap
![icon]() to save your settings.
to save your settings.
5.3 Storage Manager
You can configure your device’s video recording schedules using the Storage Manager menu. A custom recording schedule helps reduce the amount of hard drive space required, increasing the time your system can
retain recordings.
To configure custom video recording schedules:
- Under the selected device’s Settings menu, tap Storage Manager, then tap Schedule.
- Under the Channel drop-down, select a camera channel to configure recording schedule for.
-
To configure a recording schedule, tap
![icon]() .
.
![Graphic]()
- Date: Tap to select the day you would like to configure recording schedules for.
-
(OPTIONAL)
Copy: Tap to copy the settings created for one camera channel to other camera channels. Tap
![icon]() to save your settings.
to save your settings.
-
Time Periods: Configure time periods when video recording will be enabled. You can configure up to six time periods.
![Graphic]()
- Use the time bars to select the start and end times for video recording.
- Tap Continuous, Motion, and / or Alarm to select the recording type for the custom recording schedule.
-
Tap
![icon]() to save your settings. Different recording types are shown with different colored bars:
to save your settings. Different recording types are shown with different colored bars:
- Green: Continuous recording
- Yellow: Motion recording
- Red: Alarm recording

