10 Device Settings
You can configure settings for your security product from anywhere using the Lorex Home app.
Device Settings Overview

- Basic Information: Tap to view device ID, set device / channel name, change thumbnail photo, or change password. For full details, see 10.1 Basic Information .
- SmartZone™: Set the active area for motion detection. For instructions, see 10.4 Setting up SmartZone™ .
- Notifications: Configure push notifications and other motion detection settings.
- White Light: Configure options for the camera’s spotlight. For instructions, see 10.8 Spotlight Brightness .
- Continuous Recording Schedule: Set a schedule for continuous video recording. For instructions, see 10.7 Continuous Recording Schedule .
- Device Storage: Enable/disable recording to the camera’s microSD card, or format the microSD card.
- Time Zone: Tap to change the time zone (see 10.12 Changing Time Zone ) or to configure Daylight Savings Time (see 10.13 Daylight Savings Time ).
- Image Rotation: Rotate the live viewing image 180°.
- Camera LED: Enable / disable the camera’s status LED.
- Share Device: Tap to send an invite to another Lorex Home account to access the selected device. For full instructions on device sharing, see 10.10 Device Sharing .
- Firmware: Tap to check for a newer firmware version.
- Wi-Fi: Tap to change the Wi-Fi network for the device.
- Remove Device: Remove this device from Lorex Home.
10.1 Basic Information
Configure basic product settings.

- Device Photo: Tap to choose a thumbnail image for your Lorex device. By default, the thumbnail will be automatically generated using the most recent live image.
- Device Name: Tap to edit the name of your Lorex device.
- Channel Name: Tap to edit the selected channel name.
- Device ID: Displays your Lorex product’s Device ID.
10.2 Changing Device Password
You can change the password for your Lorex device at any time using the Lorex Home app.
To change your password:
- Launch the Lorex Home app. Tap the device you want to change the password for.
-
Tap
![icon]() to open up Device Settings, then tap the thumbnail for your device.
to open up Device Settings, then tap the thumbnail for your device.
-
Tap Device Password.
![Graphic]()
- Enter your current password.
- Enter a new password.
-
Tap
![icon]() to save changes.
to save changes.
![Graphic]()


10.3 Enable/Disable Device Storage
By default, the camera will automatically save motion events to the pre-inserted microSD card.
To enable/disable device storage:
- Launch the Lorex Home app. Tap the device you want to enable/disable storage for.
-
Tap
![icon]() to open up Device Settings, then tap Device Storage.
to open up Device Settings, then tap Device Storage.
-
Tap Device Storage.
![Graphic]()
-
Tap the toggle switch to enable/disable device storage.
![Graphic]()


10.4 Setting up SmartZone™
SmartZone™ allows you to customize your device’s motion detection region. Areas of the camera image that trigger unwanted
motion events can be disabled, such as a busy sidewalk or trees blowing in the wind.
To configure SmartZone™:
- Launch the Lorex Home app. Tap the device you want to set a SmartZone™ for.
-
Tap
![icon]() to open up Device Settings, then tap SmartZone™.
to open up Device Settings, then tap SmartZone™.
- By default, the entire image has a red overlay, meaning that a motion event happening anywhere on screen will trigger an event. To set a customized SmartZone™, tap Clear Area. The red overlay disappears, meaning that motion detection is disabled for the entire image.
- Tap-and-drag over parts of the camera image where you would like motion to be detected.
-
Tap Save to apply changes.
![Graphic]()

10.5 Push Notifications
By default, your Lorex device will send push notifications to your mobile device when motion is detected.
To enable/disable push notifications:
- Launch the Lorex Home app. Tap the device you want to configure notifications for.
-
Tap
![icon]() to open up Device Settings, then tap Notifications.
to open up Device Settings, then tap Notifications.
![Graphic]()
-
Tap Motion Detect to enable/disable push notifications for motion events. Tap
![icon]() when finished to save and return to Device Settings.
when finished to save and return to Device Settings.

10.6 Motion Detection Sensitivity
To ensure that your Lorex device is capturing motion events properly, it is recommended to set an appropriate sensitivity
level.
To set motion detection sensitivity:
- Launch the Lorex Home app. Tap the device you want to set motion sensitivity for.
-
Tap
![icon]() to open up Device Settings, then tap Notifications.
to open up Device Settings, then tap Notifications.
-
Tap Motion Sensitivity, then tap the desired sensitivity level. Tap
![icon]() when finished to save and return to Device Settings.
when finished to save and return to Device Settings.
![Graphic]()

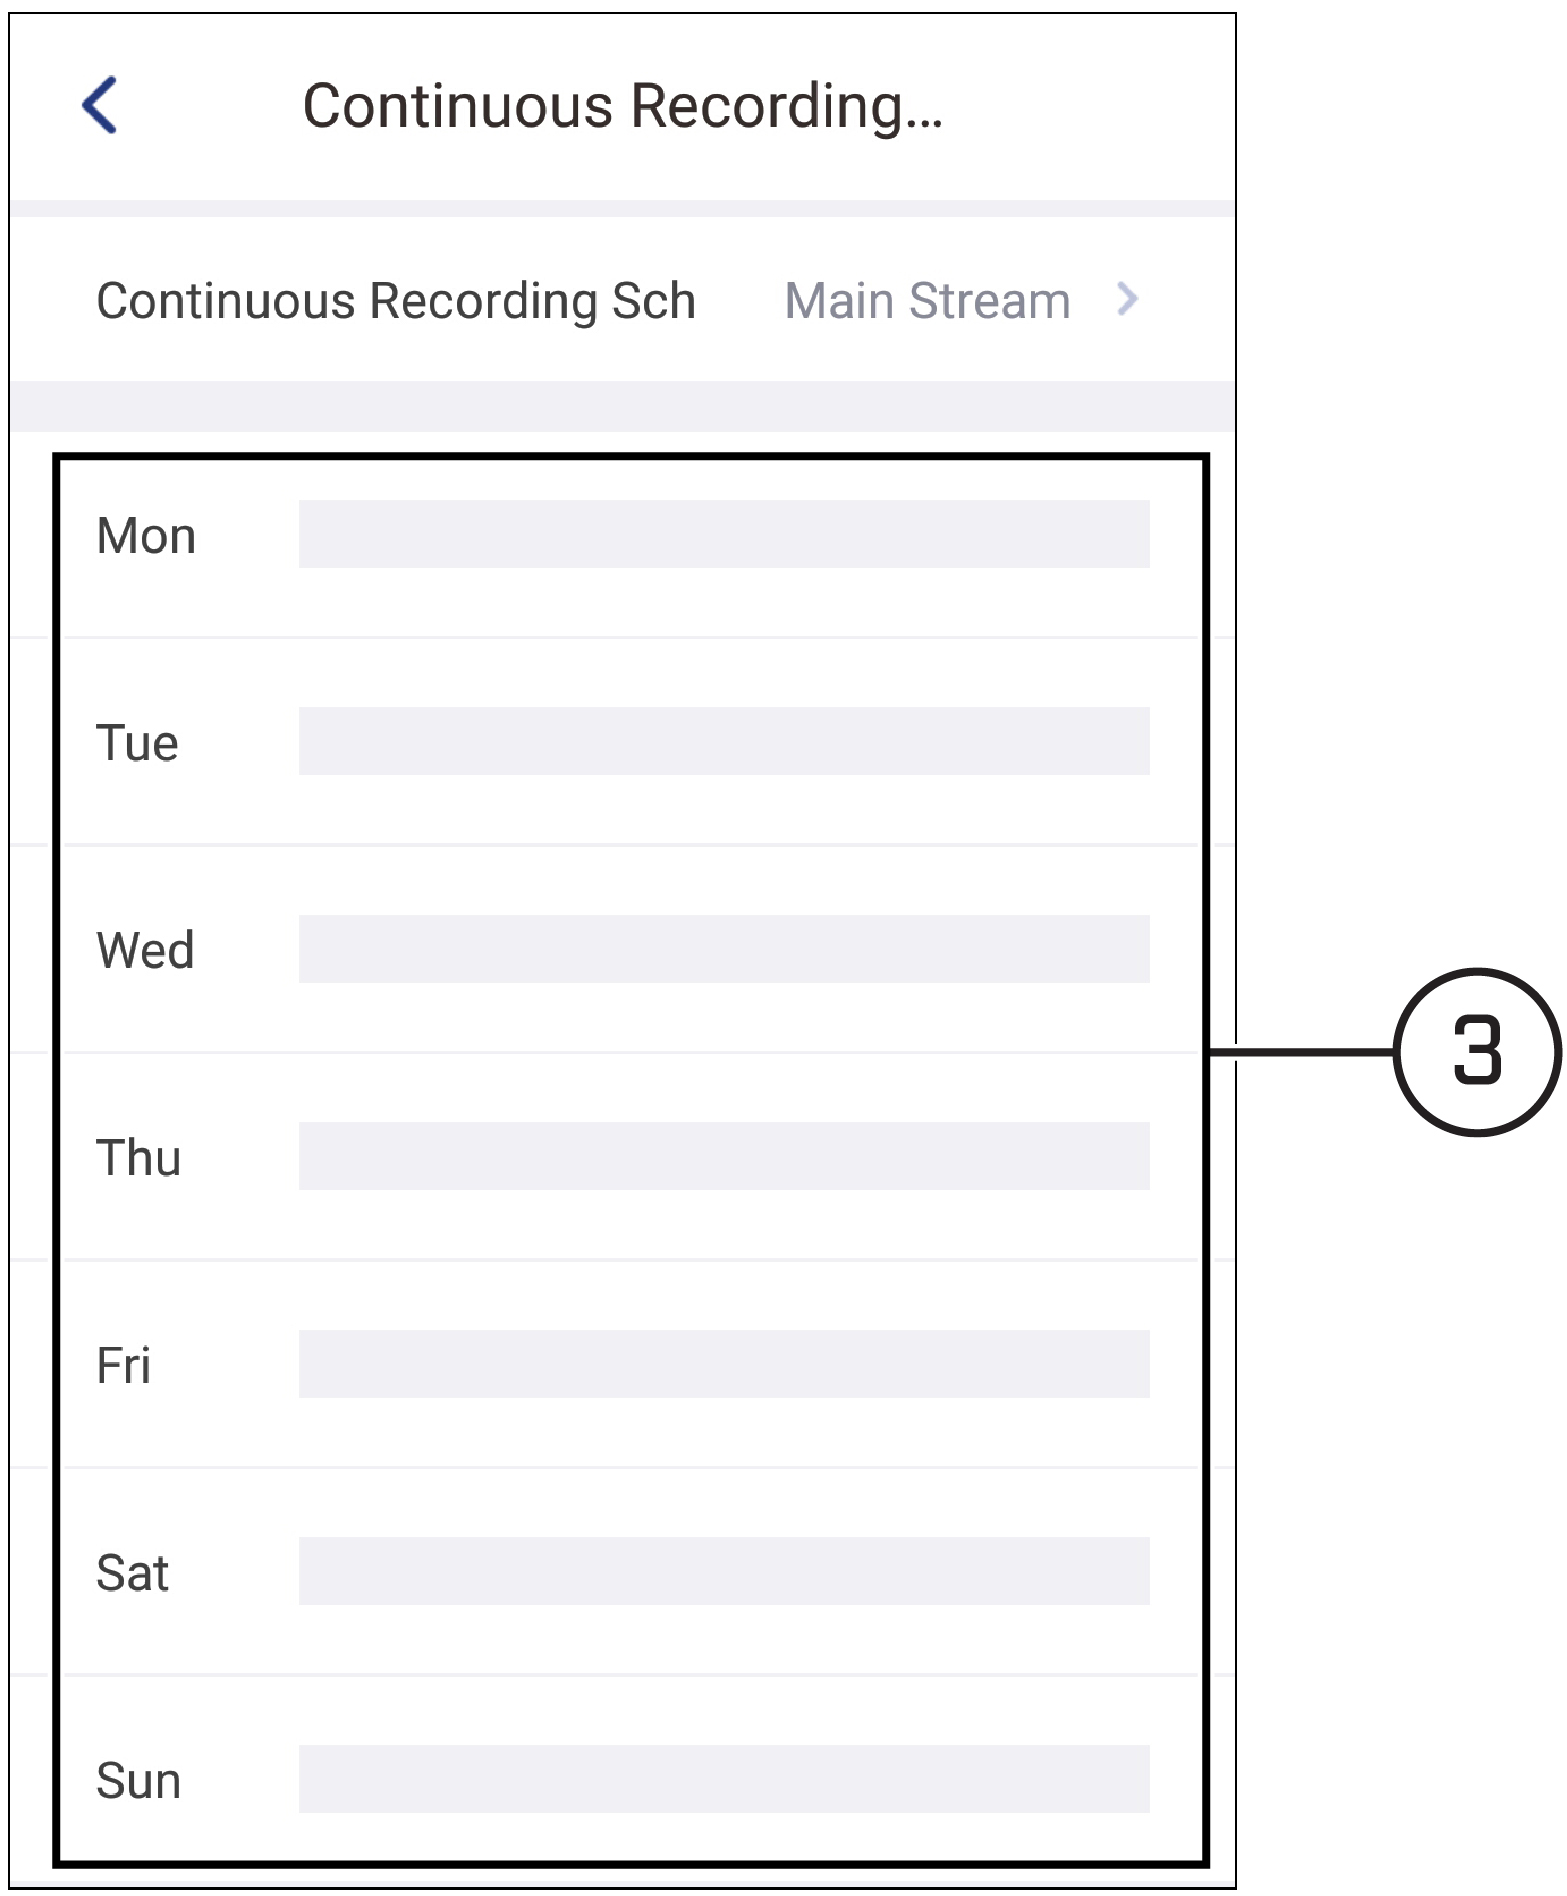
10.7 Continuous Recording Schedule
The camera automatically records motion detection events to the device’s microSD card. You can set a recording schedule to
have the camera record continuously during certain times of the week.
To set a schedule for continuous recording:
- Launch the Lorex Home app. Tap the device you want to set a recording schedule for.
-
Tap
![icon]() to open up Device Settings, then tap Continuous Recording Schedule.
to open up Device Settings, then tap Continuous Recording Schedule.
-
Schedule settings appear for each day of the week. By default, continuous recording is disabled. Tap next to any day of the
week to configure a continuous recording schedule.
![Graphic]()
-
Tap Add Schedule.
![Graphic]()
-
Enter the start and end time for continuous recording. Tap
![icon]() when finished.
when finished.
![Graphic]()
- (OPTIONAL) Tap Add Schedule again to add another block of time to the schedule.
-
Tap Save when finished. You may now tap Repeat to change the day and configure another day’s schedule, or tap
![icon]() to return to the scheduling menu.
to return to the scheduling menu.
![Graphic]()


10.8 Spotlight Brightness
Change the brightness of the spotlights on the camera.
To change spotlight brightness:
- Launch the Lorex Home app. Tap the device you want to set spotlight brightness for.
-
Tap
![icon]() to open up Device Settings, then tap White Light.
to open up Device Settings, then tap White Light.
-
Tap Brightness Setting to change the brightness of the spotlight. Tap
![icon]() when finished to save and return to Device Settings.
when finished to save and return to Device Settings.
![Graphic]()

10.9 Linking the Spotlight to Motion Detection
By default, the spotlight turns on whenever the camera detects motion.
To link/unlink spotlight with motion detection:
- Launch the Lorex Home app. Tap the device you want to configure the spotlight settings for.
-
Tap
![icon]() to open up Device Settings, then tap Notifications.
to open up Device Settings, then tap Notifications.
-
Tap Link White Light to enable/disable linking. Tap
![icon]() when finished to save and return to Device Settings.
when finished to save and return to Device Settings.
![Graphic]()

10.10 Device Sharing
You can share access to your Lorex device with other Lorex Home users.
Prerequisite:
- Users you share device access with must have the Lorex Home app and account.
To share access to your device:
- Launch the Lorex Home app. Tap the device you want to share.
-
Tap
![icon]() to open up Device Settings, then tap Share Device.
to open up Device Settings, then tap Share Device.
-
If this is your first time sharing the device, tap Add User. For additional shared users, tap the + icon in the top-right corner.
![Graphic]()
-
Enter the email address that is associated with the other user’s Lorex Home account. Tap
![icon]() when finished.
when finished.
![Graphic]()


To remove shared users:
- Launch the Lorex Home app. Tap the device you want to remove shared users from.
-
Tap
![icon]() to open up Device Settings, then tap Share Device.
to open up Device Settings, then tap Share Device.
-
All shared users are shown on the Shared Users screen. Tap Revoke next to any users you wish to remove from your device.
![Graphic]()

10.11 Formatting the microSD Card
You can format the camera’s microSD card using the Lorex Home app.
To format the microSD card:
- Launch the Lorex Home app. Tap the device you want to format storage for.
-
Tap
![icon]() to open up Device Settings, then tap Device Storage.
to open up Device Settings, then tap Device Storage.
-
Tap Format Storage Device.
![Graphic]()

10.12 Changing Time Zone
Setting the time zone is part of initial device setup. You can change the time zone at any time using the Lorex Home app.
To change device time zone:
- Launch the Lorex Home app. Tap the device you want to change the time zone for.
-
Tap
![icon]() to open up Device Settings, then tap Time Zone.
to open up Device Settings, then tap Time Zone.
-
Tap Time Zone to choose from a list of regions.
![Graphic]()
-
Tap
![icon]() when finished.
when finished.

10.13 Daylight Savings Time
Setting preferences for Daylights Savings Time (DST) is part of initial device setup. You can change DST settings at any time
using the Lorex Home app.
To configure DST:
- Launch the Lorex Home app. Tap the device you want to set DST for.
-
Tap
![icon]() to open up Device Settings, then tap Time Zone.
to open up Device Settings, then tap Time Zone.
-
Tap the switch next to DST to enable/disable DST for the selected device. If you are using DST, configure the recurrence timing below, which is displayed
only when DST is enabled.
![Graphic]()
-
Tap
![icon]() when finished.
when finished.
