12 Face Detection
The system supports face detection, face recognition, and storing faces in the database. It activates snapshot, recording
and alarms which can be configured using the menus shown below.
12.1 Configuring Face Detection
Set preferences for face detection on each channel, and select channels you want to enable face detection on.
- From the Live View display, right-click to open the Quick Menu, then click Main Menu.
-
Click EVENTS, then click the Face Settings tab on the side panel.
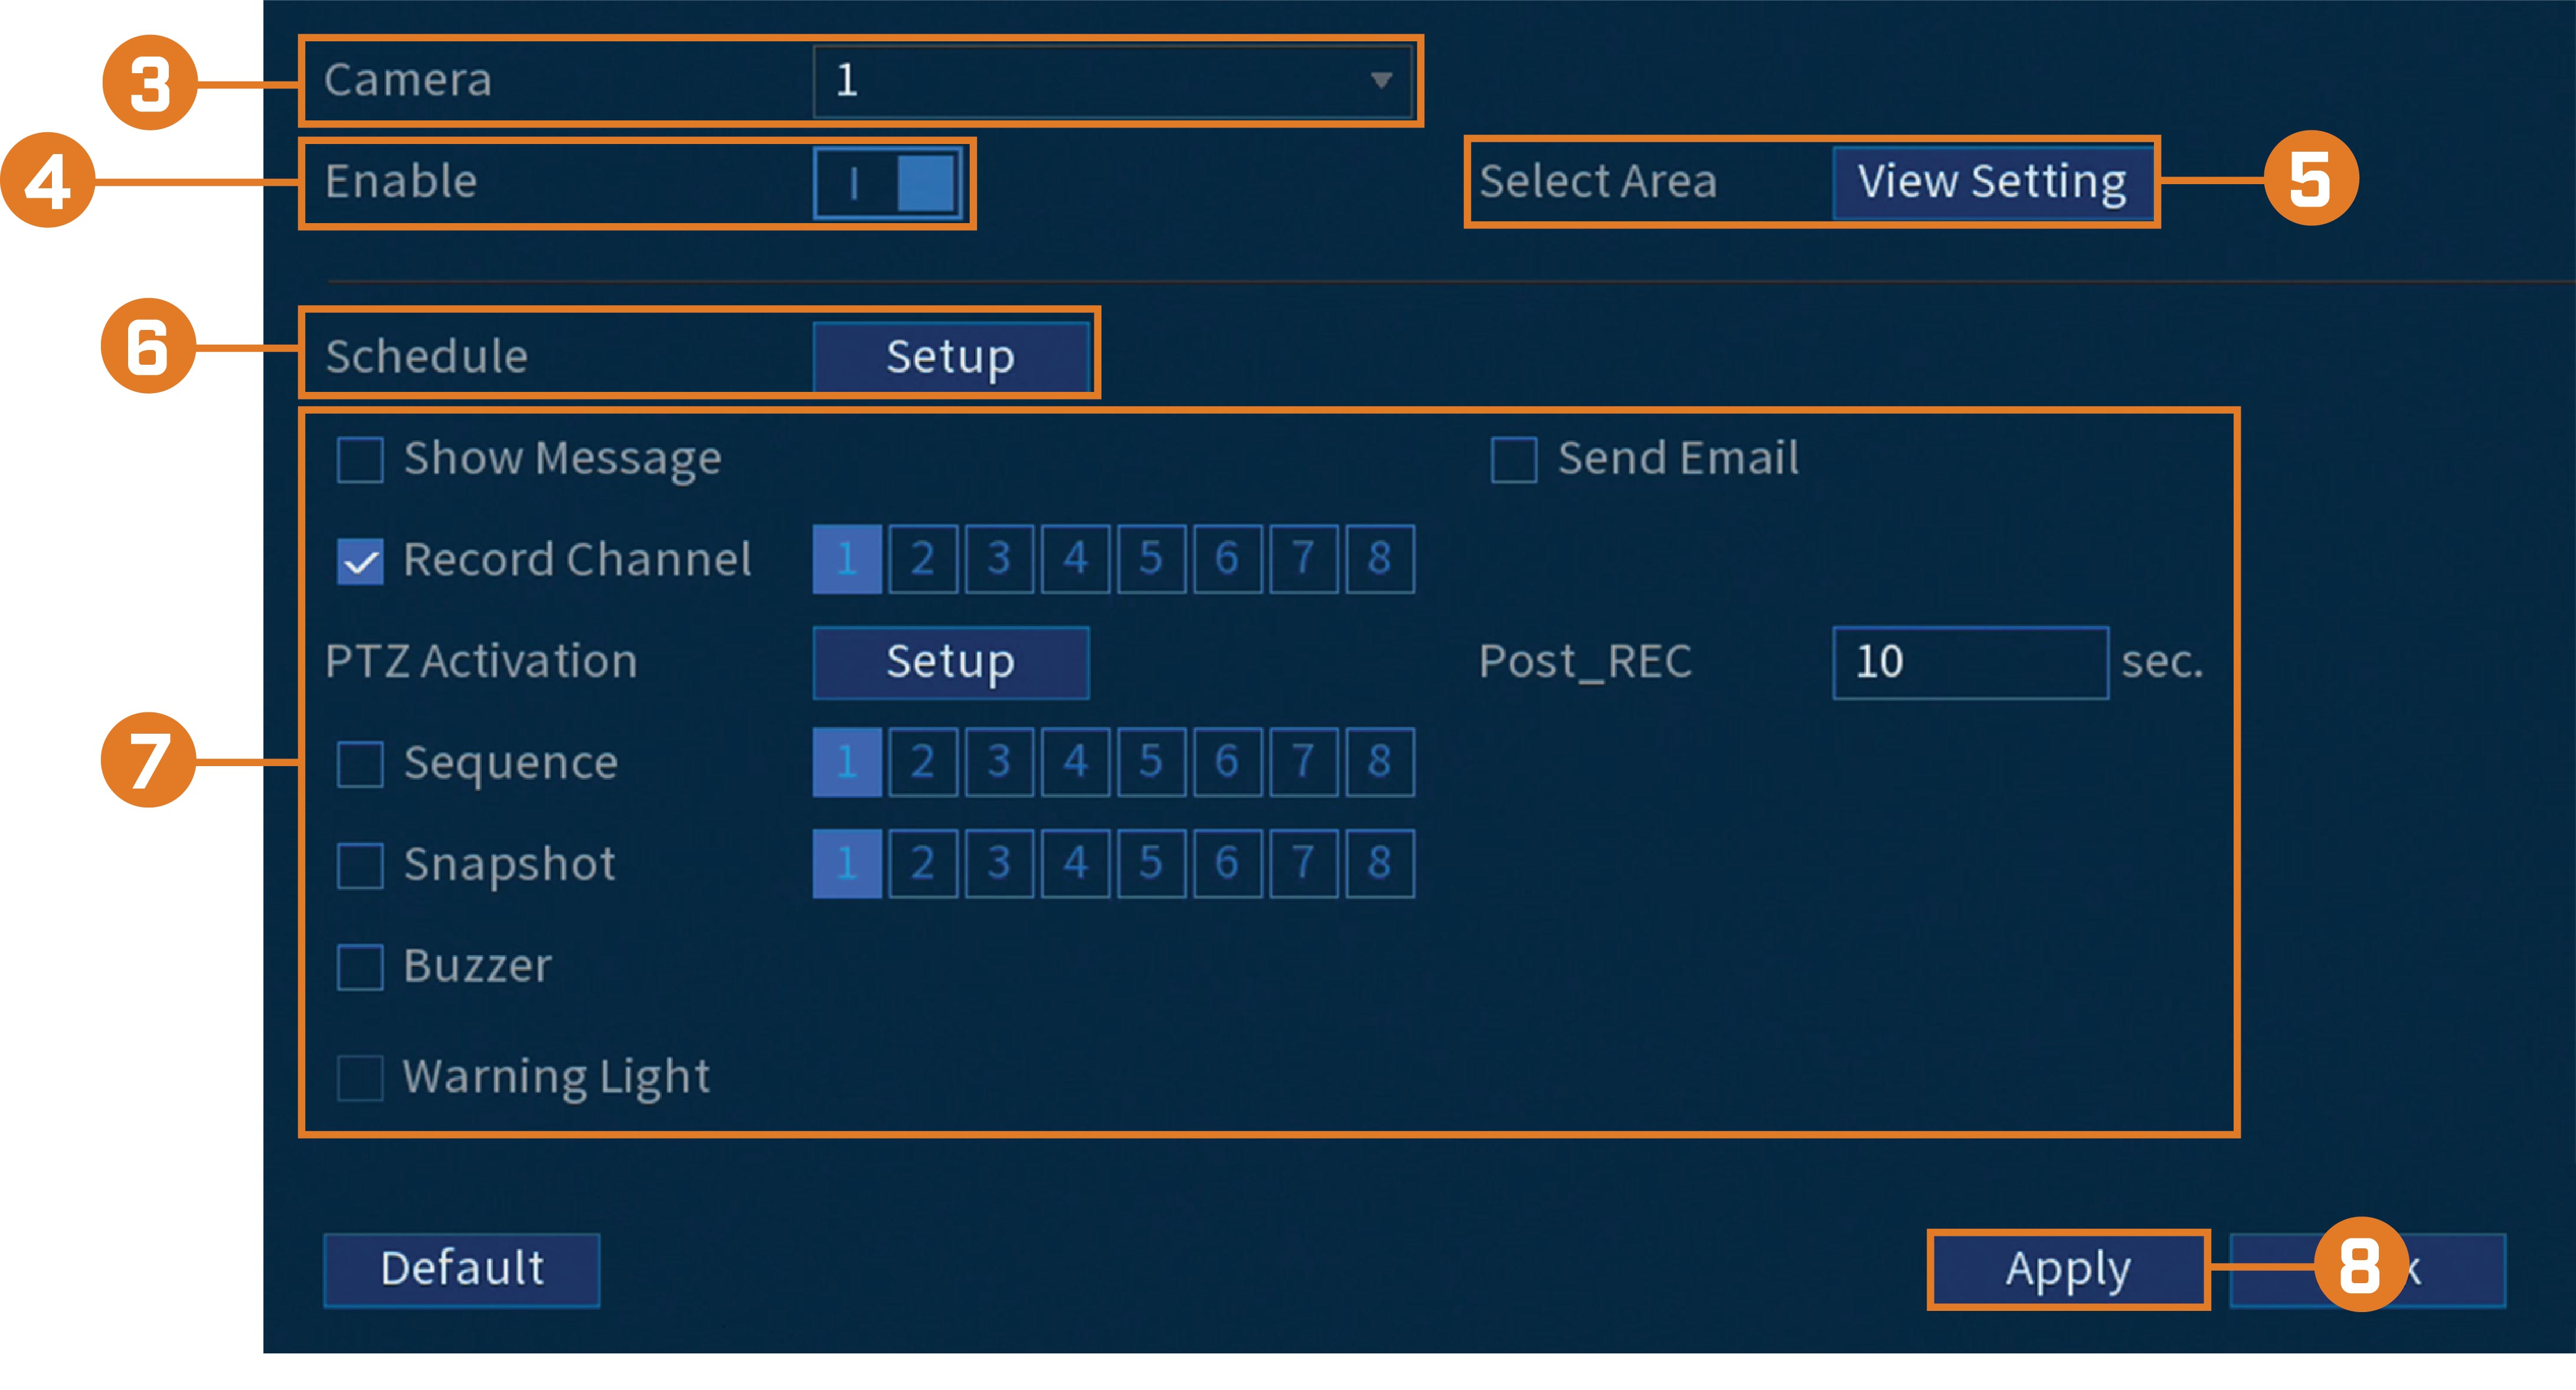
- Select a camera to configure face detection for.
-
Click to enable (
 ) / disable (
 ) face detection on the selected channel.
- Click View Settings next to Select Area to configure which areas of the image will target faces.
-
Click Setup next to Schedule to choose which days and times of the week to enable face detection:
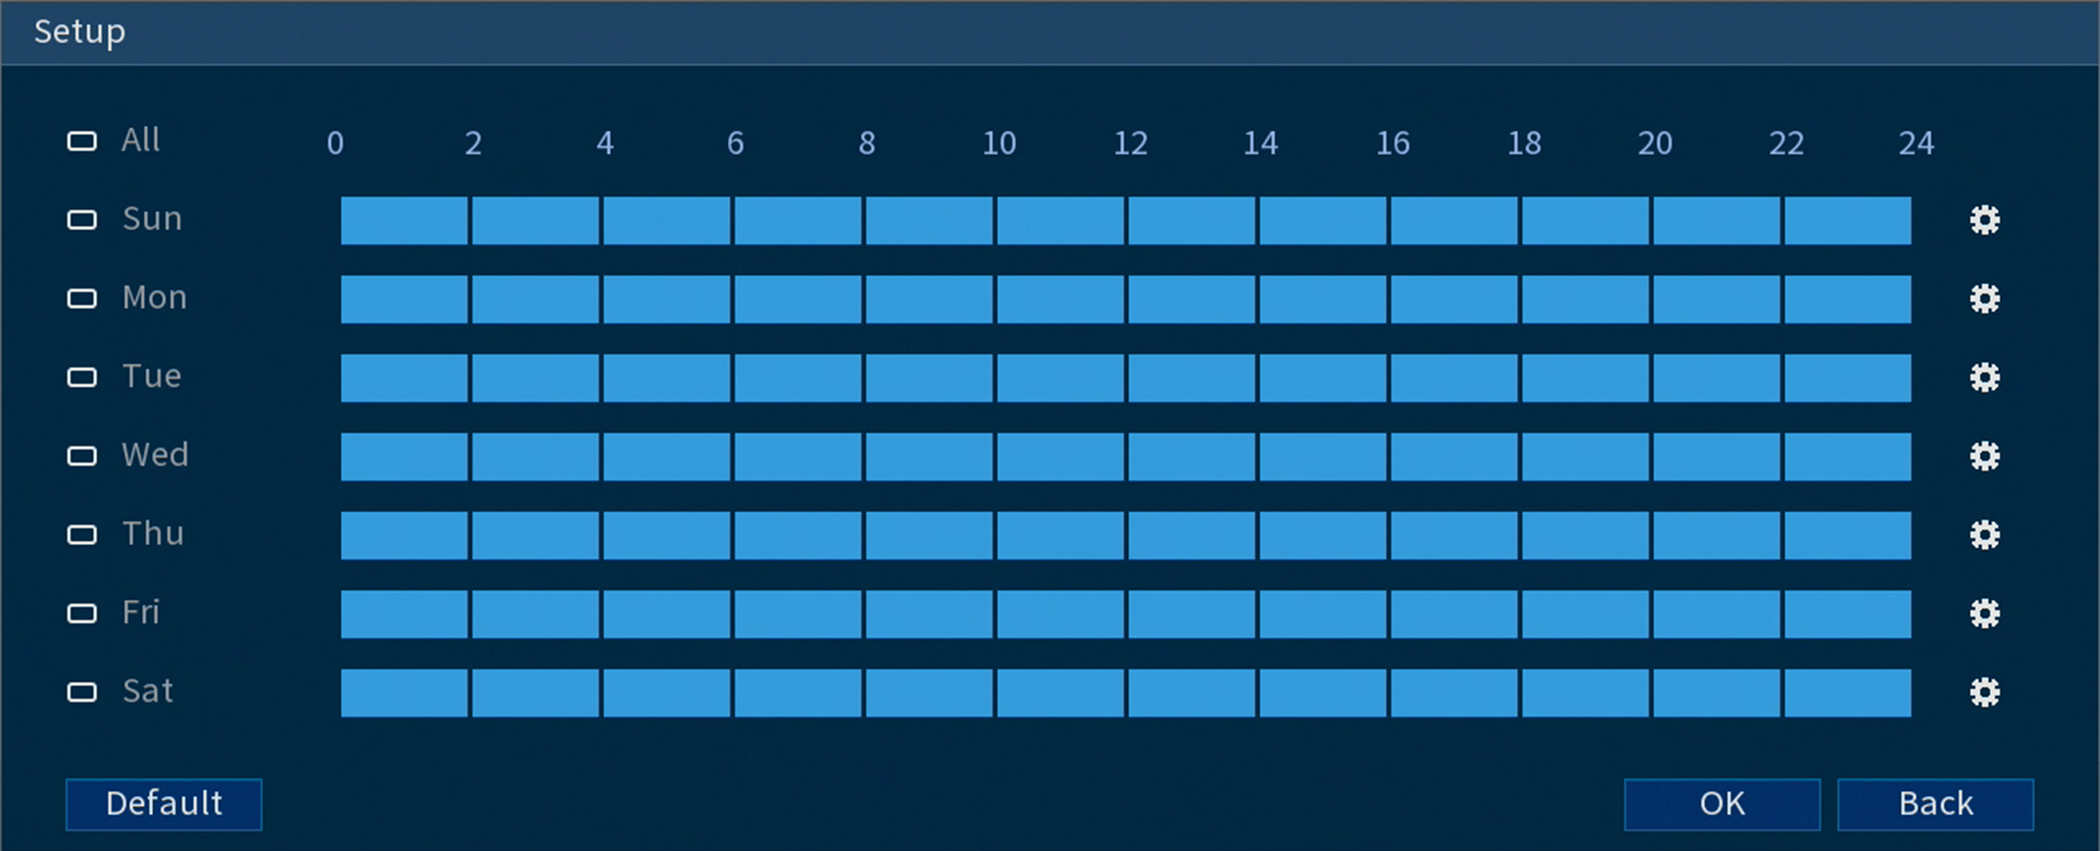
- Click or click-and-drag along the each of the blue timelines to quickly add or remove time from each day’s schedule in 15–minute segments.
-
Click
 beside 2 or more days to link schedules (
 ). This allows you to quickly change multiple schedules at once.
-
To make fine adjustments to a schedule, click
 . This will allow you to set exact start and end times for a schedule.
-
You can set various events to happen when the alarm is triggered including:
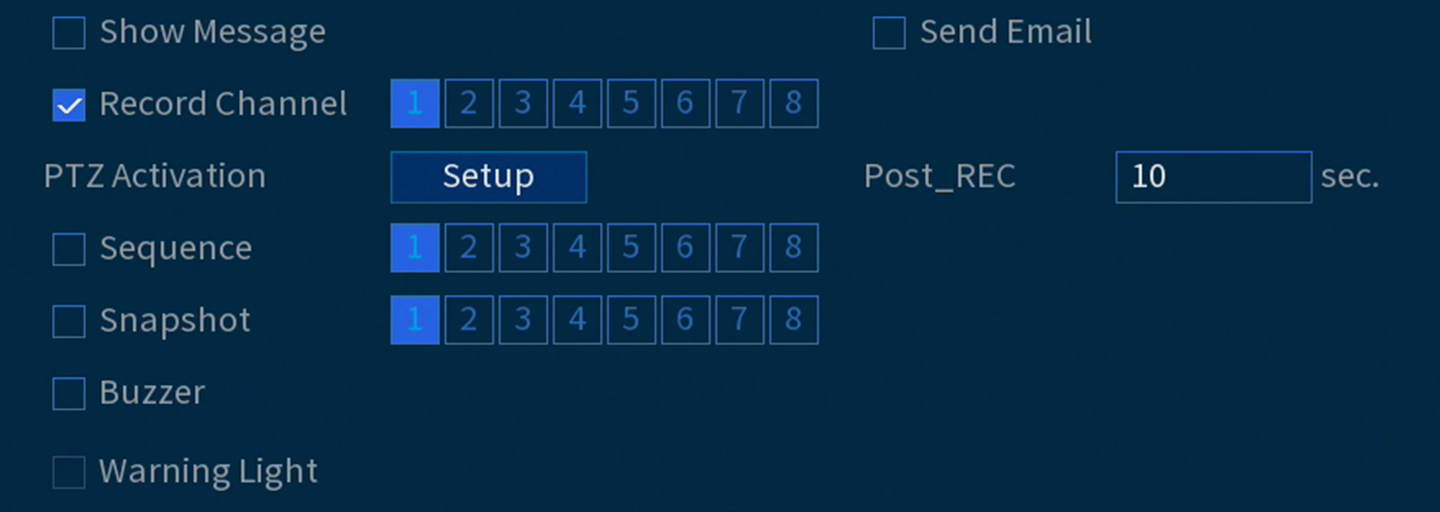
- Show Message: Check to enable an on-screen pop-up when one of your cameras detects a face. On-screen pop-up shows the channels an event occurred on.
- Send Email: Check to enable email alerts. You must configure email alerts before you will be able to receive them (see 15.7.3 Configuring Email Alerts ).
- Record Channel: Select the channels that will record when a face is detected on the selected channel. Set the length of recording following a video loss event in the Post_REC field.
- PTZ Activation: Set connected PTZ cameras to start a tour, pattern, or go to a preset location.
- Sequence: Sequence mode will begin. Select the numbered tiles next to this option to include the corresponding channels in the sequence.
- Snapshot: Select the numbered tiles next to this option to save a snapshot of the corresponding channels.
- Buzzer: Check to enable the system buzzer.
- Warning Light: Check to enable the system warning light.
- Click Apply.
- (OPTIONAL) Click Copy to apply the settings for the current channel to one or more other channels (see 15.12 Copying Settings to Another Channel for full instructions on using the copy function).
To configure face detection:
12.2 Configuring Face Recognition
You can configure the system to detect faces and respond with various actions.
- From the Live View display, right-click to open the Quick Menu, then click Main Menu.
-
Click EVENTS, then click the Face Recognition tab on the side panel.
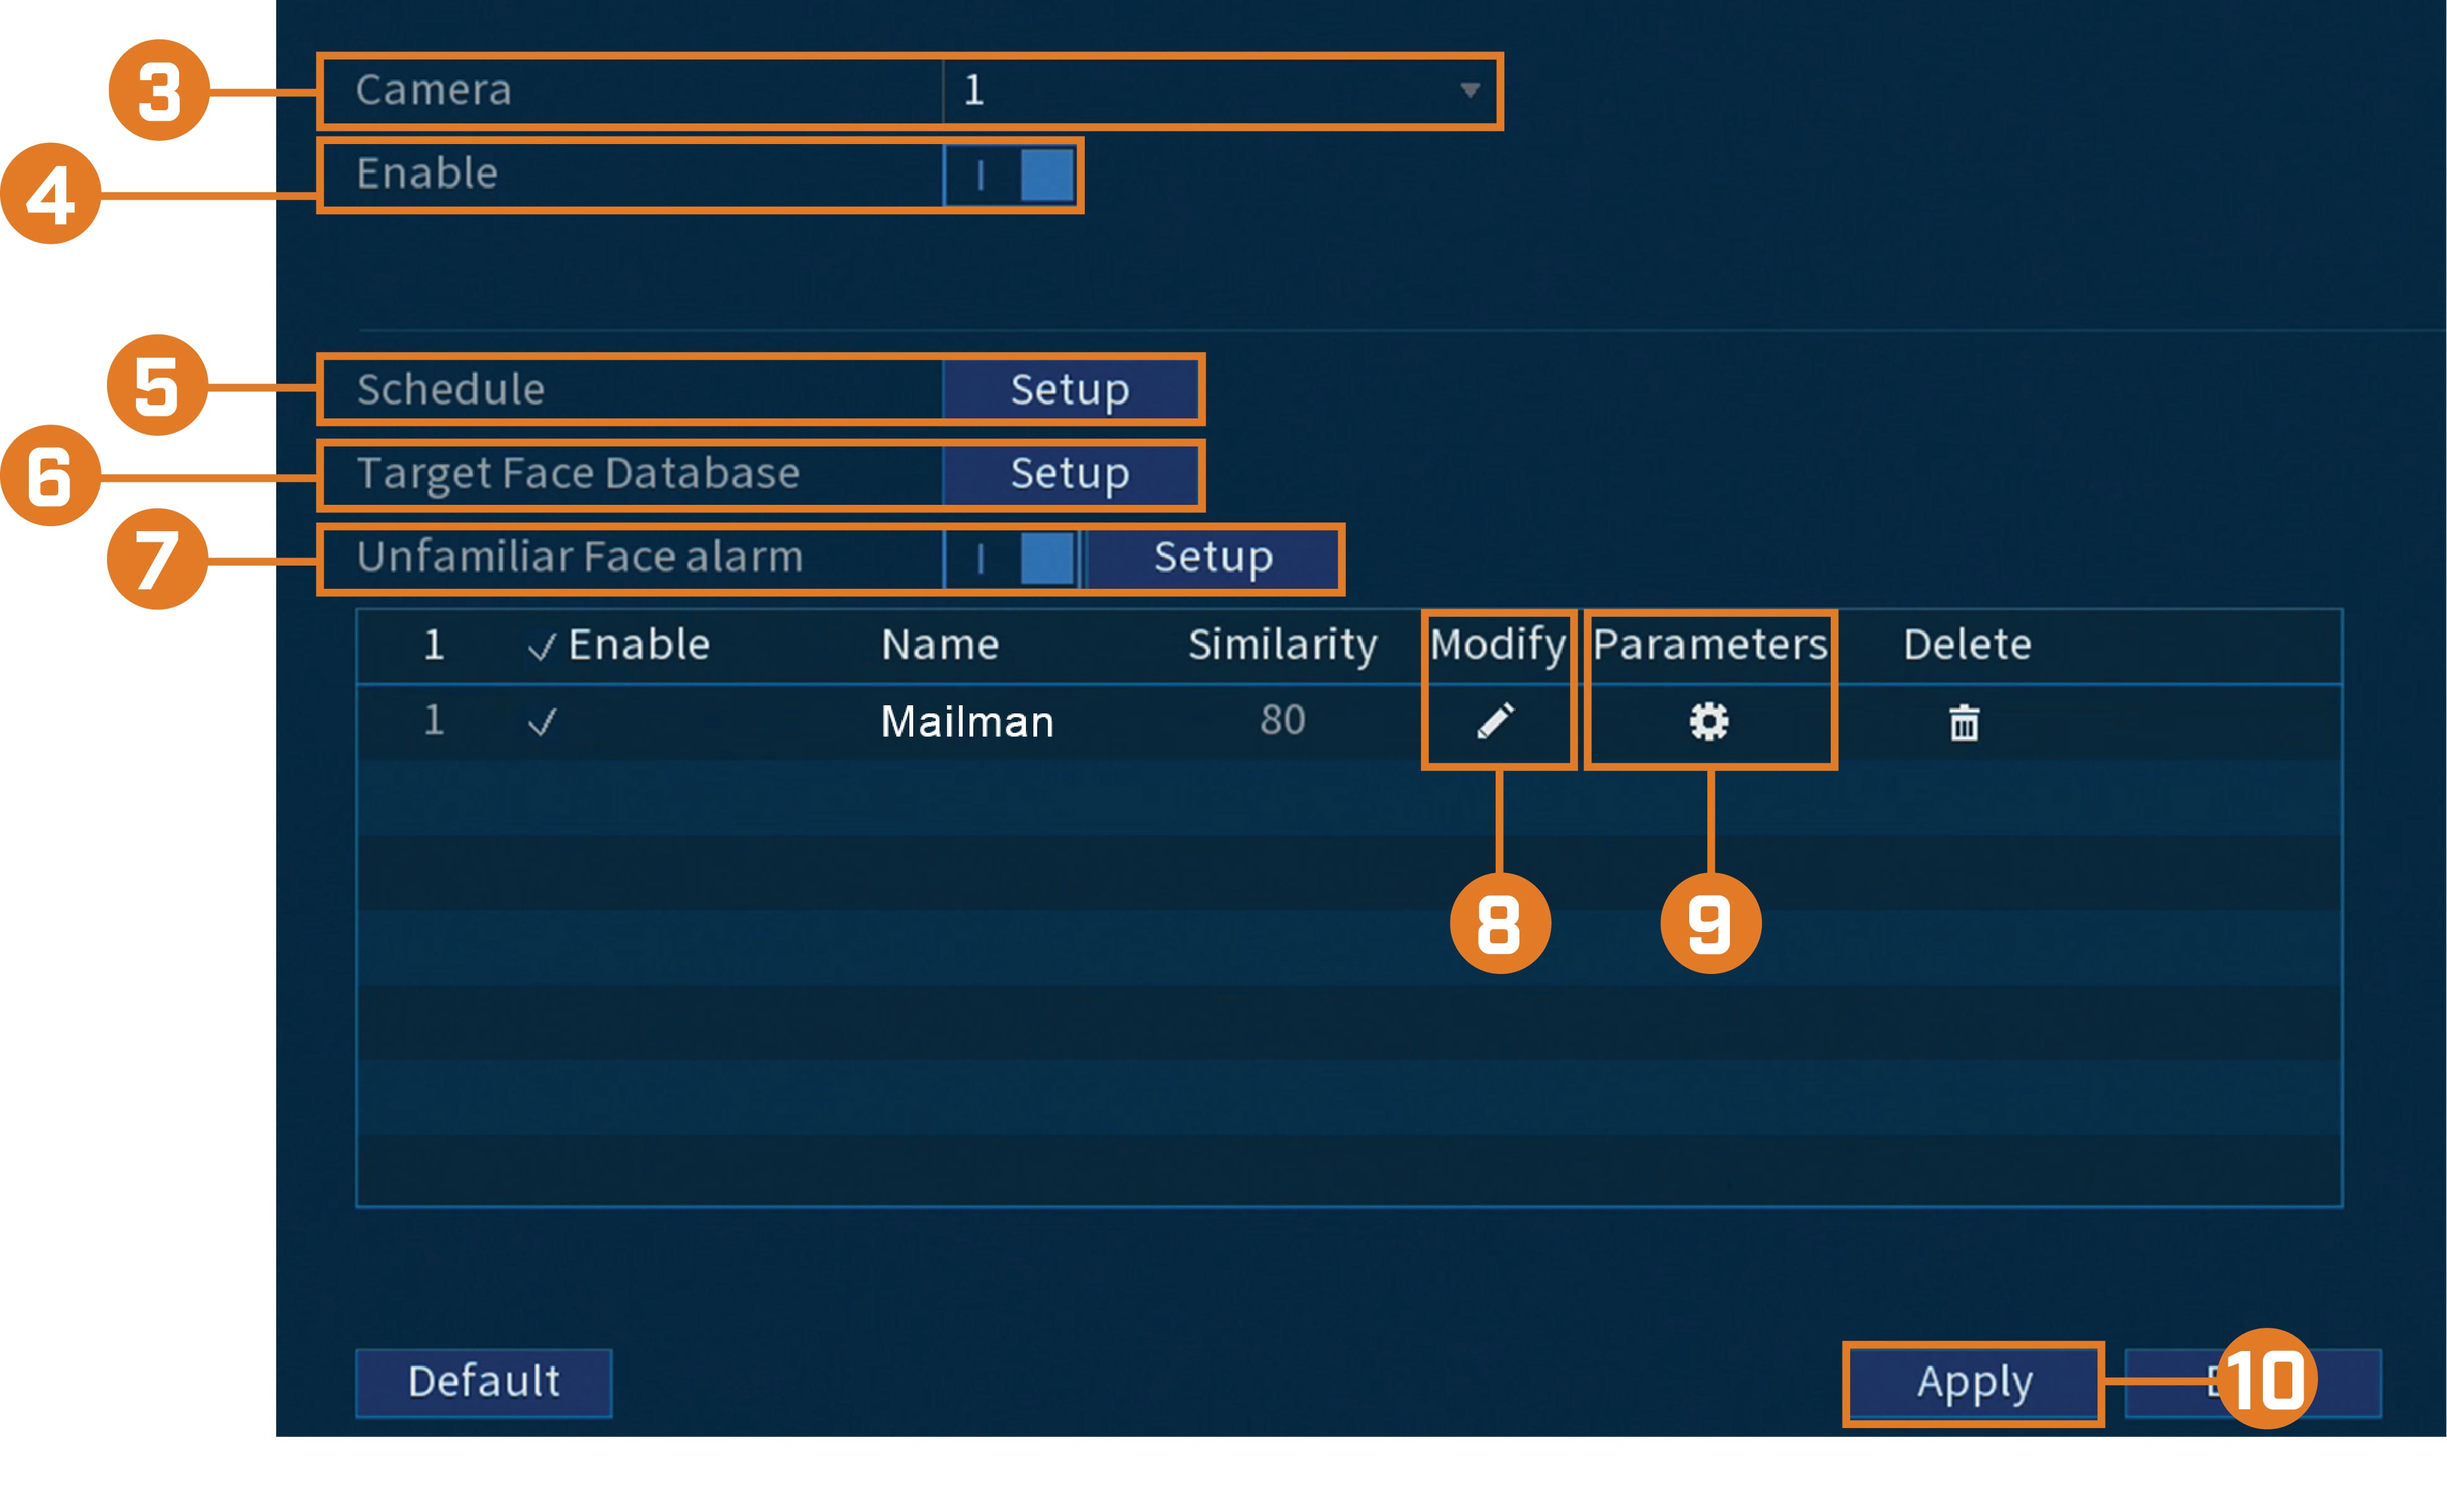
- Select a camera to configure face recognition for.
-
Click to enable (
) / disable (
) face recognition on the selected channel.
-
Click Setup next to Schedule to choose which days and times of the week to enable face recognition:
- Click or click-and-drag along the each of the blue timelines to quickly add or remove time from each day’s schedule in 15–minute segments.
-
Click
beside 2 or more days to link schedules (
). This allows you to quickly change multiple schedules at once.
-
To make fine adjustments to a schedule, click
. This will allow you to set exact start and end times for a schedule.
-
Click Setup next to Target Face Database.
- Check the box next to the face database that you want to use for Face Recognition.
- Click OK.
- Click to enable Unfamiliar Face Alarm. Setup alarms if a face has been detected that has not been added to the face database (also labeled “stranger” in AI mode).
-
Click the icon under modify to adjust the Similarity value.
- Enter a value for the Similarity from 1% being the lowest to 100% being the highest.
- Click OK.
- Click the icon under Parameters to set the alarms for face recognition.
- Click Apply to save all changes.
To configure face recognition:
12.3 Create a Face Database
To build your face database, you can create a face database list and add faces to each database from a USB drive or live captured
faces in AI mode.
- From the Live View display, right-click to open the Quick Menu, then click Main Menu.
-
Click EVENTS, then click the Face Database tab on the side panel.
-
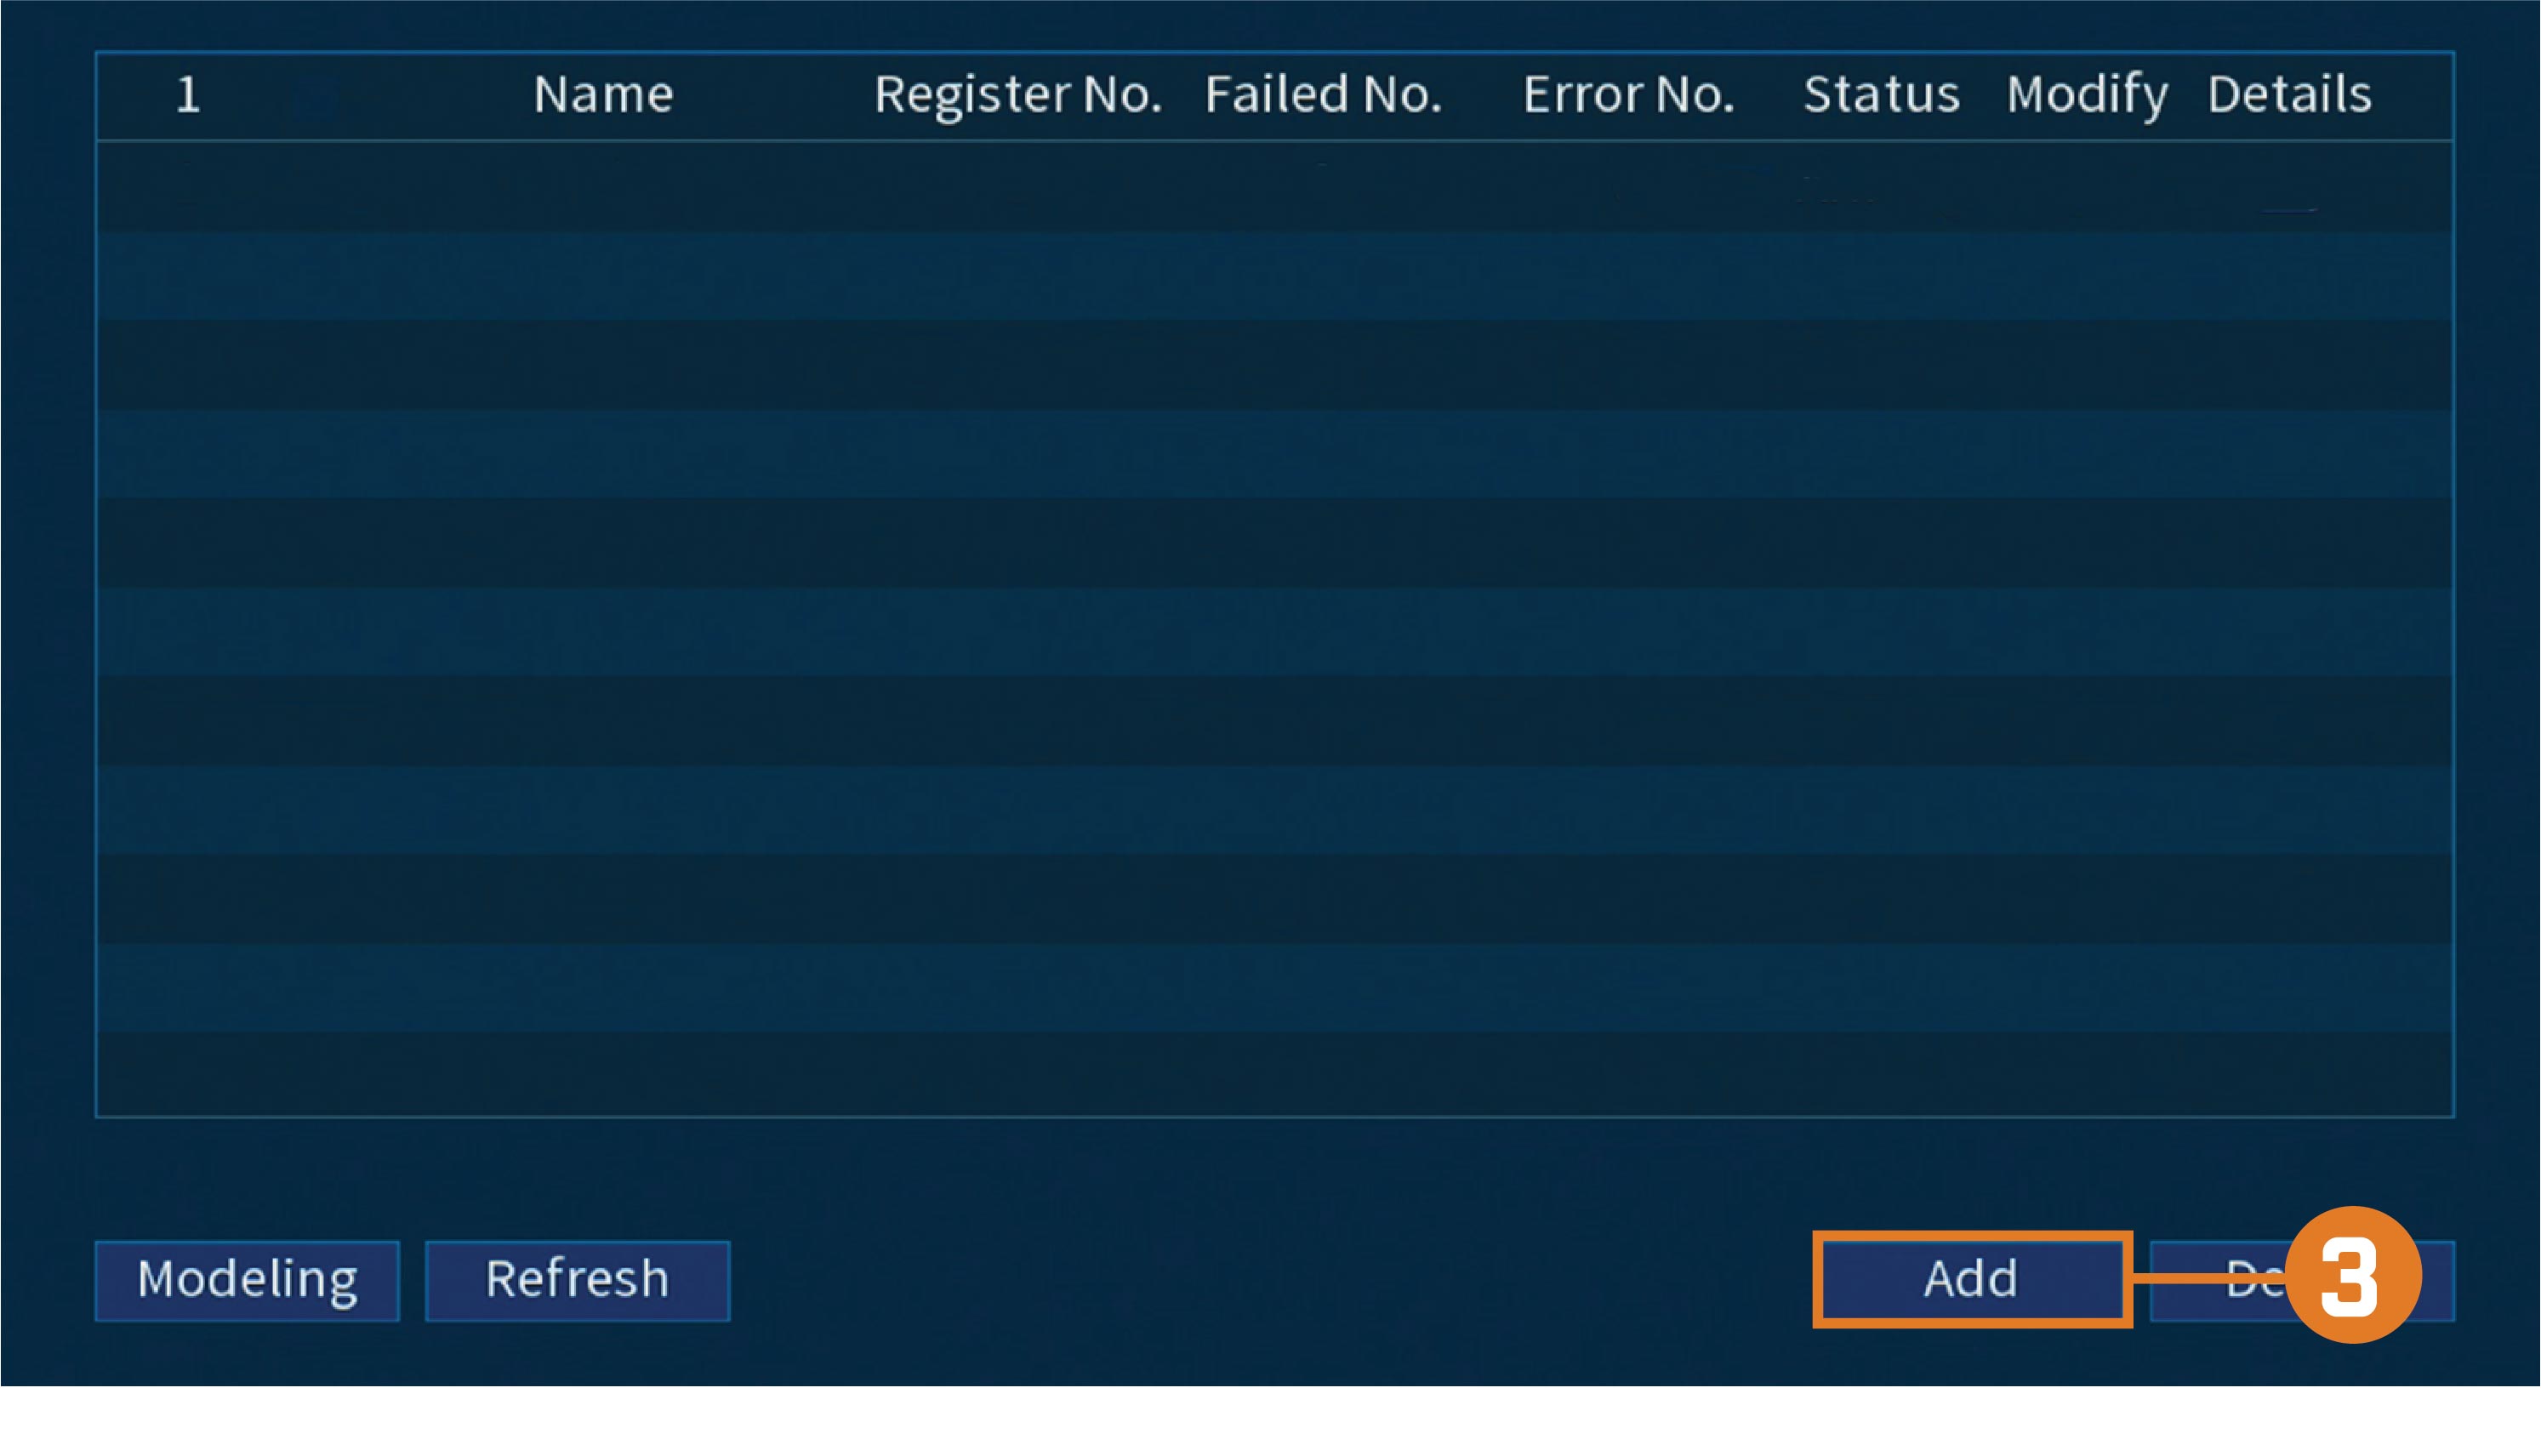
Click Add in the bottom right of the screen to add a new database.

- Enter a name for the database.
- Click OK.
To create a database:
The created database will appear in the face database list.
12.3.1 Add a Face by USB to the Database
- From the Live View display, right-click to open the Quick Menu, then click Main Menu.
-
Click EVENTS, then click the Face Database tab on the side panel.
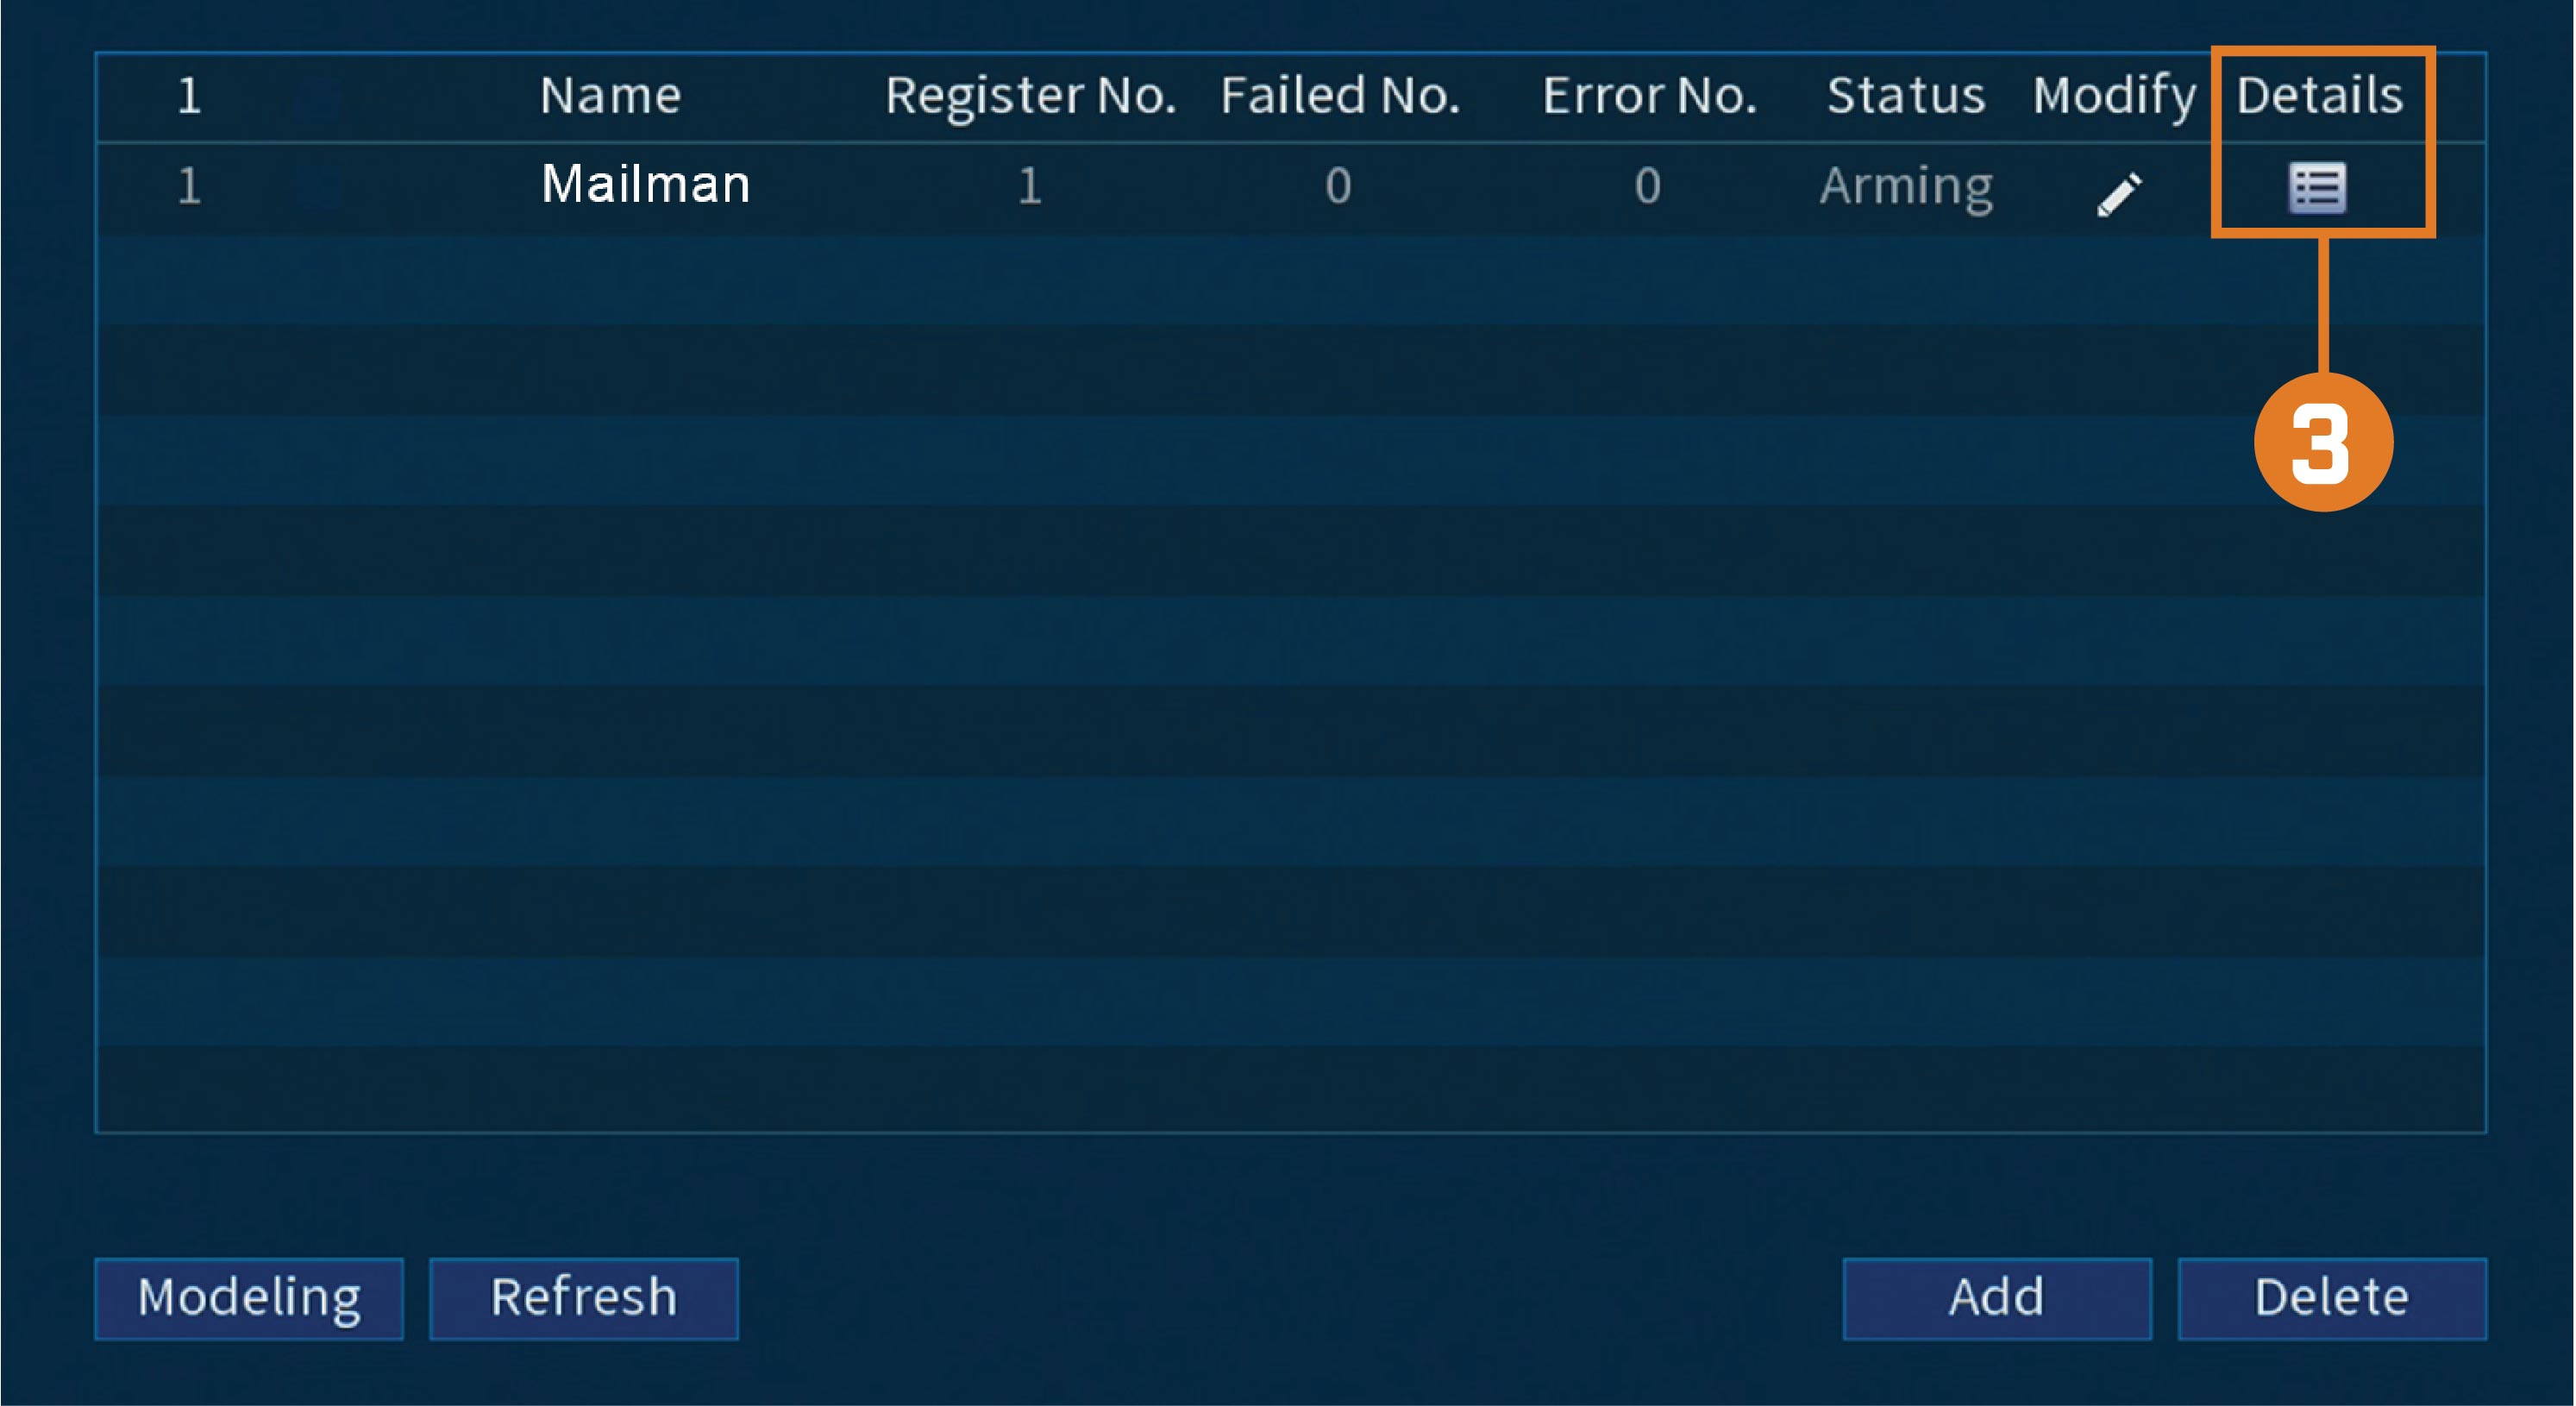
- Select a database from the list and click the details icon to configure.
-
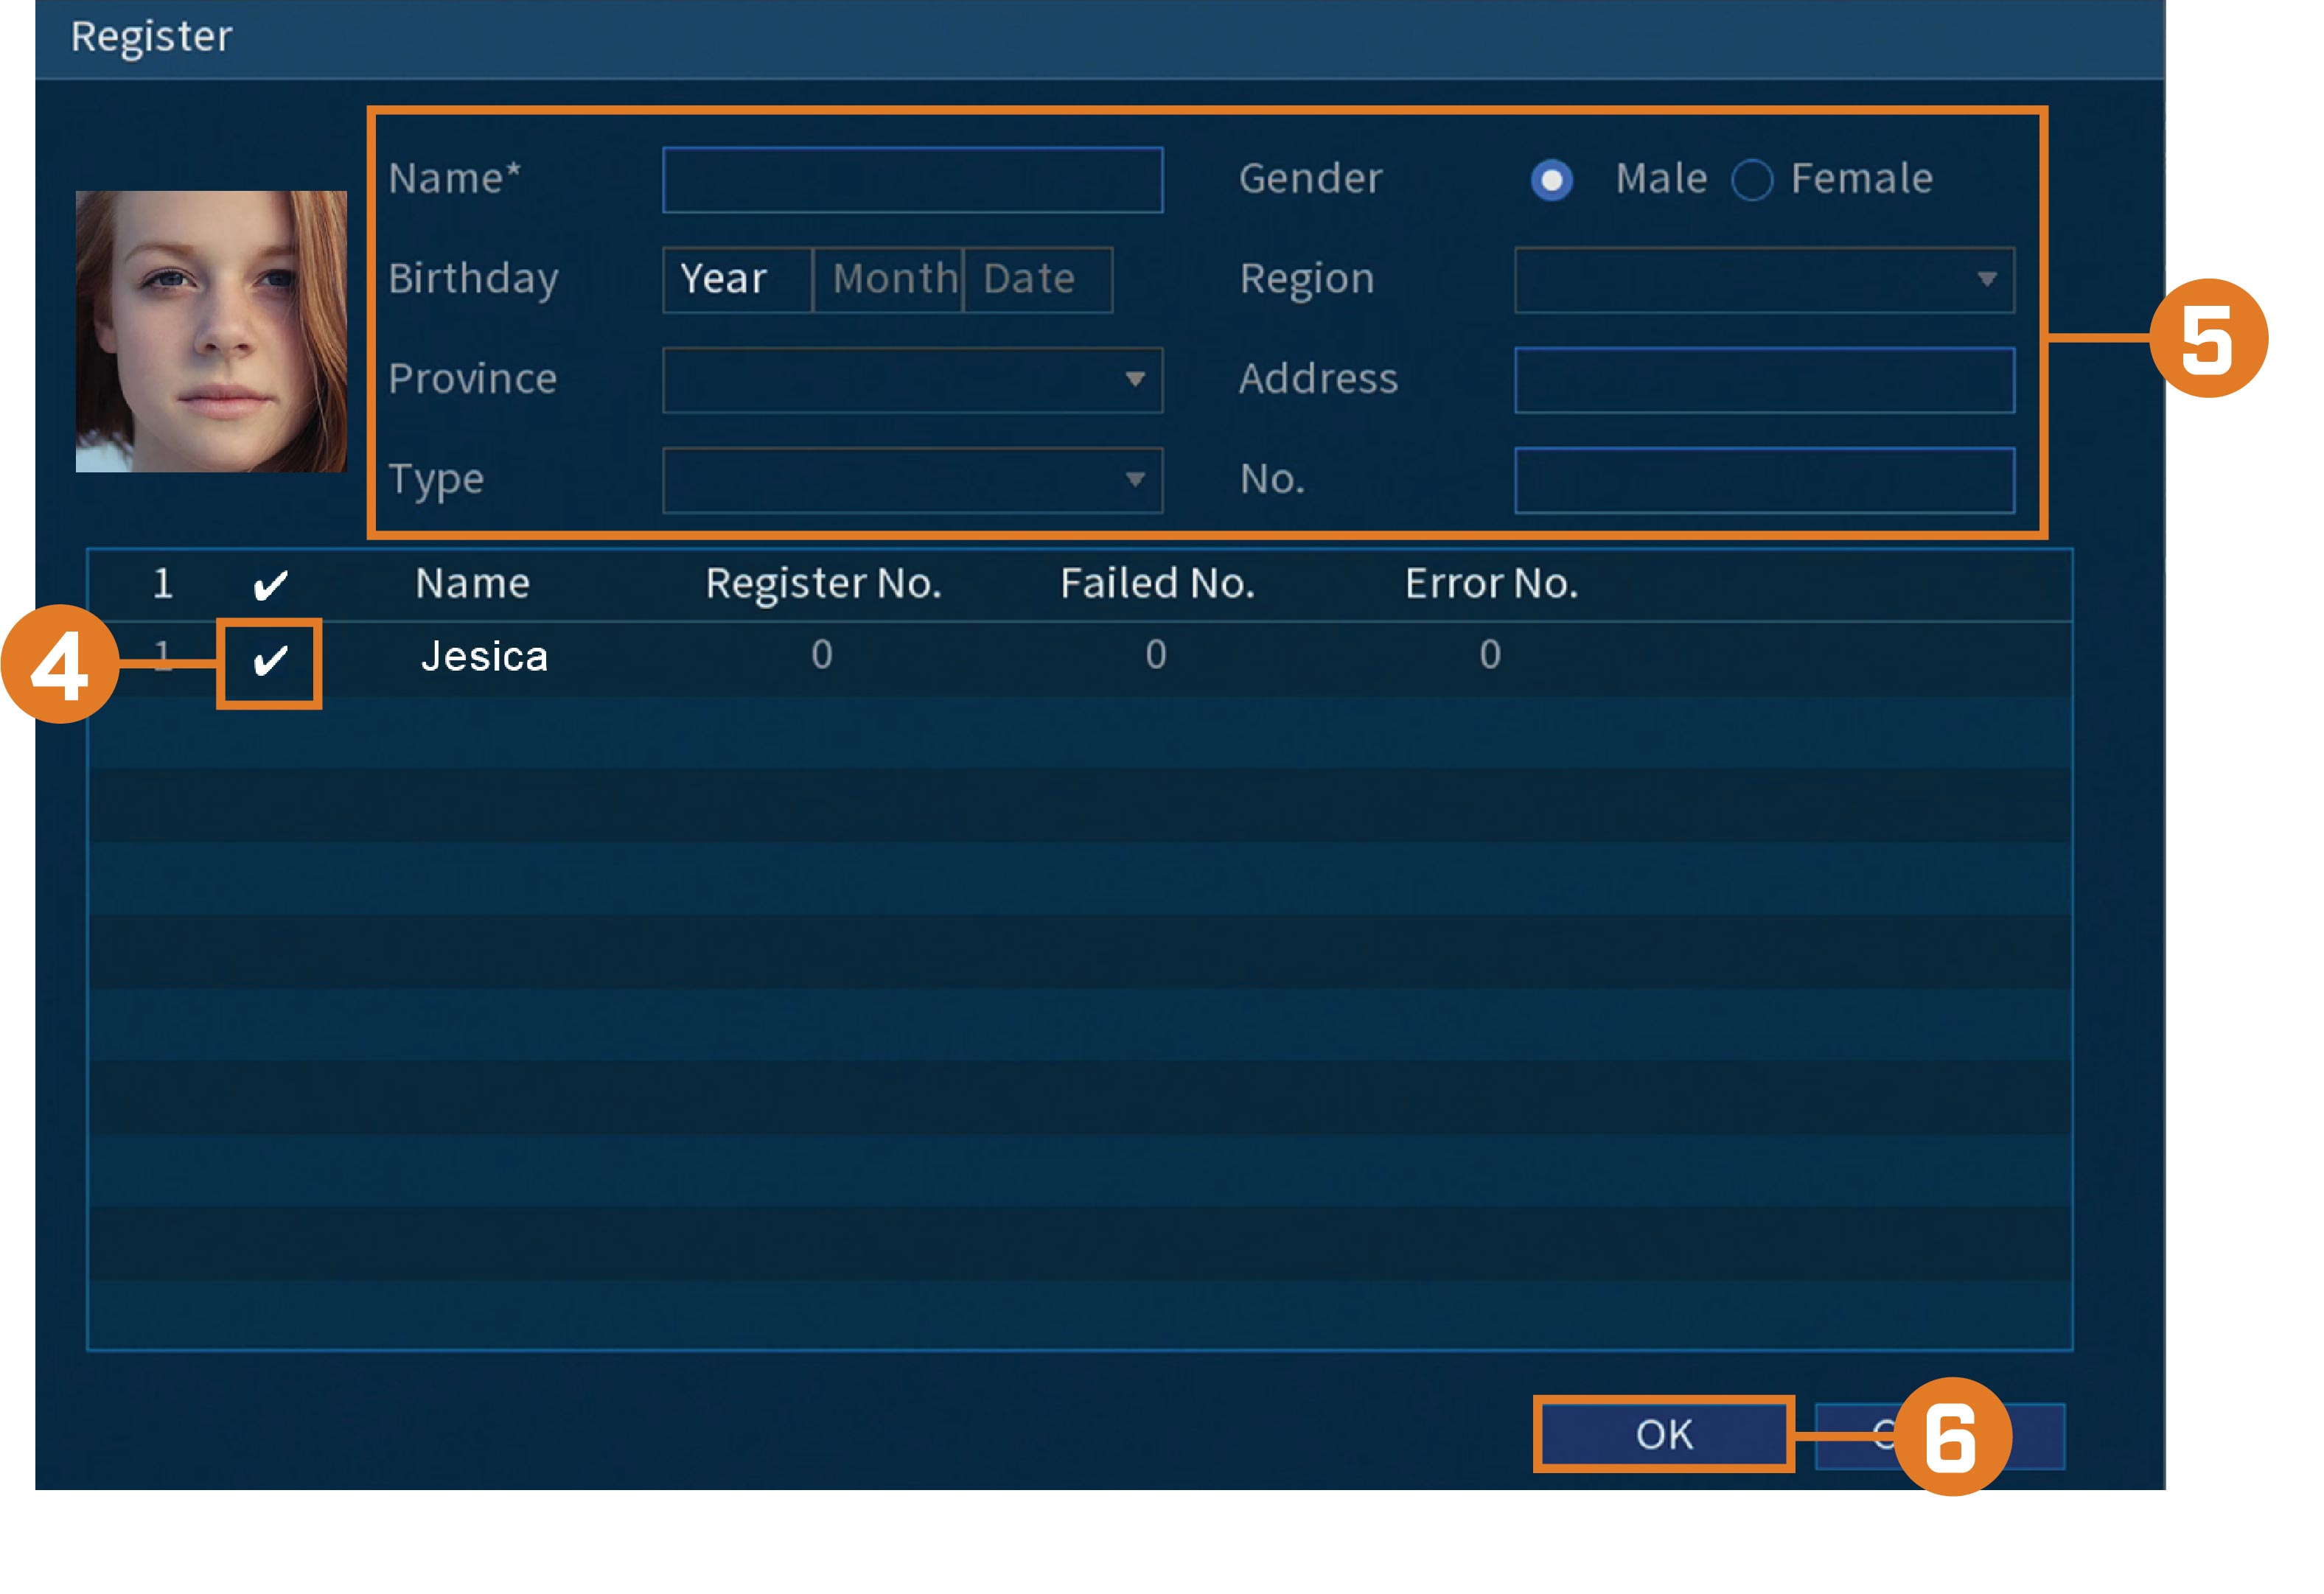
Click Register to add a face to the database. The USB drive will automatically load.
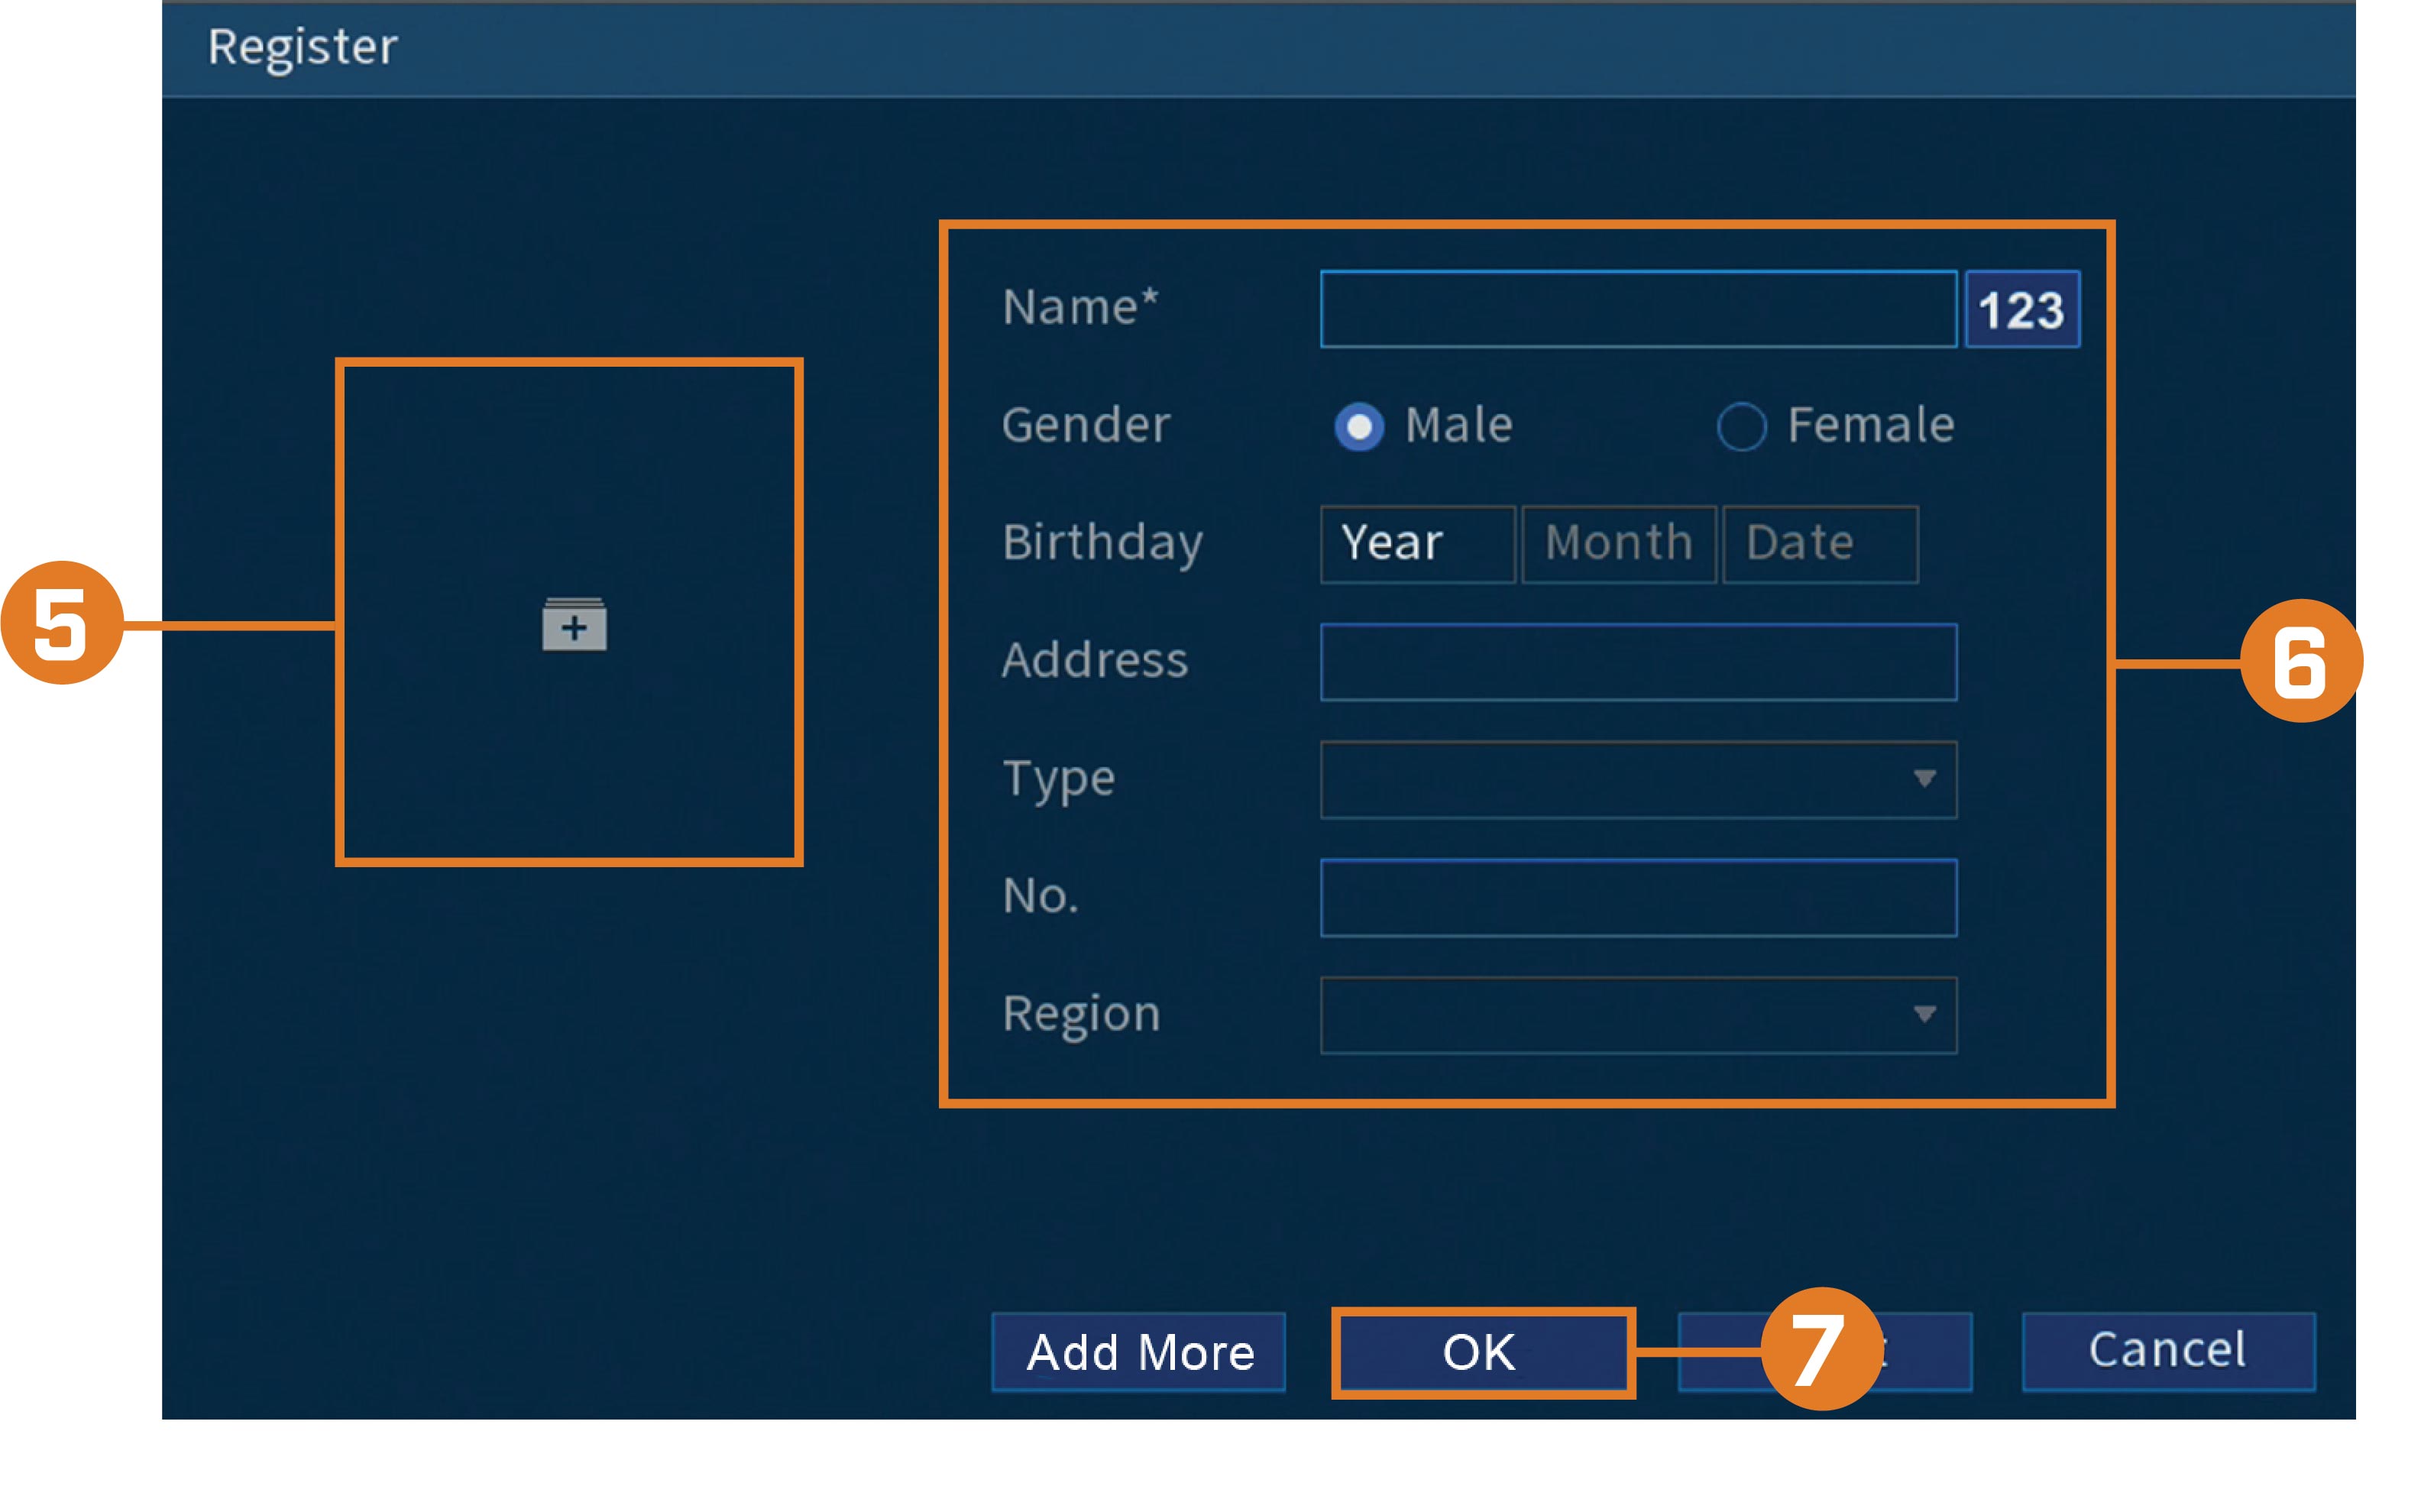
- Click + to upload a new face image.
- Use the Register window to add additional information to the face entry, including name and gender.
- Click OK to save.
To add a face to the face database:
The added face will appear in the face database.
12.3.2 Add by USB Drive (Batch Add)
Face pictures can also be imported in batches which is useful when adding a large number of faces at one time.
12.3.3 Add Captured Faces
- From the Live View display, AI mode will display recently captured faces on the right side of the screen.
-
Double-click on the face that you want to add.
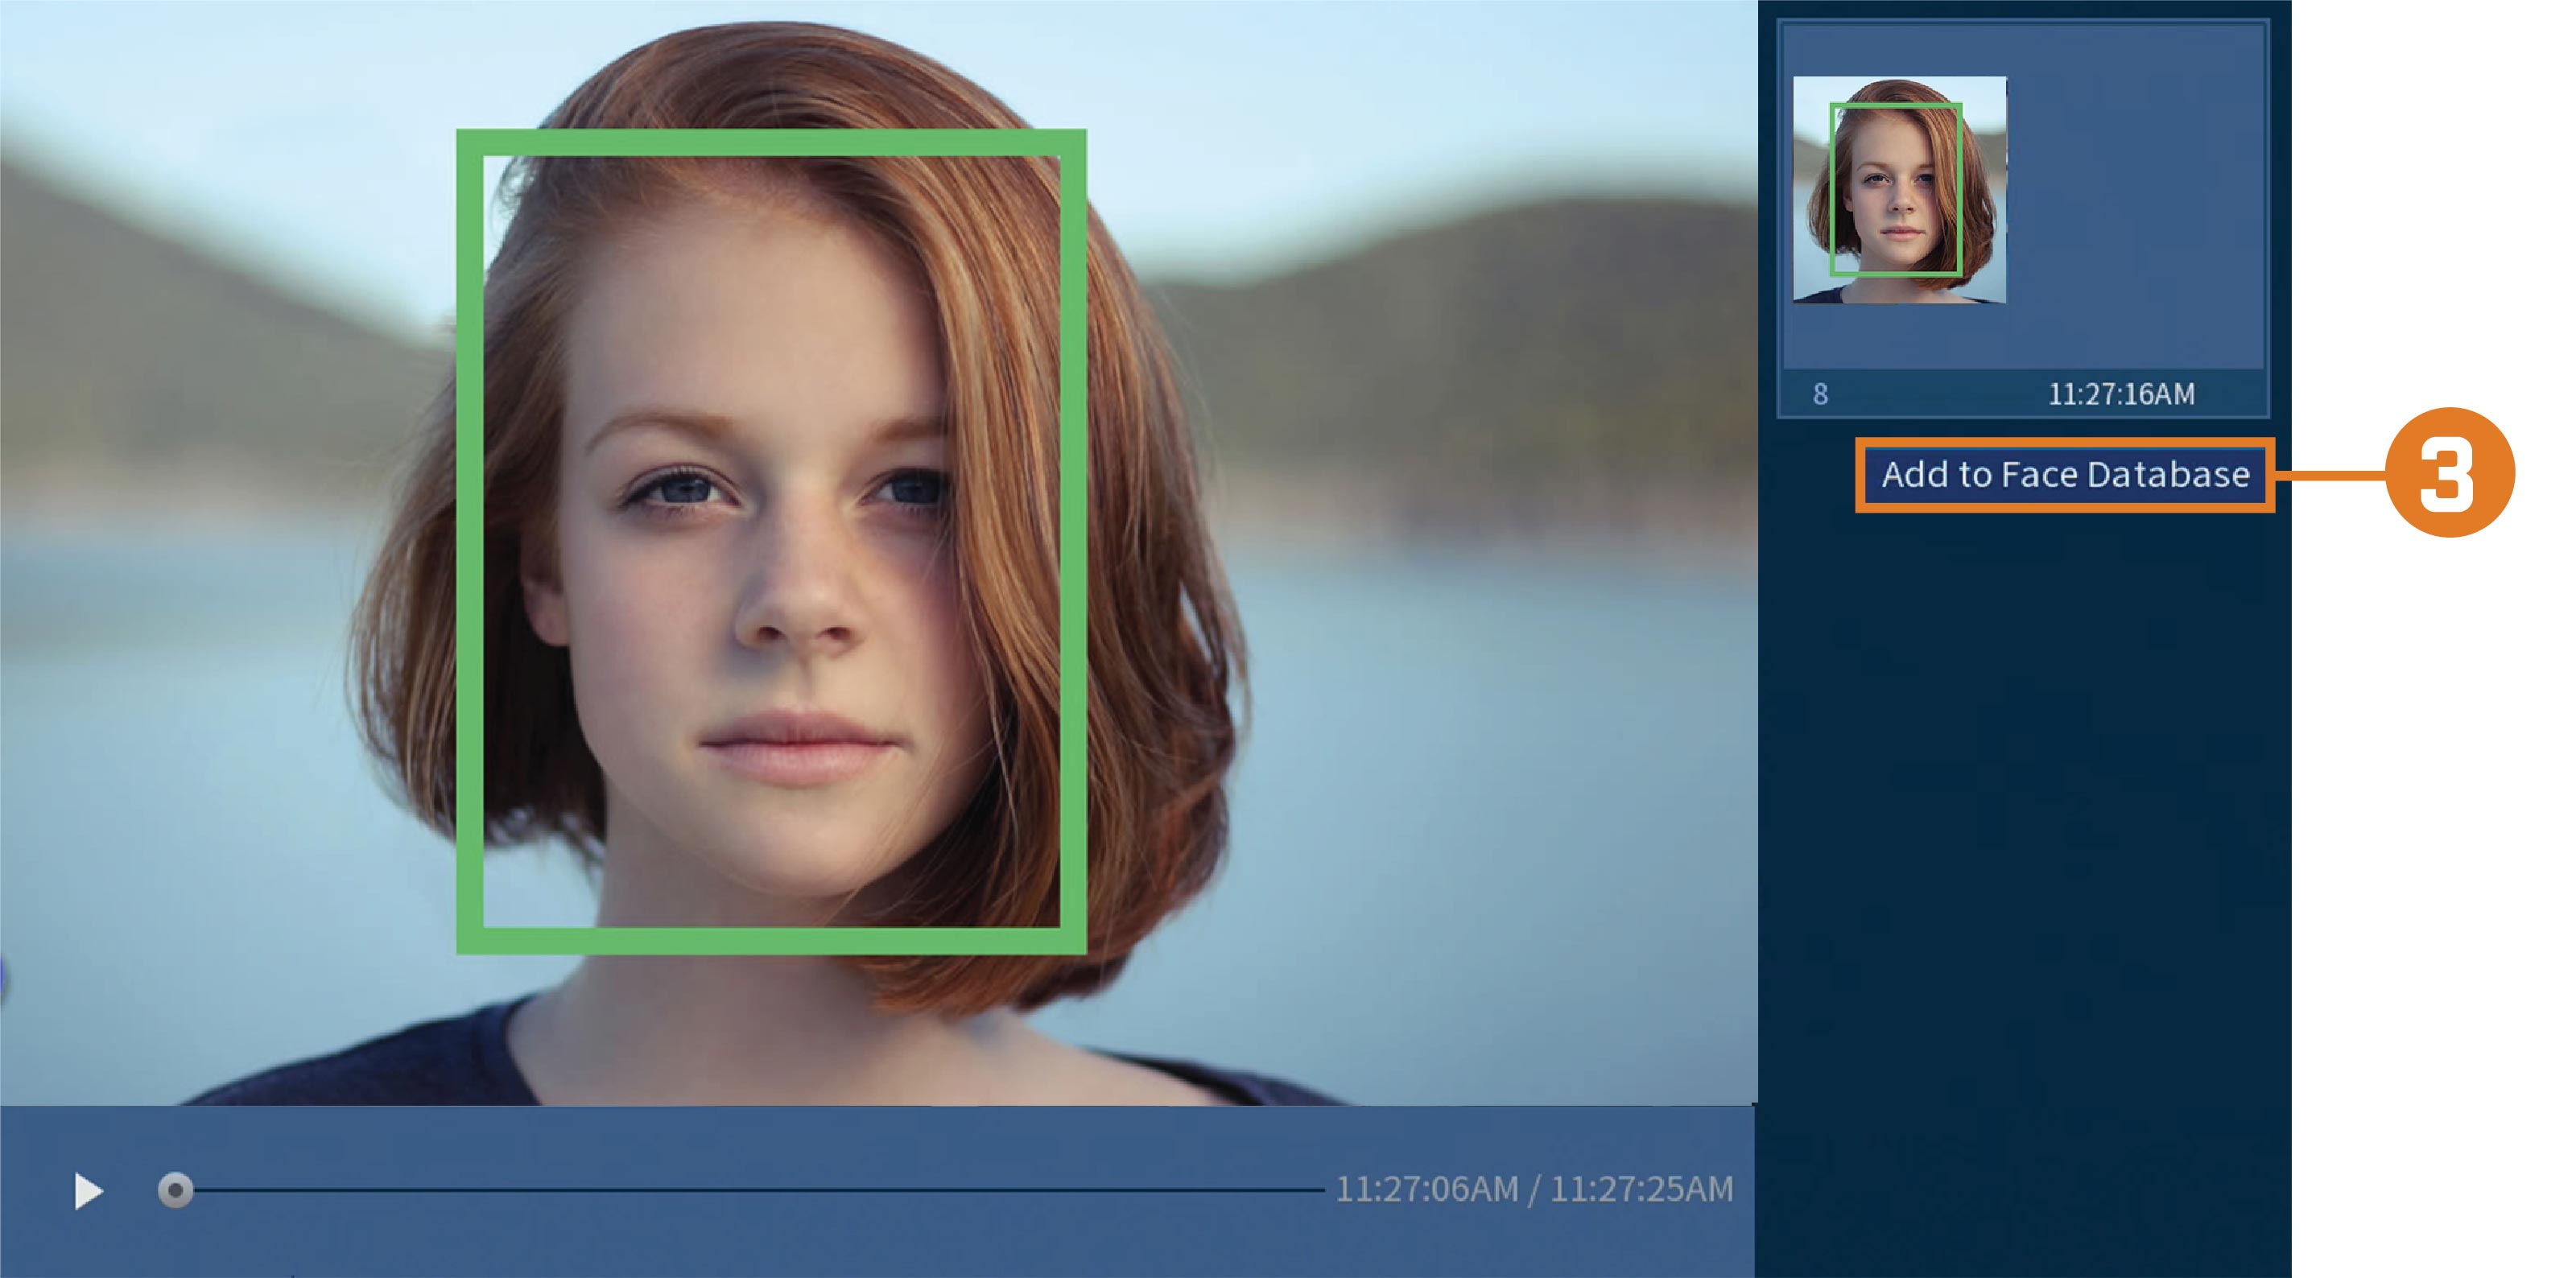
-
Click the button Add to Face Database for the register window to appear.
- Check the box next to the database that you want to add the face to.
- Add additional details for the face entry including name.
- Click OK to save.
You can add images to build the face database by using images that have been captured in AI mode.
To add a face captured by AI mode:
The added face will appear in the face database.