4 Basic Setup
4.1 STEP 1: Prepare the Wire-Free cameras and receiver
Before you begin, you will need to prepare the power packs, Wire-Free cameras, and the wireless receiver.
-
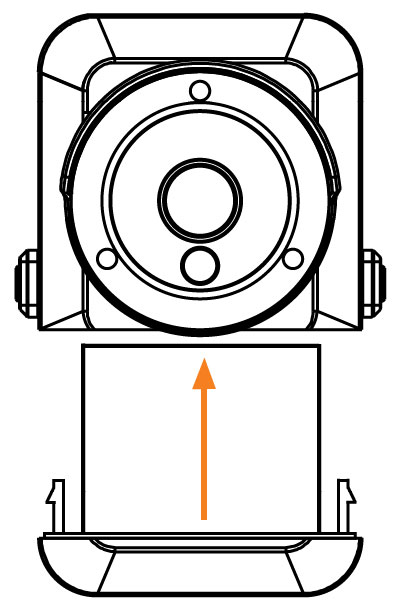
Peel off the PLEASE REMOVE label covering the contacts on each power pack. Insert the charged power packs into each camera base. Push up until the power pack ‘clicks’ firmly into place.

-
Twist the adjustment ring near the camera base counterclockwise to loosen and reposition each camera as shown to the right.
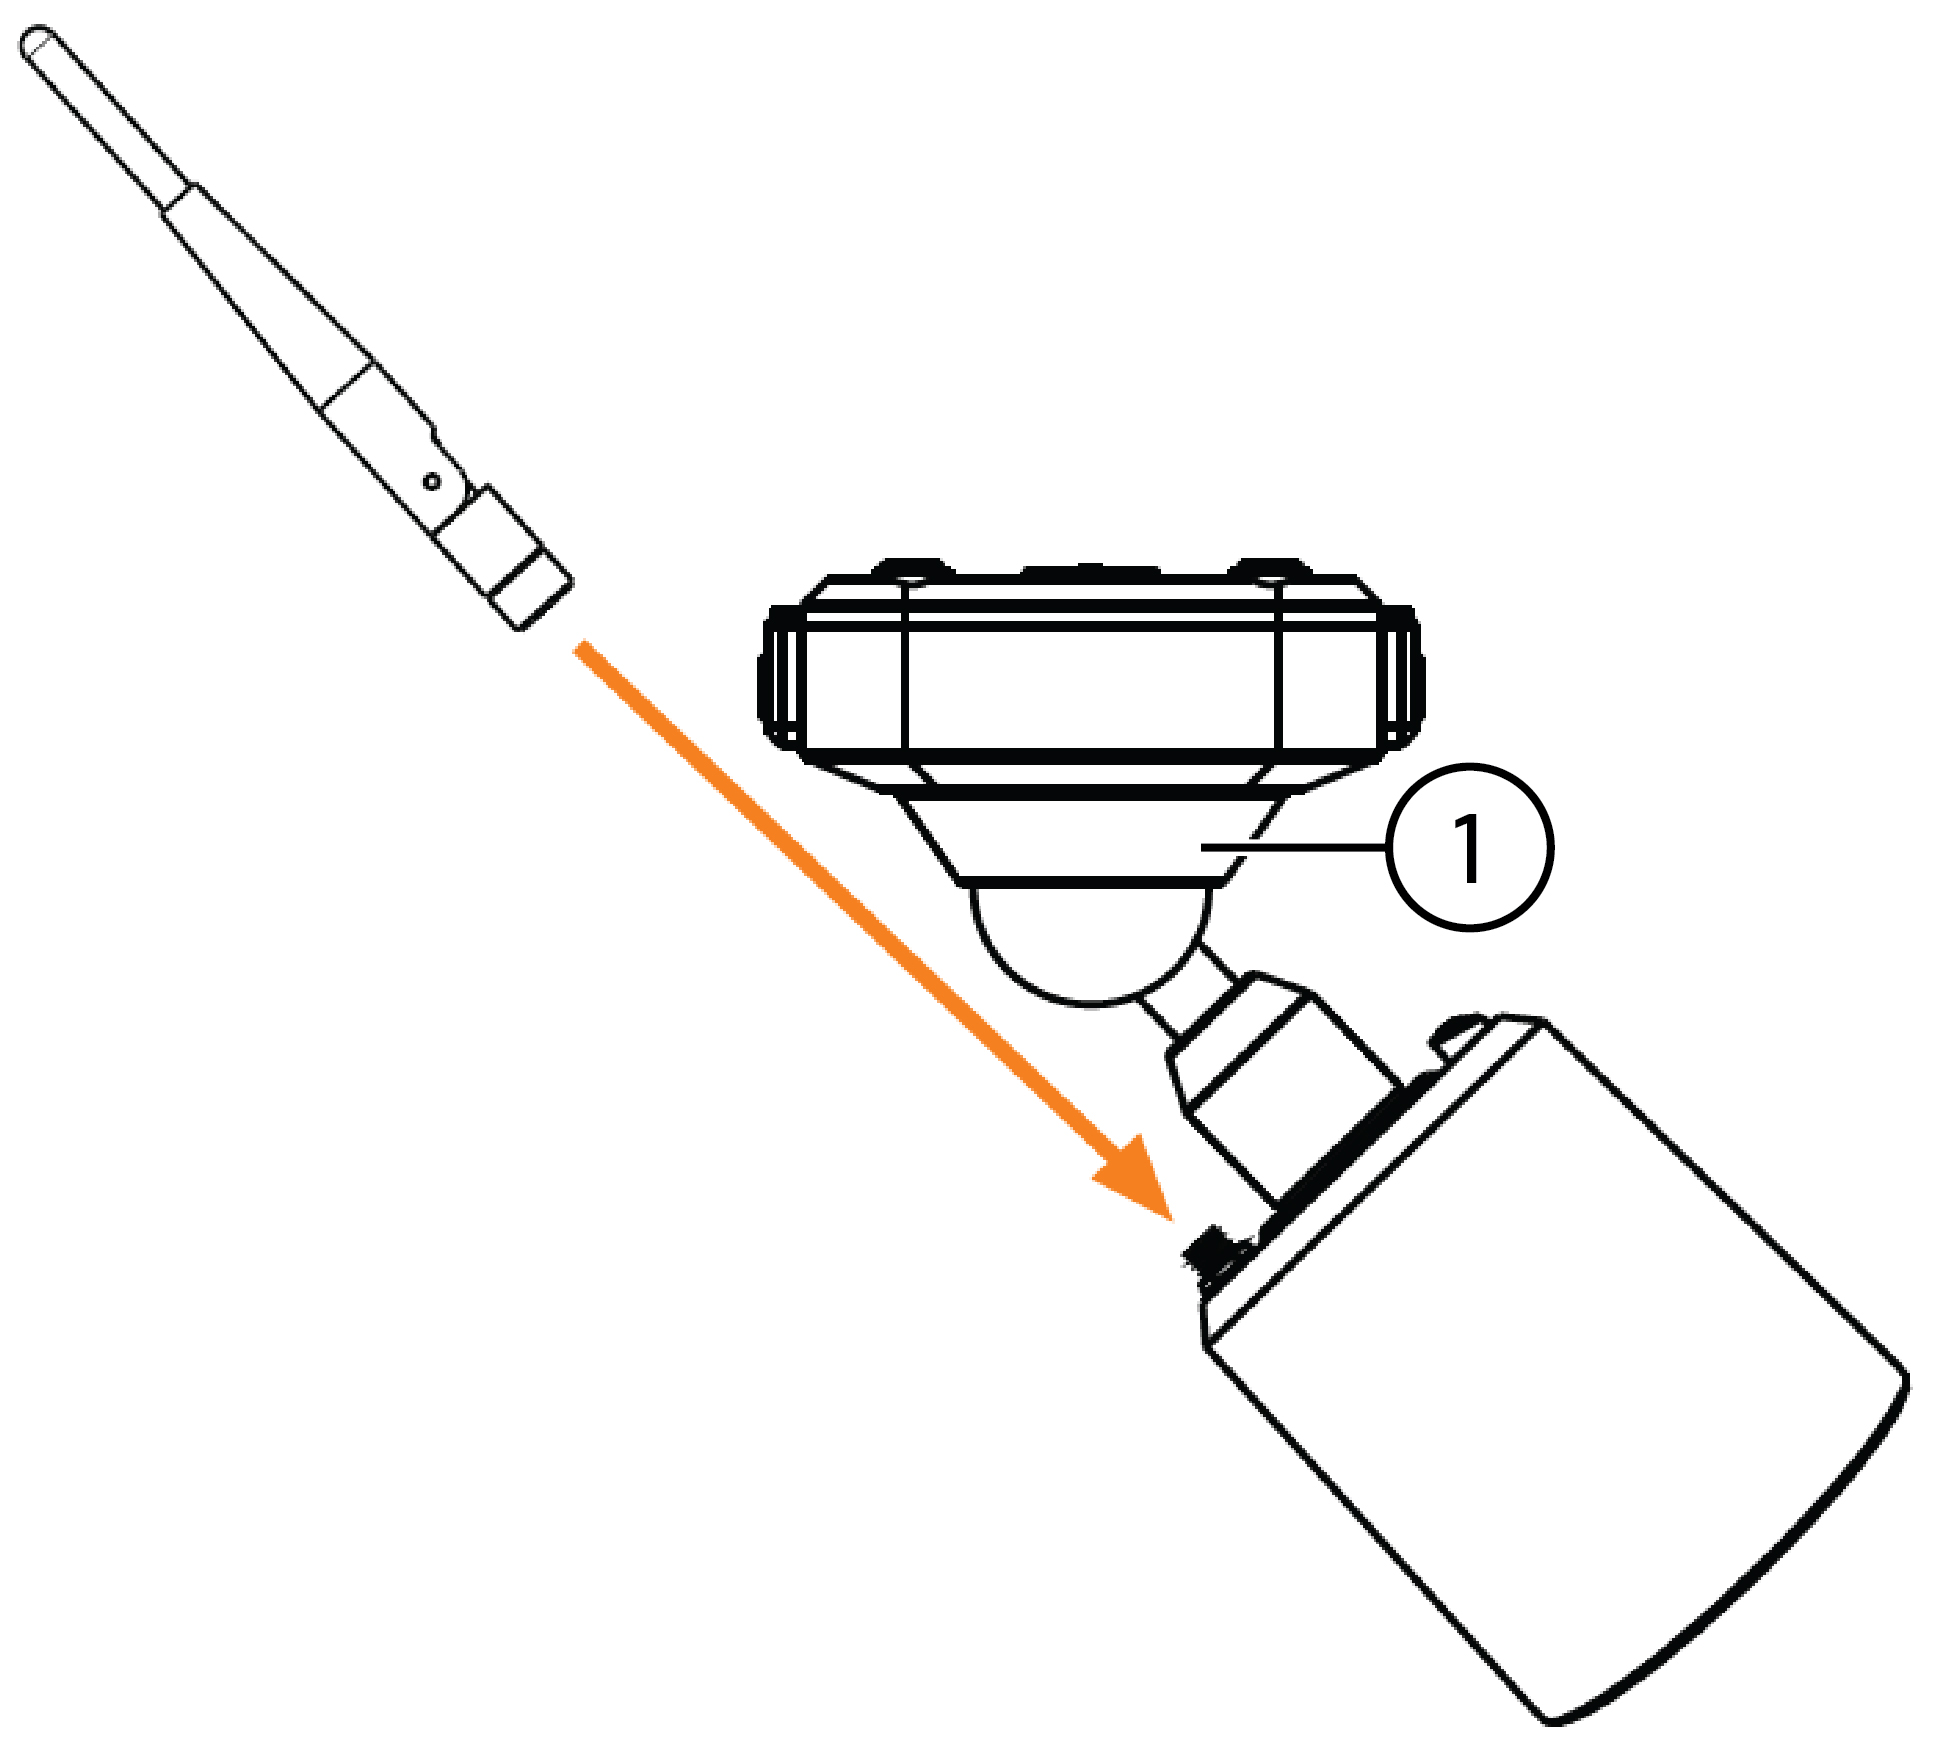
Connect one of the white antennas to each camera.

- Adjustment ring
To prepare the cameras and receiver:
4.2 STEP 2: Setting Up the Recorder
Next, you must set up the recorder.
To set up the recorder:
4.3 STEP 3: Connecting with Lorex Secure
Connect to your system using the free Lorex Secure app for smartphones and tablets (iOS and Android).
To connect with Lorex Secure:
- Download and install the free Lorex Secure app from the App Store or Google Play Store.
-
Tap the Lorex Secure icon (
 ) to launch the app.
- Tap SIGN UP. Enter your email address and password to create a new account.
-
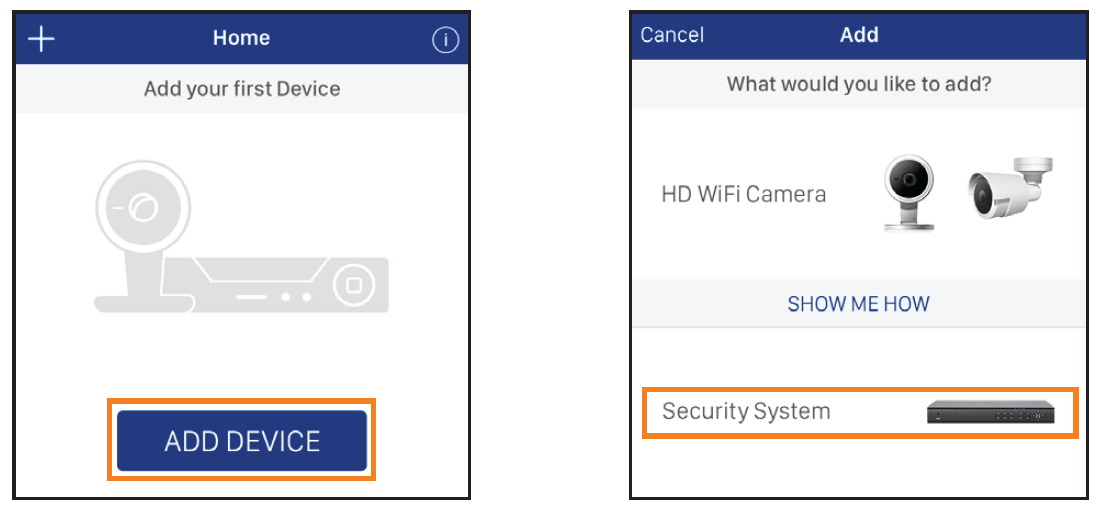
Tap ADD DEVICE, then tap Security System.

- Scan the QR code on the rear panel of your recorder using the camera on your smartphone or tablet.
- Enter your recorder’s user name (default: admin) and password (default: 00000000). Tap DONE.
- Enter a new, secure 8-15 character password . This password will be used to connect to your system from now on.
-
Your system will appear on the homescreen of the app. Tap each channel with a camera connected then tap the play button (
 ) to stream live video.
4.4 STEP 4: Installing Wire-Free Cameras
Prerequisites:
-
Remove the power pack from each camera by pushing both release buttons*, then pulling down on the power pack.
4.4.1 Installation Tips
The wire-free cameras use a Passive InfraRed (PIR) sensor to ensure video is only recorded when motion is detected. Follow
the tips below for more accurate motion detection and to optimize battery life:
-
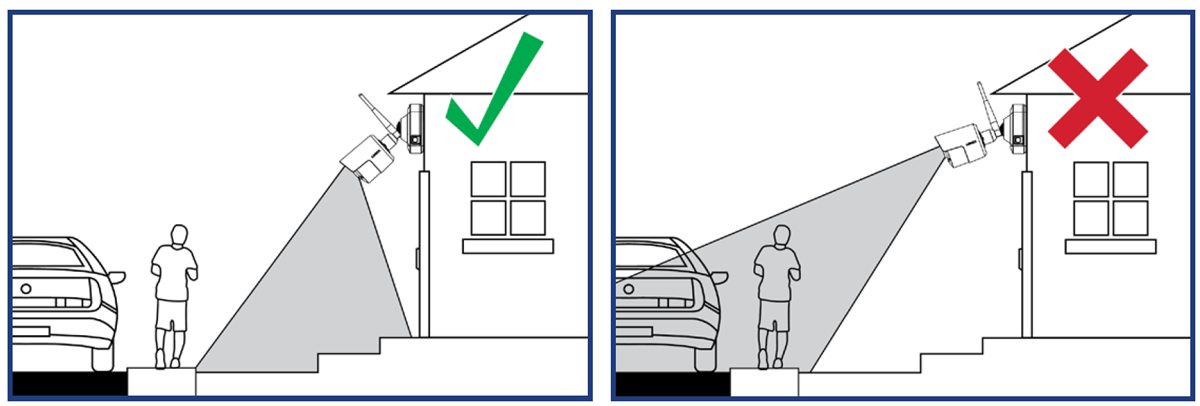
See images below for ideal setup.
It is recommended to place your camera at least 7ft (2.1m) above the ground and angle it slightly downward toward the monitoring
area, excluding any busy areas (e.g., sidewalks or roadways).

- Ensure the camera image is free of obstructions (i.e., tree branches).
- Position the camera no more than 20ft (6.1m) away from the area you wish to monitor.
- For best performance, position the camera so that objects of interest will move from side-to-side across the camera image, rather than moving towards or away from the camera.
- Install the camera within range of the wireless receiver (noted in the camera’s specifications).
- This camera is weather resistant for outdoor use (IP65 rated). Installation in a sheltered location is recommended.
- Battery life will vary based on temperature, settings and number of events.
4.4.2 Installing the Cameras
Follow the instructions below to secure the cameras. It is recommended that you refer to the "Installation Tips" section above
to help you select good mounting locations.
To install your cameras:
-
Set the mounting bracket in the desired mounting position. Mark holes through the mounting bracket (shown as orange X’s below).
- Drill holes where marked for the mounting screws.
-
Insert the included mounting screws (×3) into the 3 holes closest to the top of the mounting bracket. Make sure all screws
are fastened tightly.
-
Lower the camera base onto the mounting bracket so the tab in the mounting bracket locks into the slot in the camera base.
-
Insert the security screw through the fastener on the camera base to secure the camera to the mounting bracket. Tighten using
the included Allen key.
-
Insert the included power pack into the bottom of the camera base. Push up until the power pack ‘clicks’ into place.
-
(OPTIONAL) Lift up the rubber seal on the right-side release button. Insert the locking screw and tighten using the included Allen key
to secure the power pack in place.
-
Twist the adjustment ring near the camera base counterclockwise to loosen and reposition the camera. Hold the camera in the
desired angle and tighten the adjustment ring completely to secure the camera in place.
4.5 Quick Access to System Information
To quickly open a window with system information:
-
Click
 on the recorder’s Taskbar.
OR
 -
Press the
button on the included remote control.