8 Playback
You can view and back up recorded video on the recorder.
To access playback:
8.1 Using Playback
Play back video recordings from a specific date and time.
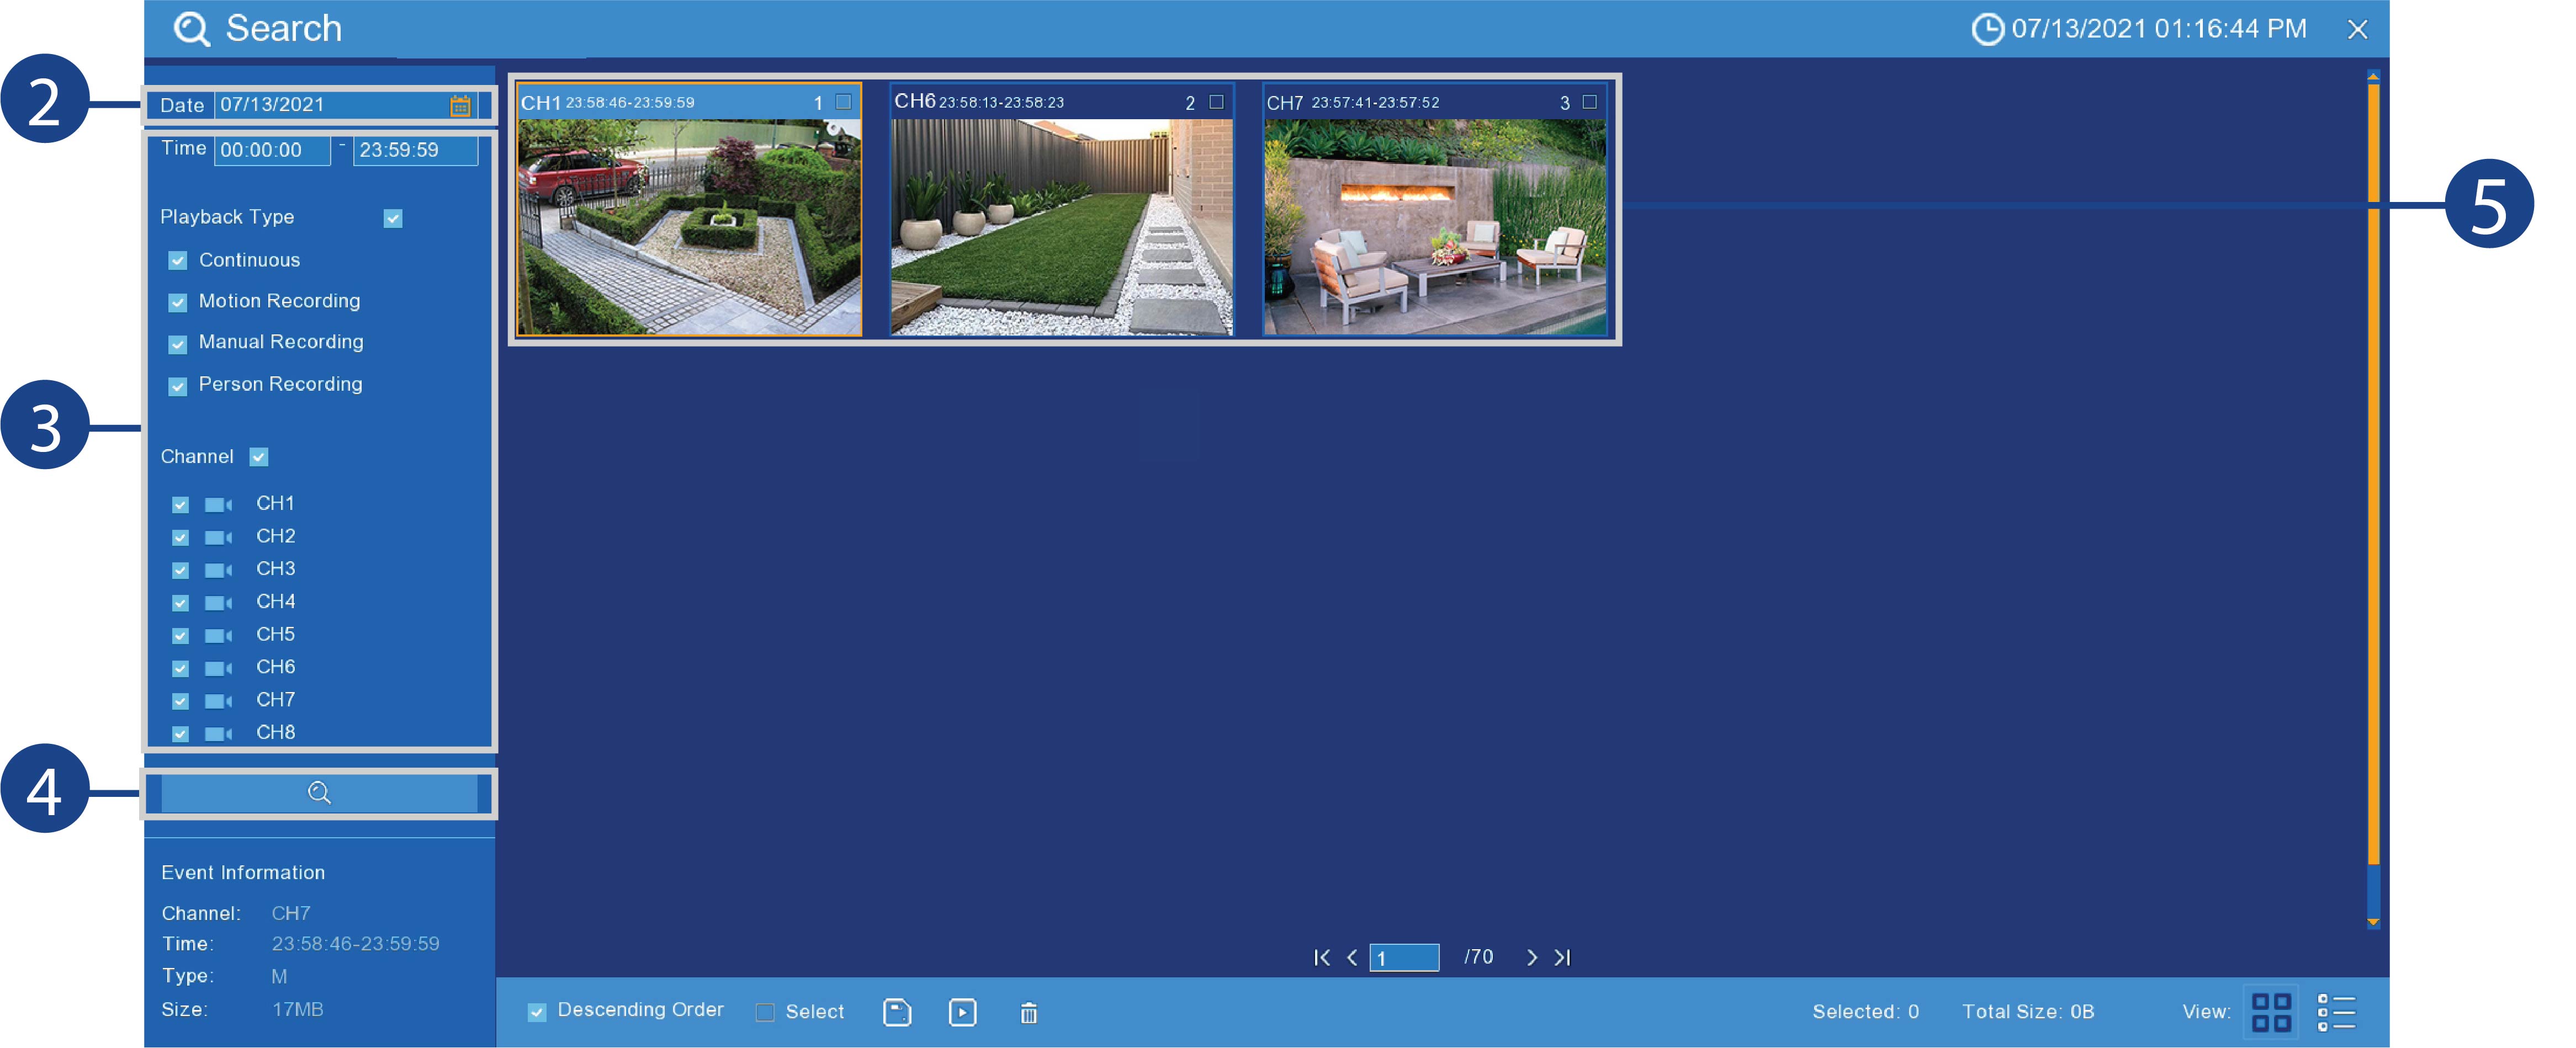
To search for and play back videos:
-
Open the Playback menu:
-
Right-click in the Live View screen to open the Taskbar, then click
 .
OR
.
OR -
Right-click in the Live View screen to open the Taskbar, click
 , then click
 .
.
-
Right-click in the Live View screen to open the Taskbar, then click
-
Click
 on the right side of the Date to select the date to search for video recordings from.
- Check off the channels you would like to search for recordings from on the left-side of the screen.
-
Click
 to search for recordings.
- Recordings that fit your search criteria appear. Double-click an event to begin playback.
8.2 Playback Controls
Once you have started playing a video clip, the playback controls appear as shown below.

- Event List: Shows all video clips that fit your original search criteria. Double-click any event to begin playback, or check multiple events to perform a backup.
-
Backup and Playback Buttons:
-
Click
 to play the currently selected video clip.
-
Click
 to backup one or more clips to a USB flash drive (not included).
-
Click
- Return: Return to previous screen to perform a new search.
- Full Screen
- Fast-Backward: Click to fast-backward playback by double-speed. Click repeatedly to rewind as fast as 8x the normal speed.
- Slow Play: Click to slow playback by half-speed. Click repeatedly to play as slow as 1/16 of normal speed.
- Play / Pause: Click to pause or play.
- Step: Click to playback frame by frame.
- Stop
- Fast-Forward: Click to fast-forward playback by double-speed. Click repeatedly to play as fast as 8x the normal speed.
-
Digital Zoom: Click
 , then click-and-hold on a camera image during playback to zoom in on the selected area. Right-click to return to regular
playback.
, then click-and-hold on a camera image during playback to zoom in on the selected area. Right-click to return to regular
playback.
- Video Clip: Quickly save a section of video to a USB flash drive (not included). For full instructions on using the Video Clip, see 9.1.2 Video Clip Backup .
- Audio: Click to open the volume control setting. Click the (audio icon) to mute / unmute.
- Manual Capture: Click to take a snapshot.
- Timeframe: Use the timeframe options to view a smaller or larger time period.
- Timeline: Continuous recordings are shown with colored bars to represent different types of recording (legend shown in the bottom-left corner of the display).
- Video Playback Area: Double-click any channel to view in full screen.
- Exit Playback: Return to the previous screen.