14 Smart Motion Detection
Note
Smart Motion Detection must be enabled in Smart Plan before configuring settings. Refer to
17.6.7 Configuring Smart Plan
for further details.
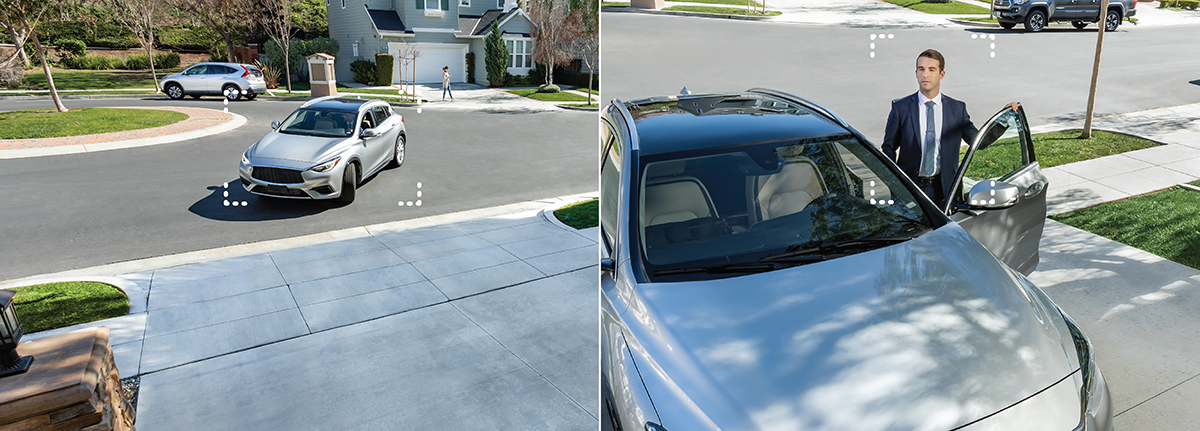
The system supports detection of people and vehicles with compatible IP cameras only. This helps deliver more relevant notifications
when using the
Lorex Home
app for remote viewing. You can also link white light deterrence to person and/or vehicle detection on compatible Lorex deterrence
cameras for an added level of smart security.
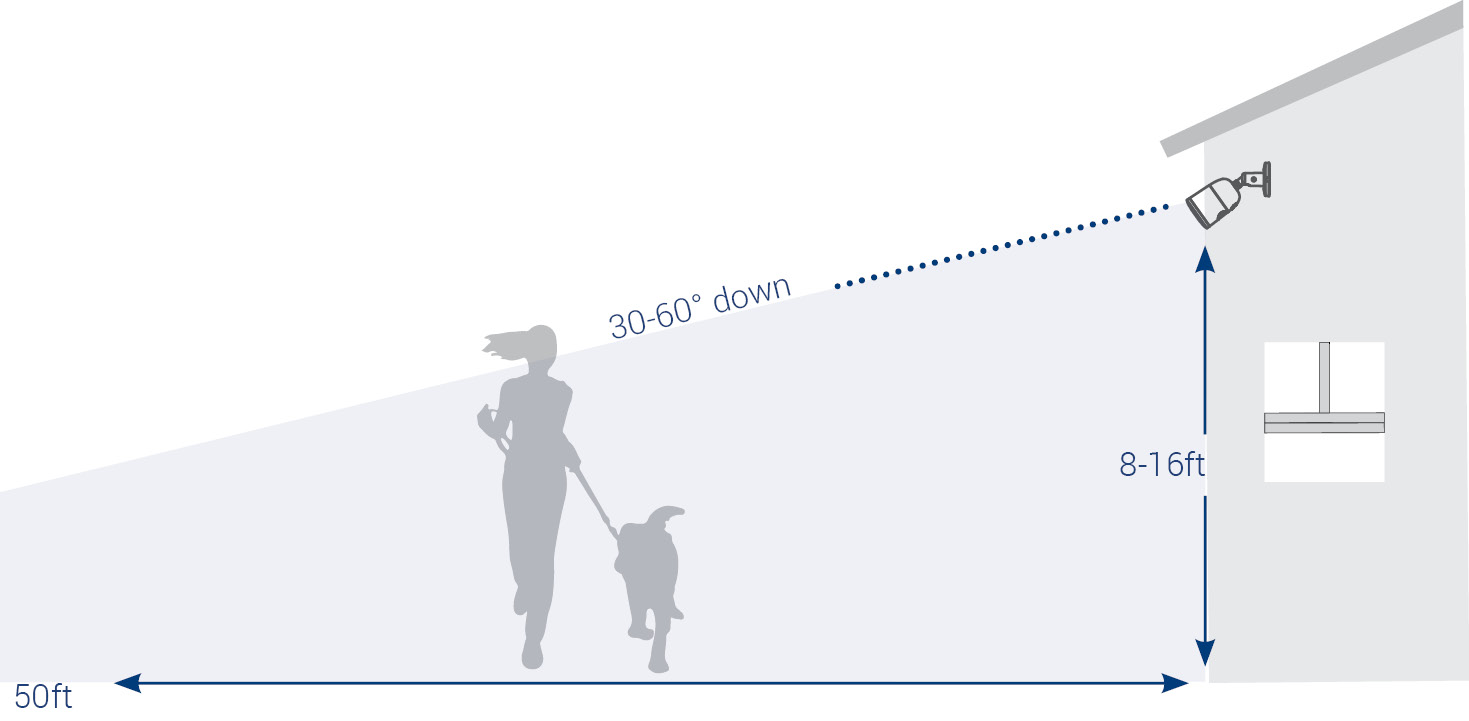
14.1 Ensuring Accurate Person & Vehicle Detection
The following are important camera installation notes to ensure accurate Person & Vehicle detection. Refer to the documentation
that came with your camera or search for your camera model number at
for full mounting instructions.
- Choose a location where objects of interest will be no further than 50ft (~15m) from the camera.
- Install the camera between 8-16ft (2.5-5m) off the ground.
- Angle the camera between 30-60° down from the level position.
- Optimal accuracy for objects of interest appear in the bottom ⅔ of the camera image.
-
Point the camera where there is the least amount of obstructions (i.e. tree branches).
14.2 Configuring Person & Vehicle Detection
Set preferences for person and/or vehicle detection per channel.
- From the Live View display, right-click to open the Quick Menu, then click Main Menu.
-
Click EVENTS. Click the Event Settings tab on the side panel, then in the drop-down click Motion. On the top panel click Smd/Deterrence.
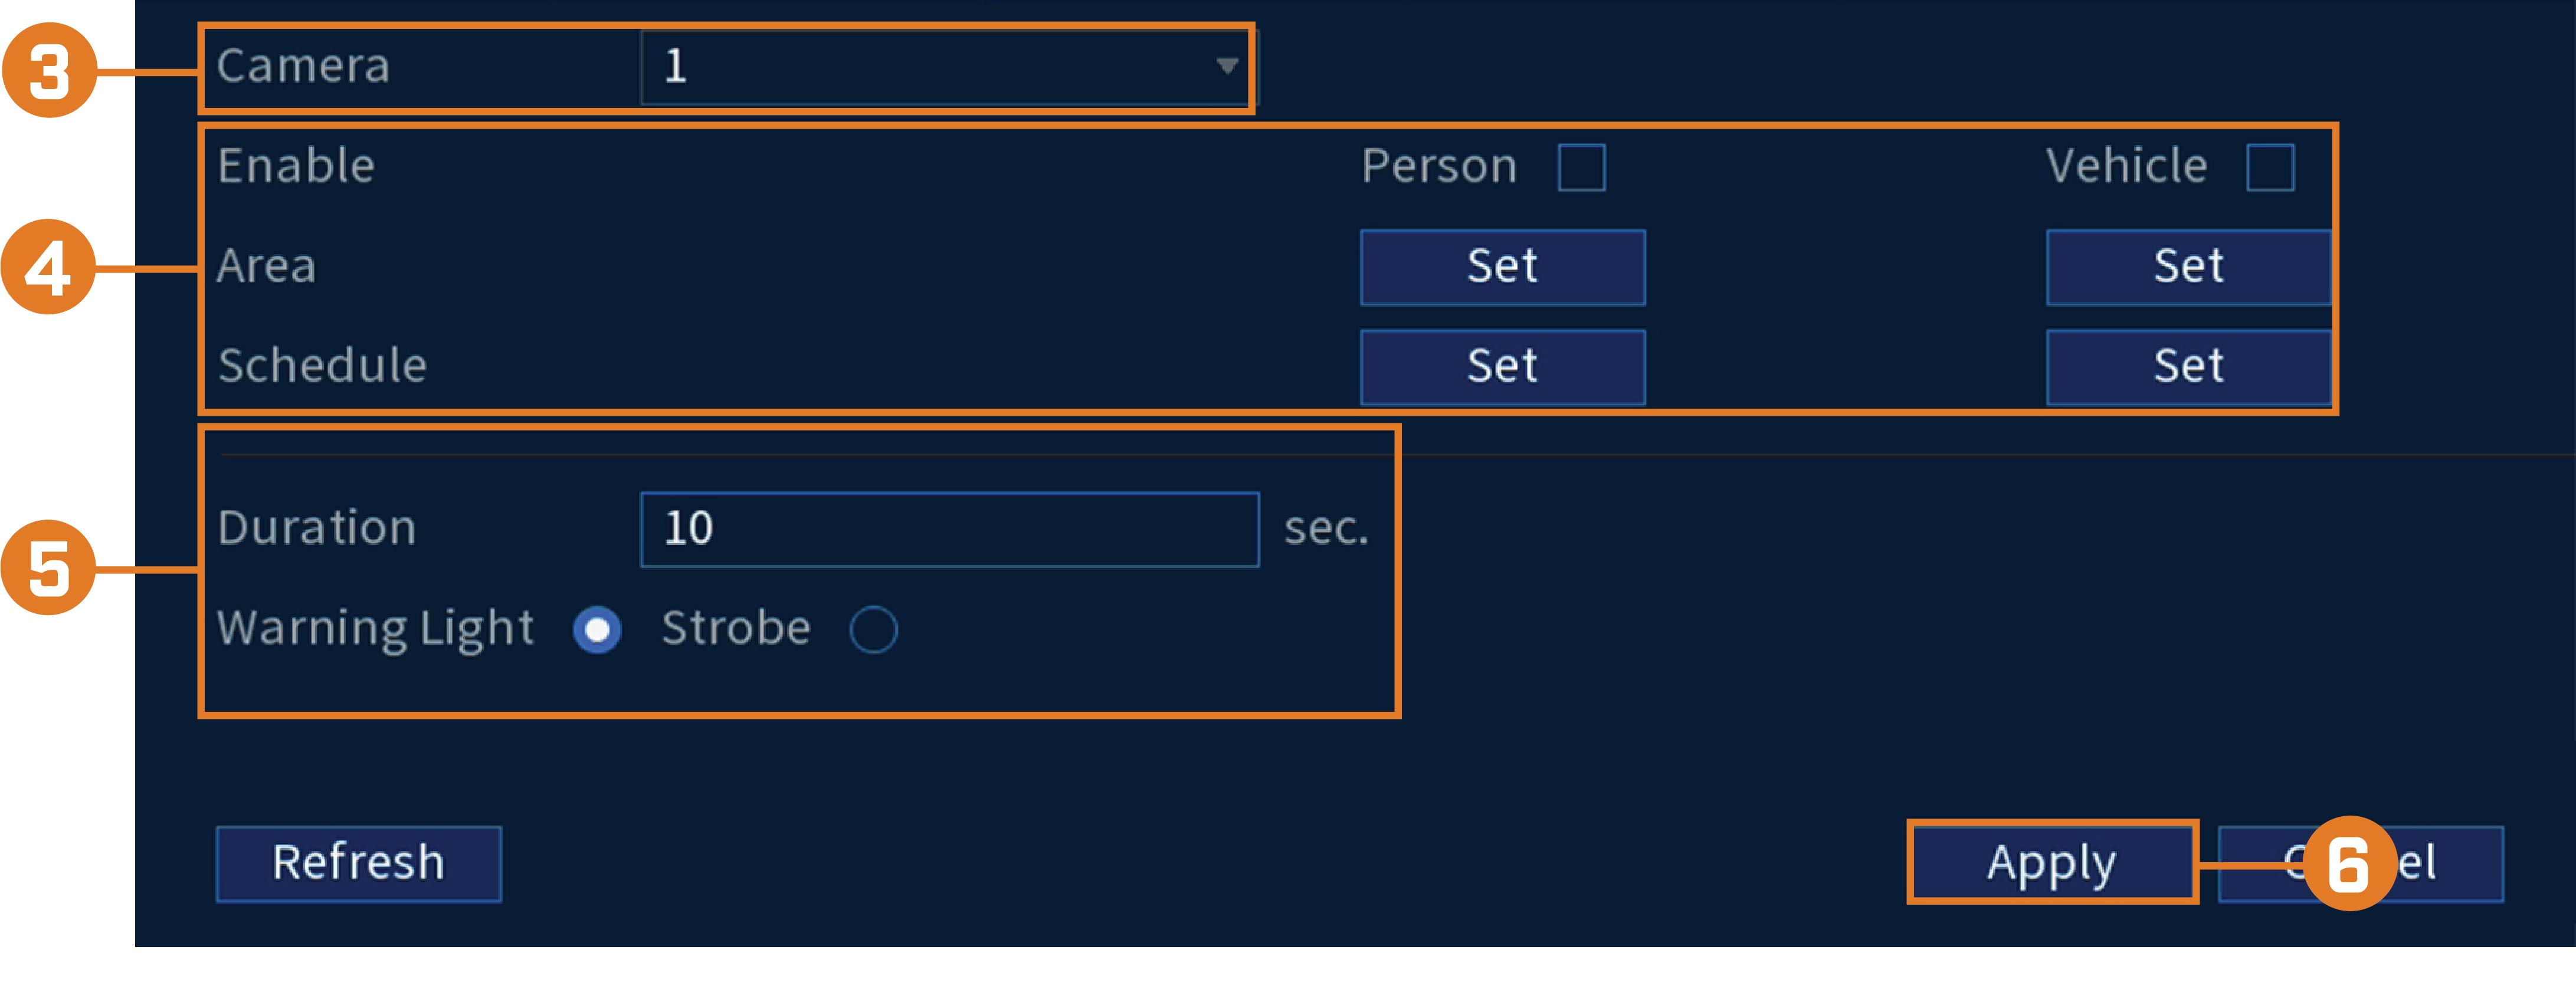
- Select a channel with a compatible camera you would like to configure smart detection for.
-
Configure the following:
- Enable: Check Person or Vehicle or both to enable each type of smart detection.
-
Area: Click Set under each detection type you have enabled to set the active area(s) for detection.
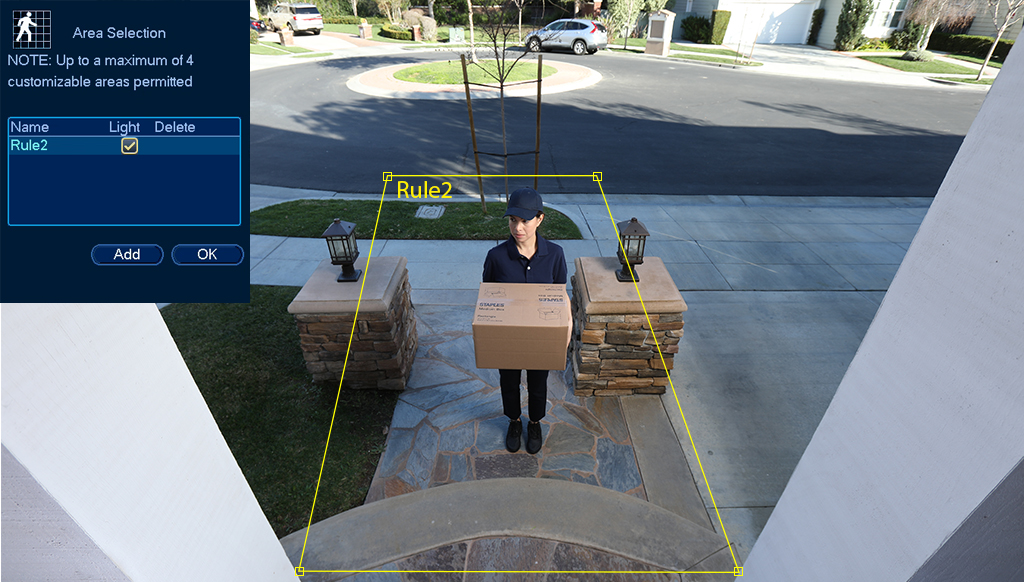
- Click Add to set an area for person or vehicle detection on the selected channel. Click-and-drag the corners to resize the area.
- For most accurate results, set an area where objects of interest will move within the bounding box as well as into / out of.
- Check Light next to a rule to flash the camera’s warning light when an object is detected.
- See 14.1 Ensuring Accurate Person & Vehicle Detection for optimal camera positioning for person and vehicle detection.
-
Schedule: Click Set under each detection type you have enabled to set the weekly schedule for detection.
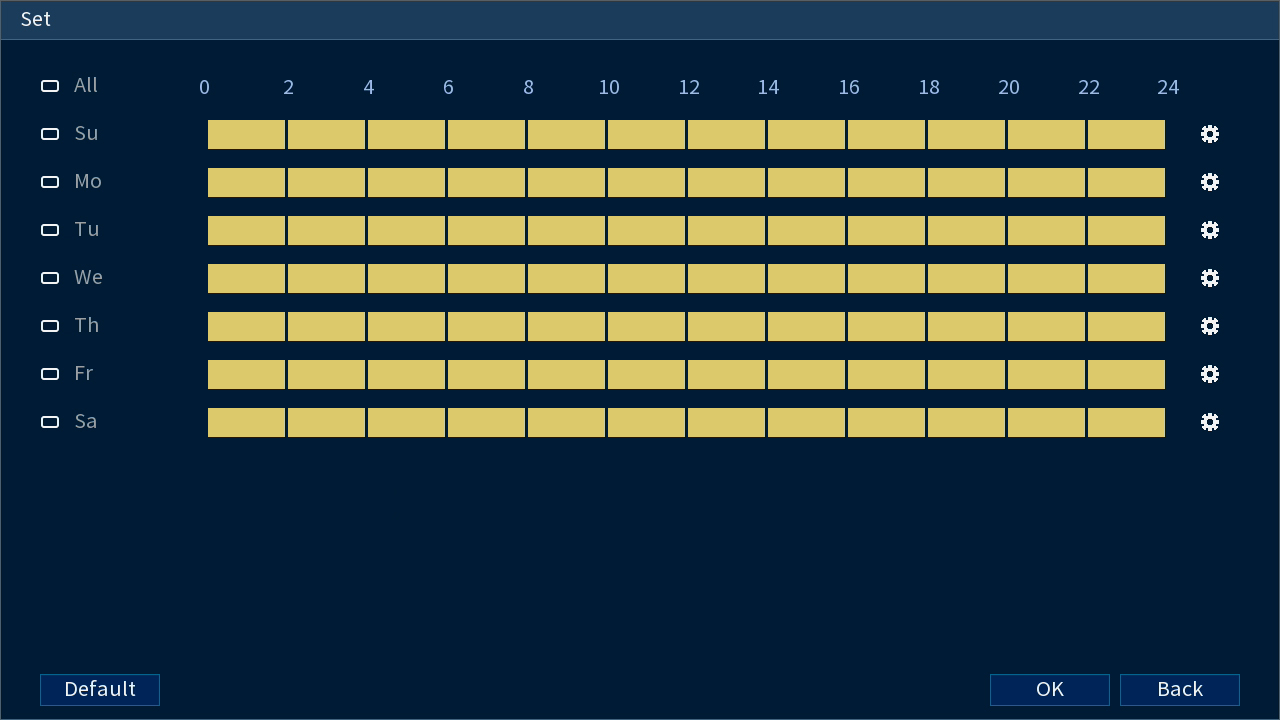
- Click or click-and-drag along each of the yellow timelines to quickly add or remove time from each day’s schedule in 15–minute segments.
-
Click
 beside 2 or more days to link schedules (
 ). This allows you to quickly change multiple schedules at once.
-
To make fine adjustments to a schedule, click
 . This will allow you to set exact start and end times for a schedule.
- Click OK when finished.
-
If you choose to flash the camera’s warning light when a person or vehicle is detected, configure the following warning light
options:
- Duration: Enter the time in seconds the warning light will remain on after a person or vehicle is detected.
- Warning Light / Strobe: Choose Warning Light to use a solid white light, or Strobe for a flashing light. If you select Strobe, choose the Strobe Frequency to determine how quickly the warning light will flash when triggered.
- Click Apply.
To configure person and/or vehicle detection:
14.3 Searching for Person & Vehicle Detection Events (Smart Search)
Smart Search lets you filter recorded video to search for person detection events, vehicle detection events, or both.
- From the Live View display, right-click to open the Quick Menu, then click Main Menu.
-
Click EVENTS. Click the Smart Search tab on the side panel, then in the drop-down click Smart Motion.
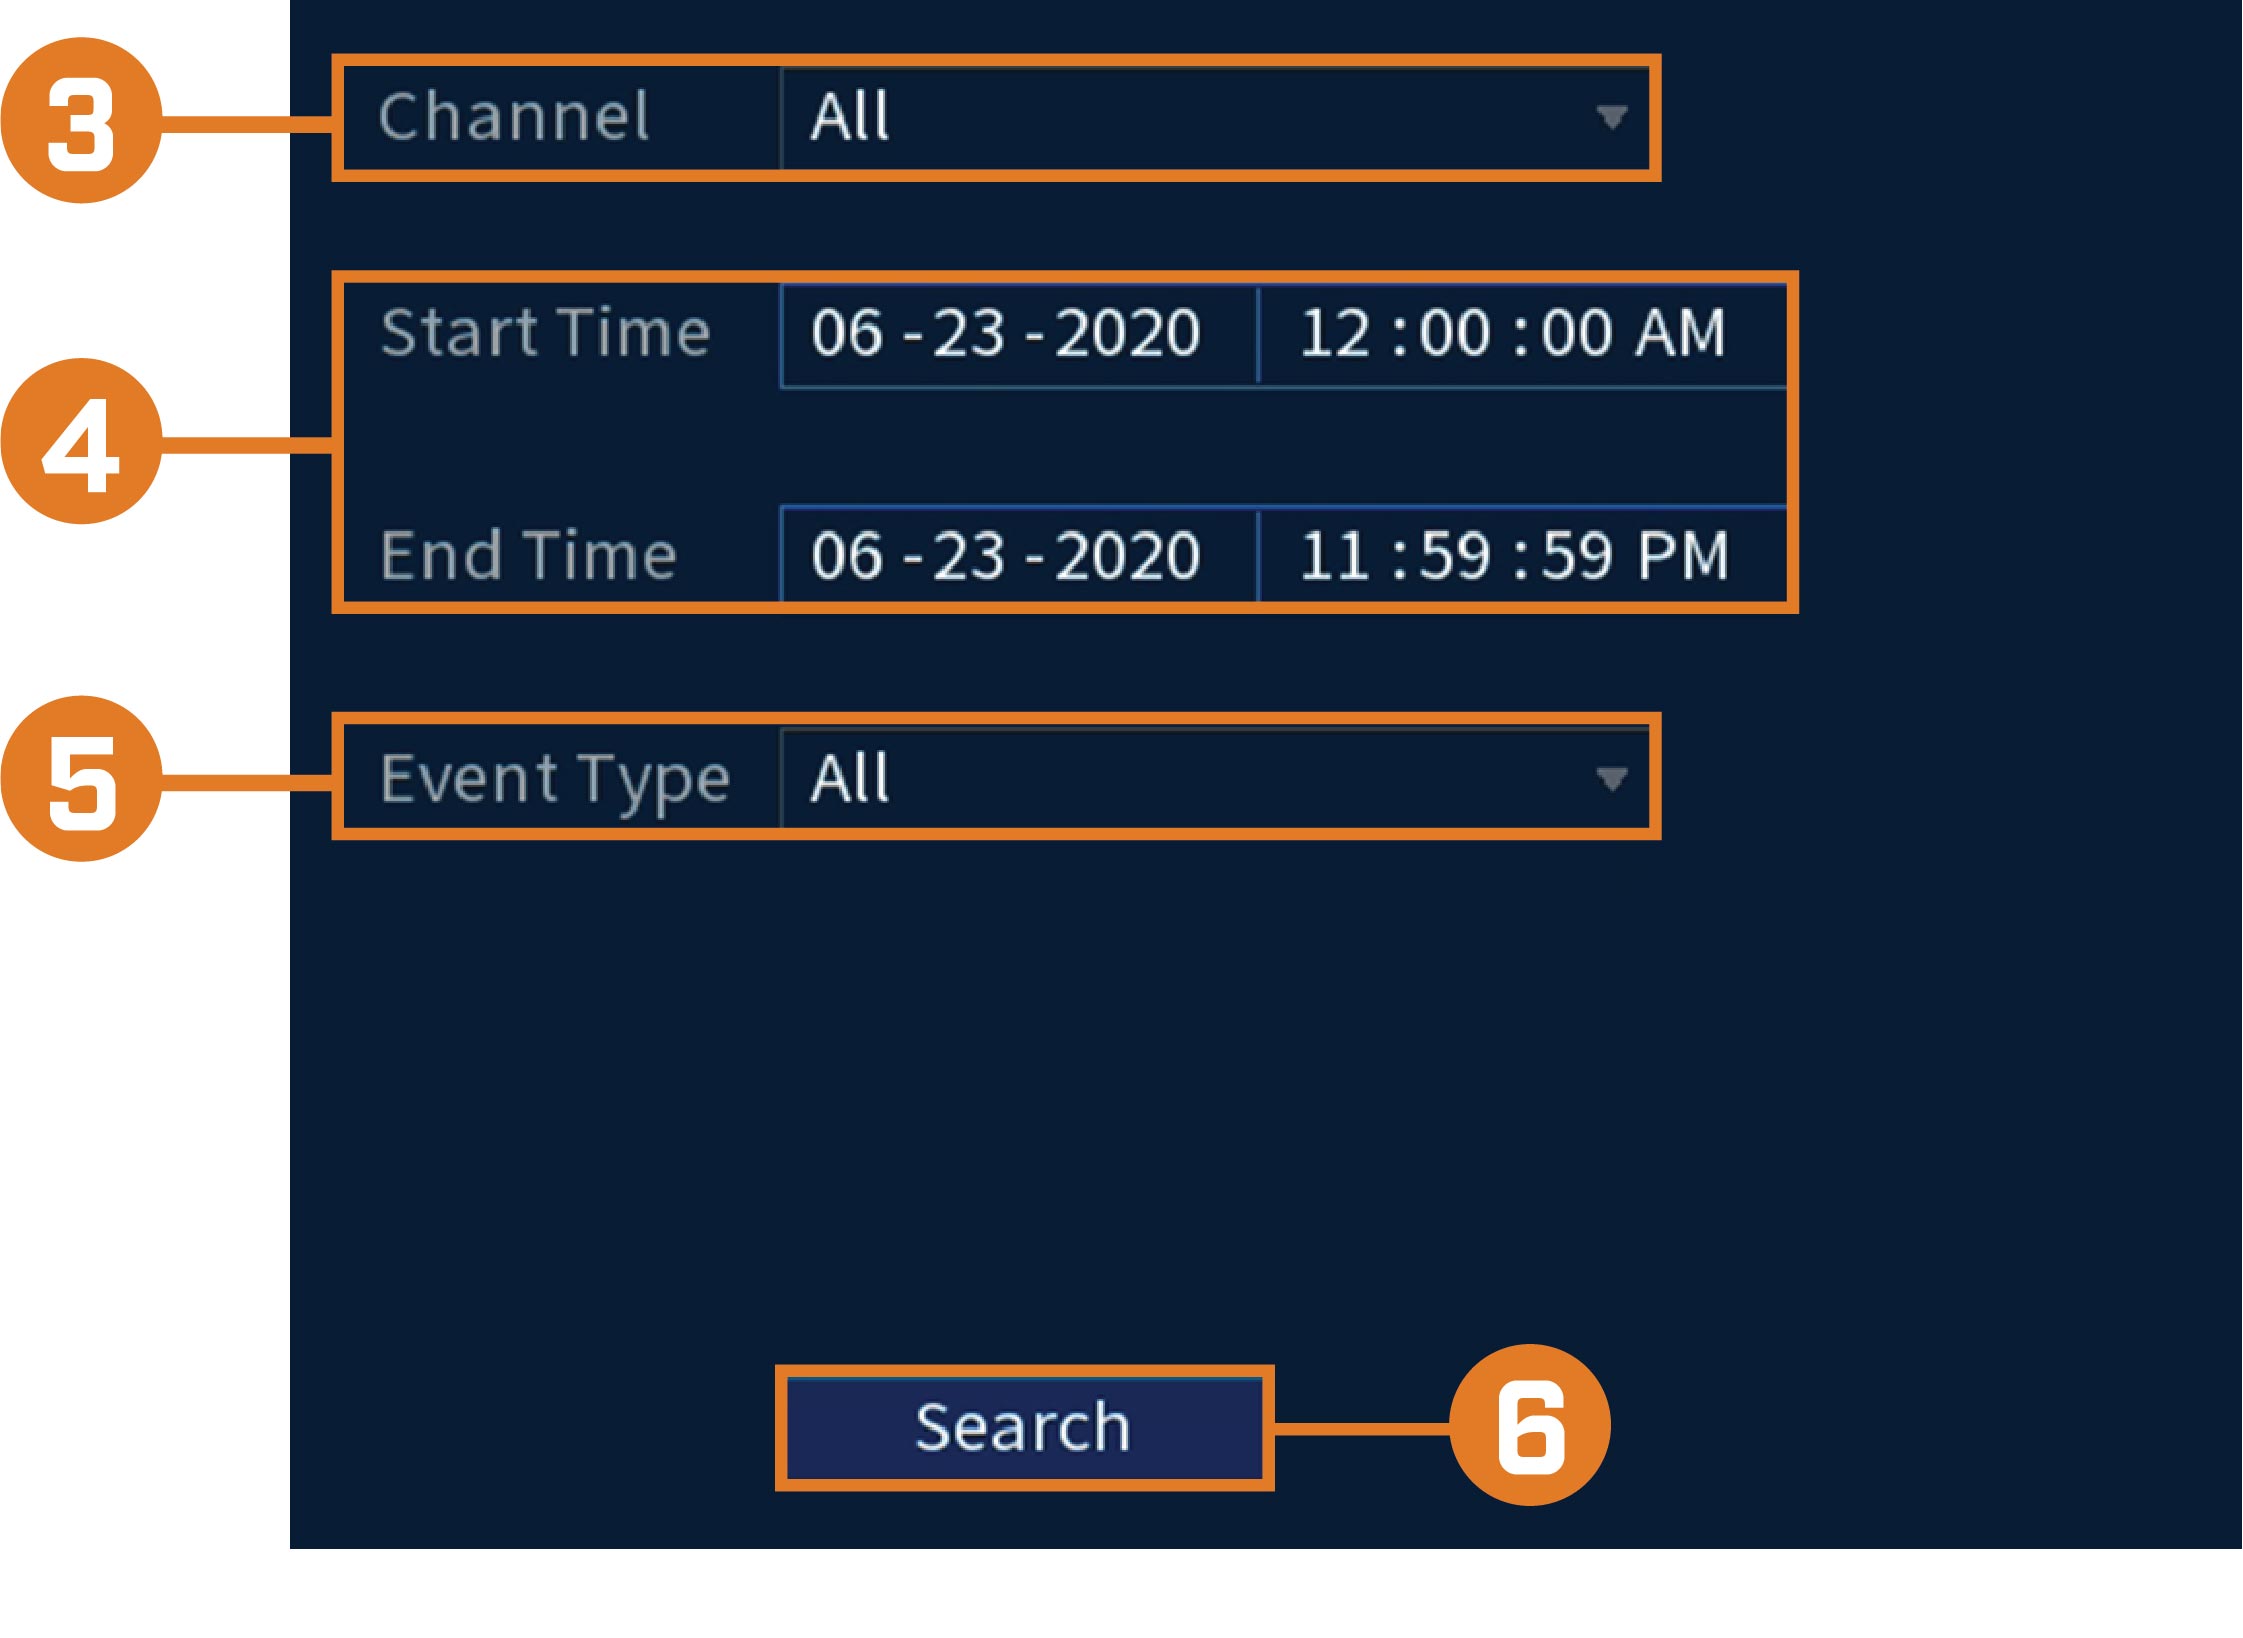
- Select a channel to search for detection events from, or select All.
- Enter a start and end time for your search.
- Next to Event Type, select Person, Vehicle, or All.
-
Click Search.
-
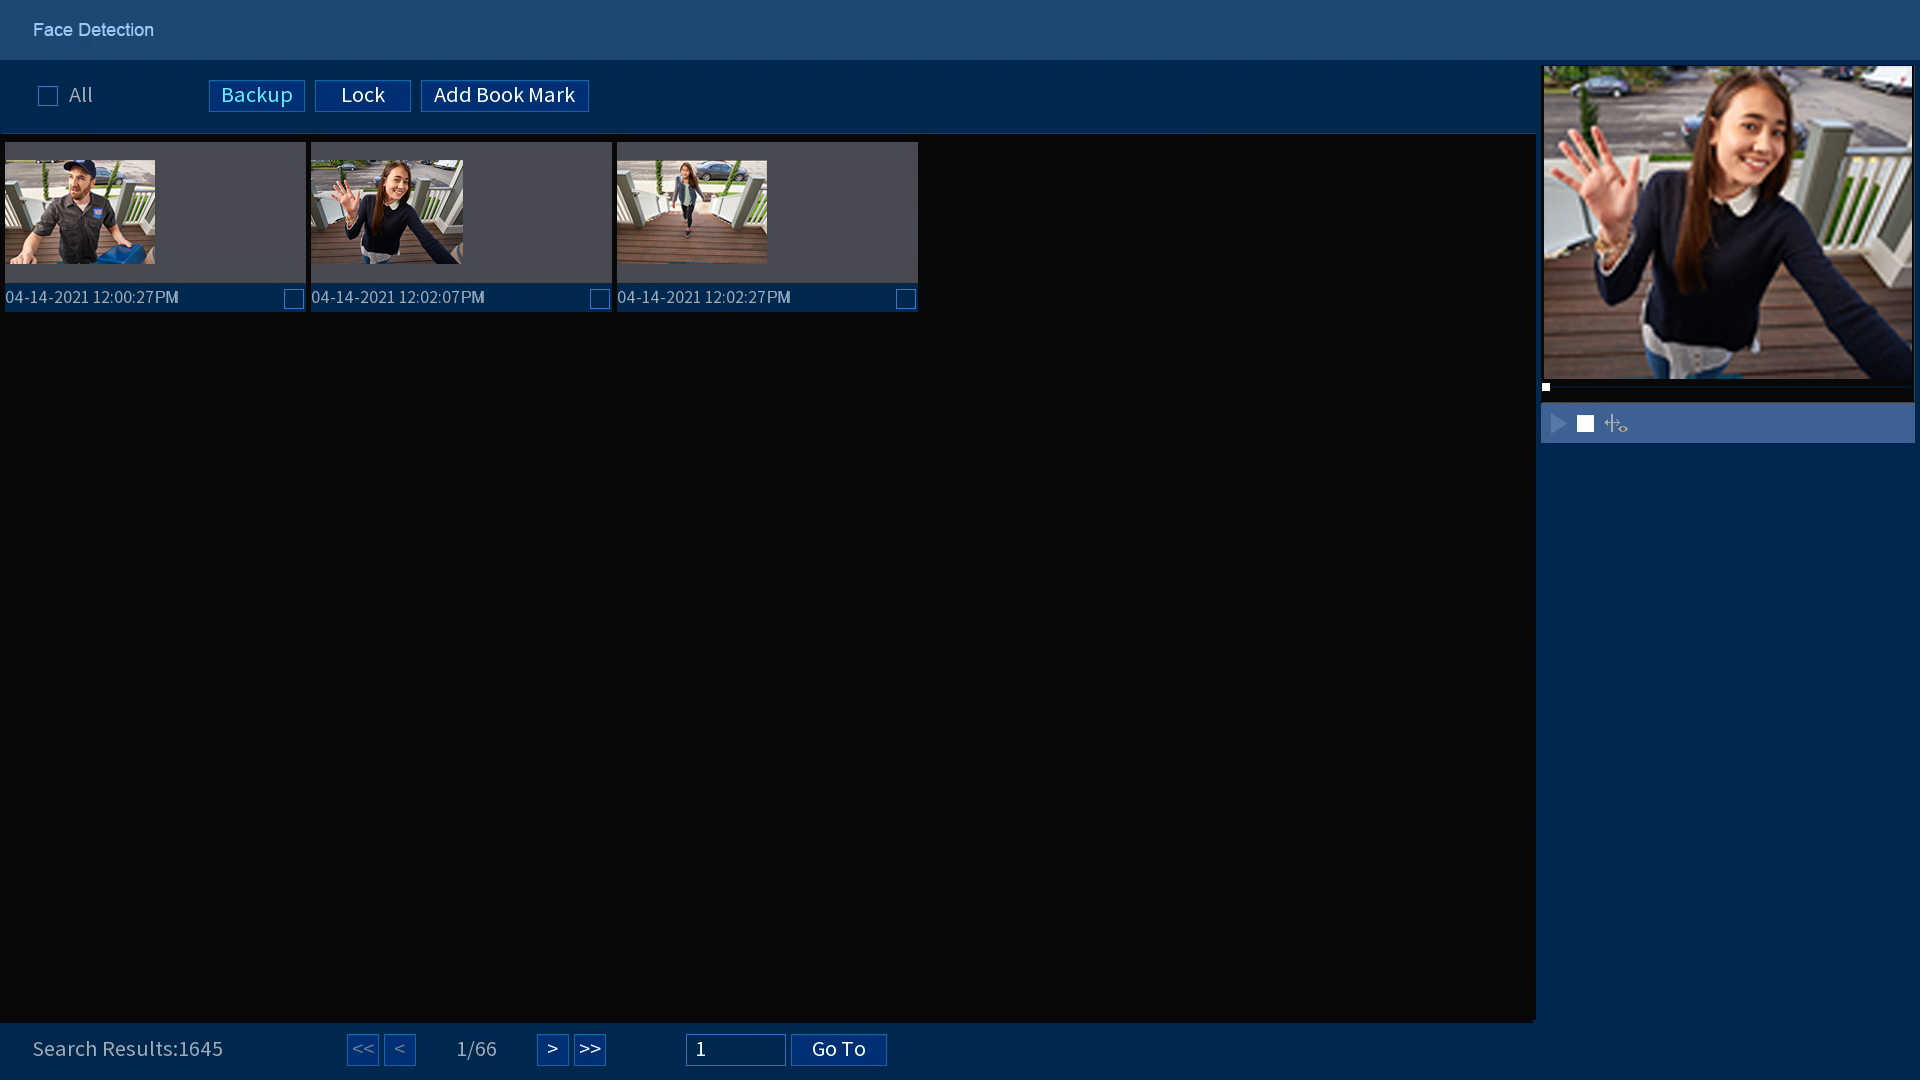
Events that match your search criteria are displayed. You now have the following options:
- Click a thumbnail to preview the event. Double-click the preview window to view in full screen.
-
Check thumbnails to perform other actions:
- Backup: Back up events.
- Lock: Lock events.
- Add Book Mark: Bookmark events.
To perform a Smart Search:
14.4 Configuring Active View
Track motion that is detected by following and zooming in on the moving object.
- From the Live View display, right-click to open the Quick Menu, then click Main Menu.
-
Click EVENTS. Click the Event Settings tab on the side panel, click Motion, then click the Motion Detect tab on the top panel.
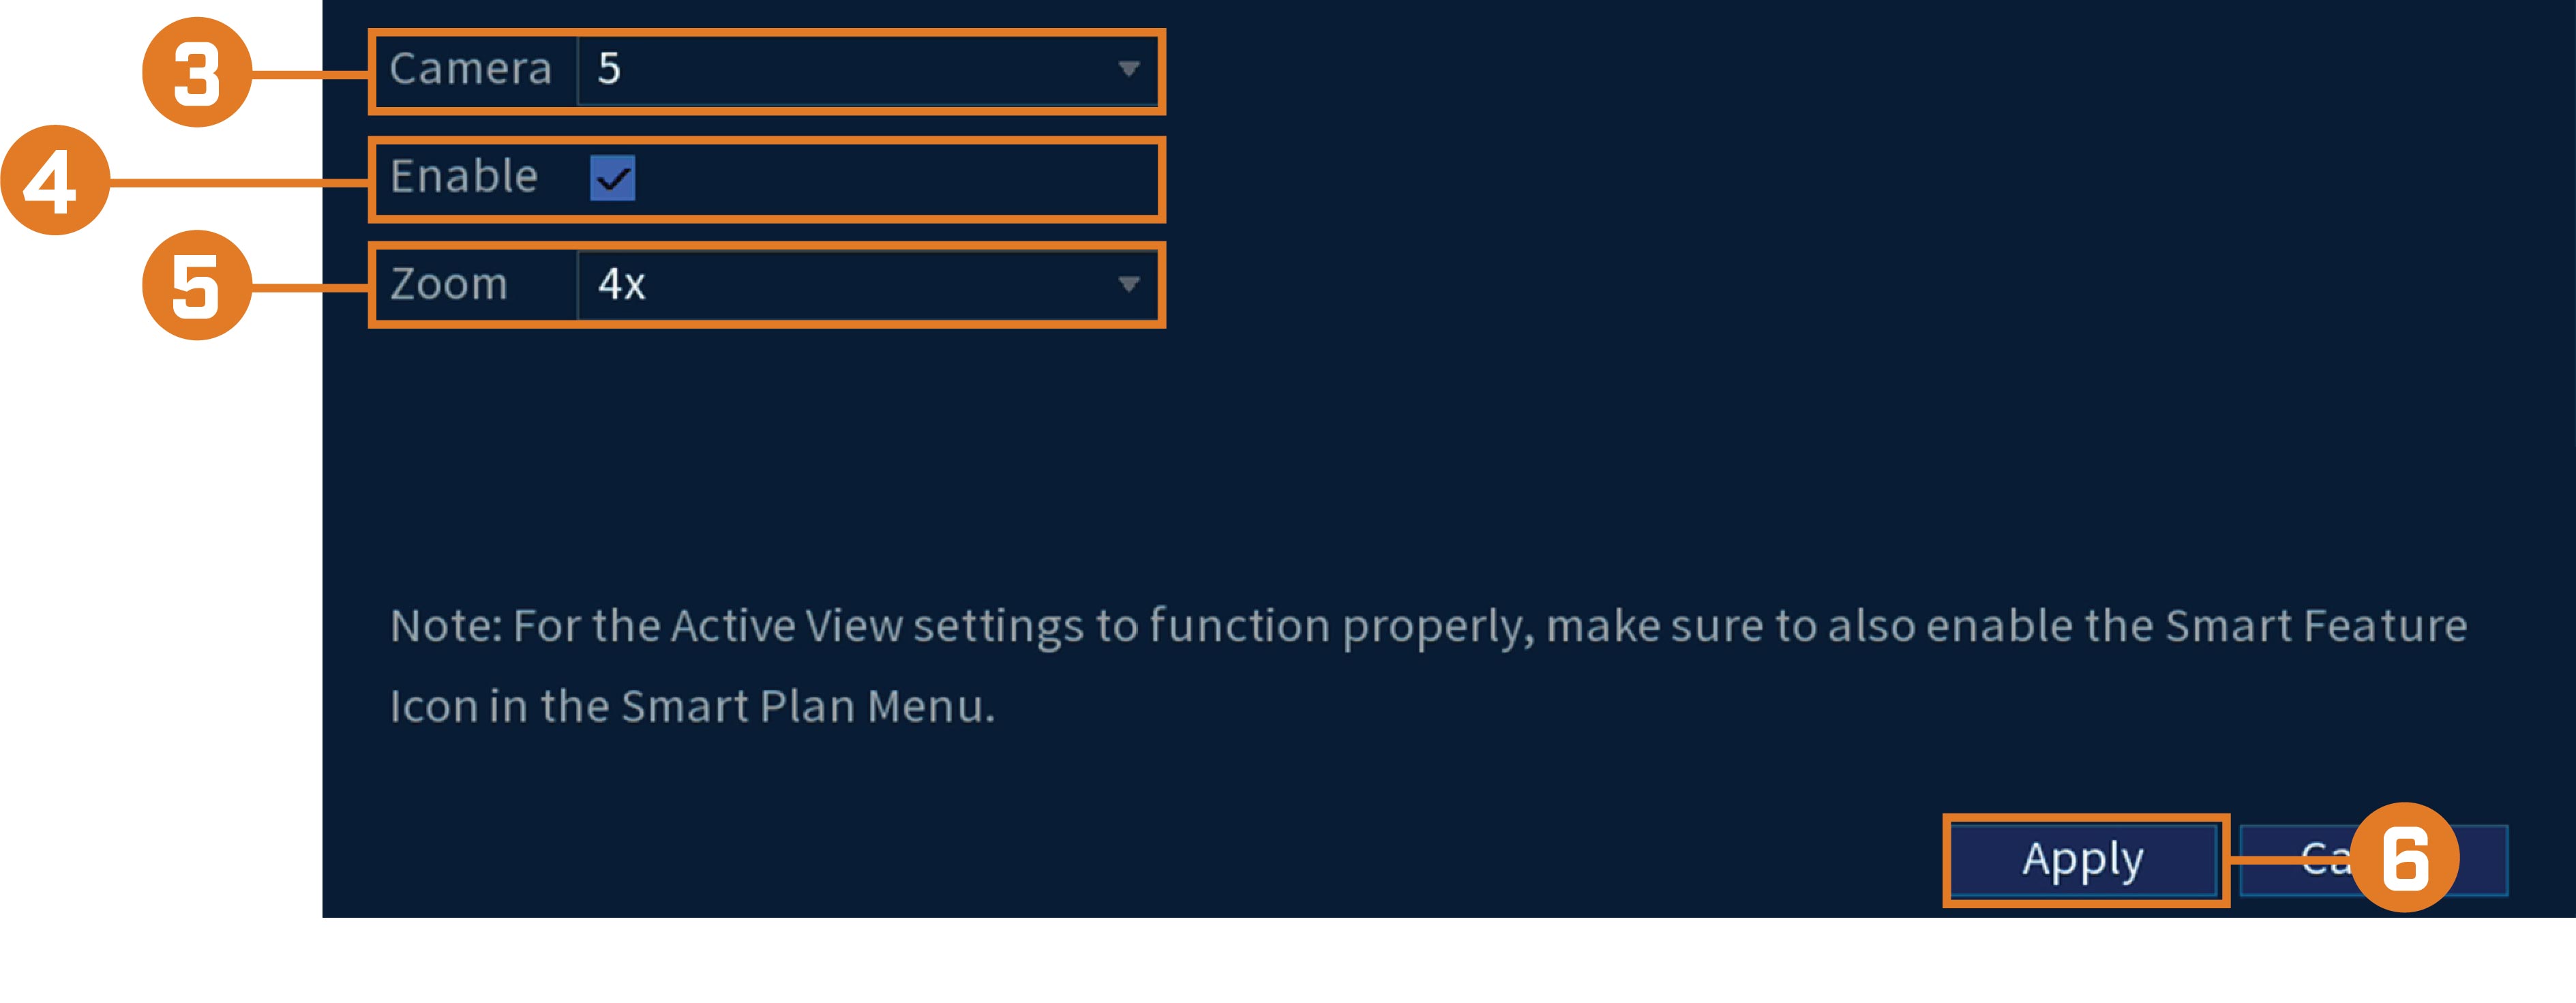
- Select a camera to configure active view for.
- Check to enable active view.
- Click to select the zoom setting between 2x, 4x, 6x, or 8x.
- Click Apply to save changes.
To configure the active view settings: