19 Replacing the Hard Drive
The system comes with a pre-installed 3.5" SATA hard drive. You can replace the hard drive with one up to a maximum size of
10TB, and add a second drive if you choose to.
19.1 Removing the Hard Drive
- Power off the system, and unplug all cabling from the system.
-
Remove the back panel screws (4×). Remove the cover by sliding it backwards.

-
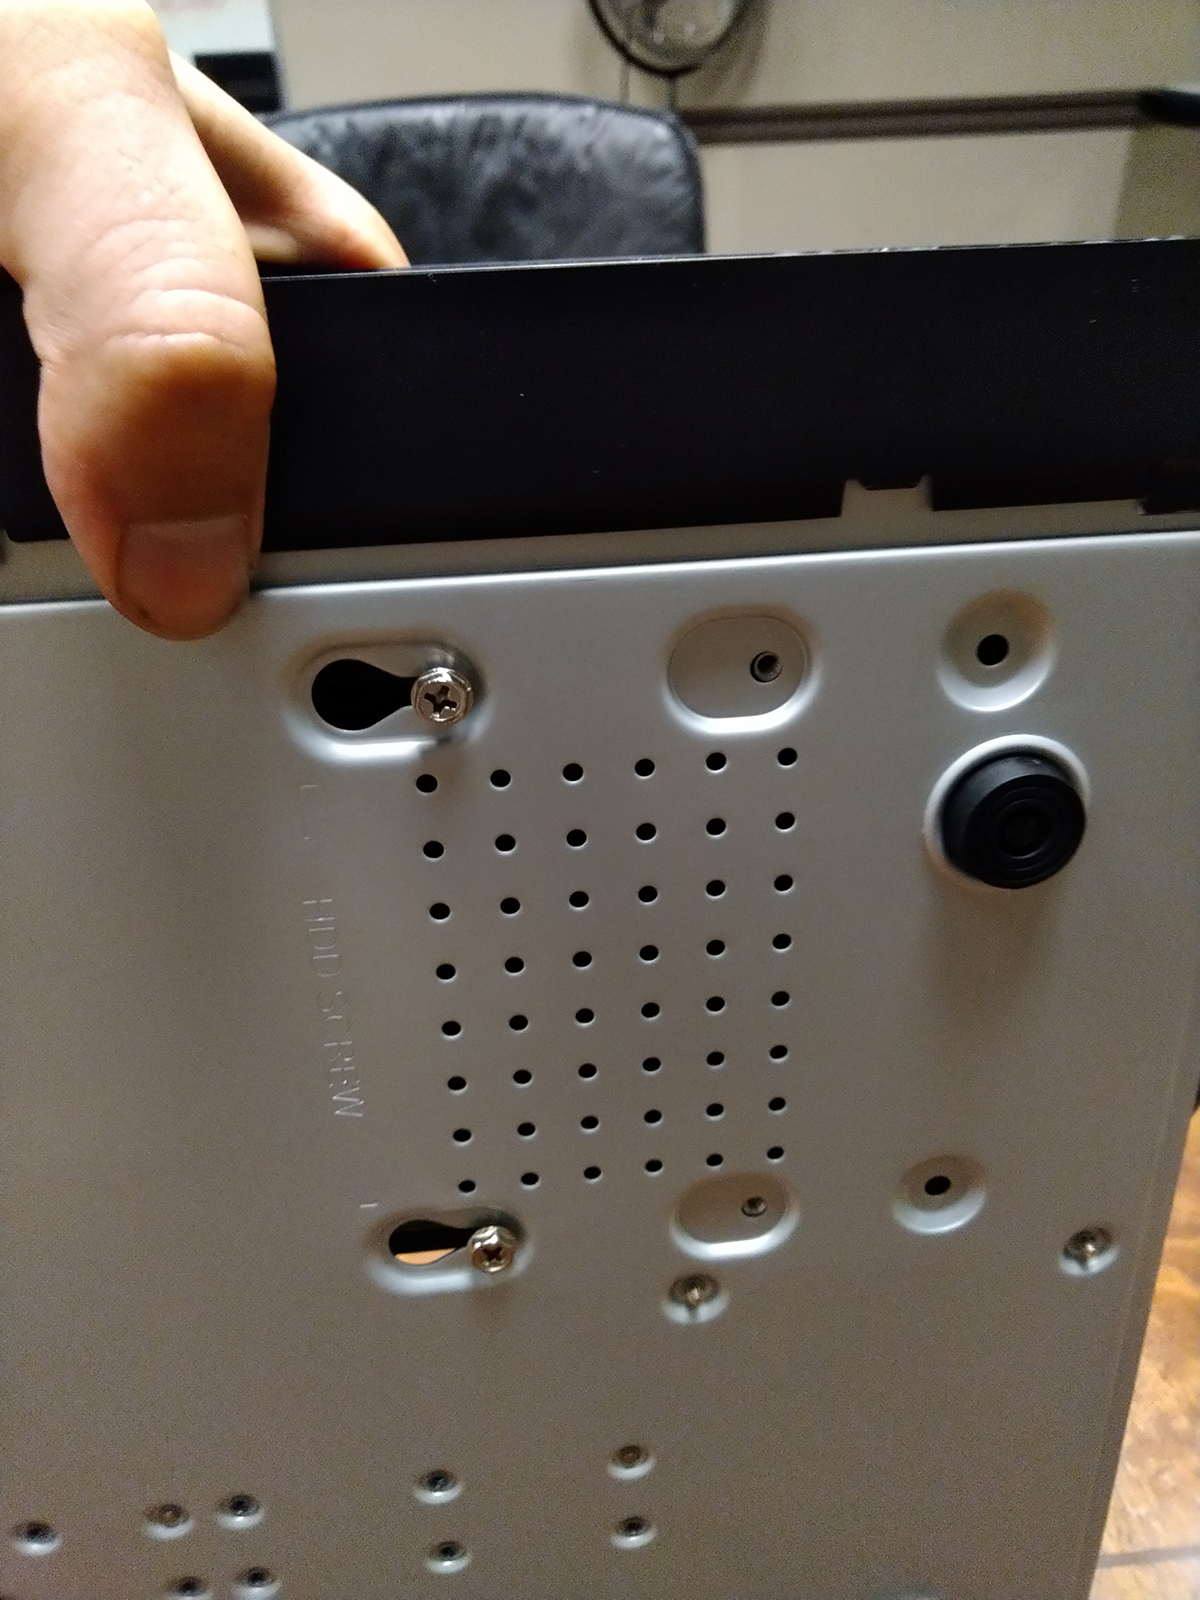
Turn the recorder over carefully. Remove the 2 hard drive screws closest to the edge of the recorder. Loosen the remaining
2 hard drive screws, but do not remove them.
-
Remove the power and SATA cables from the hard drive.
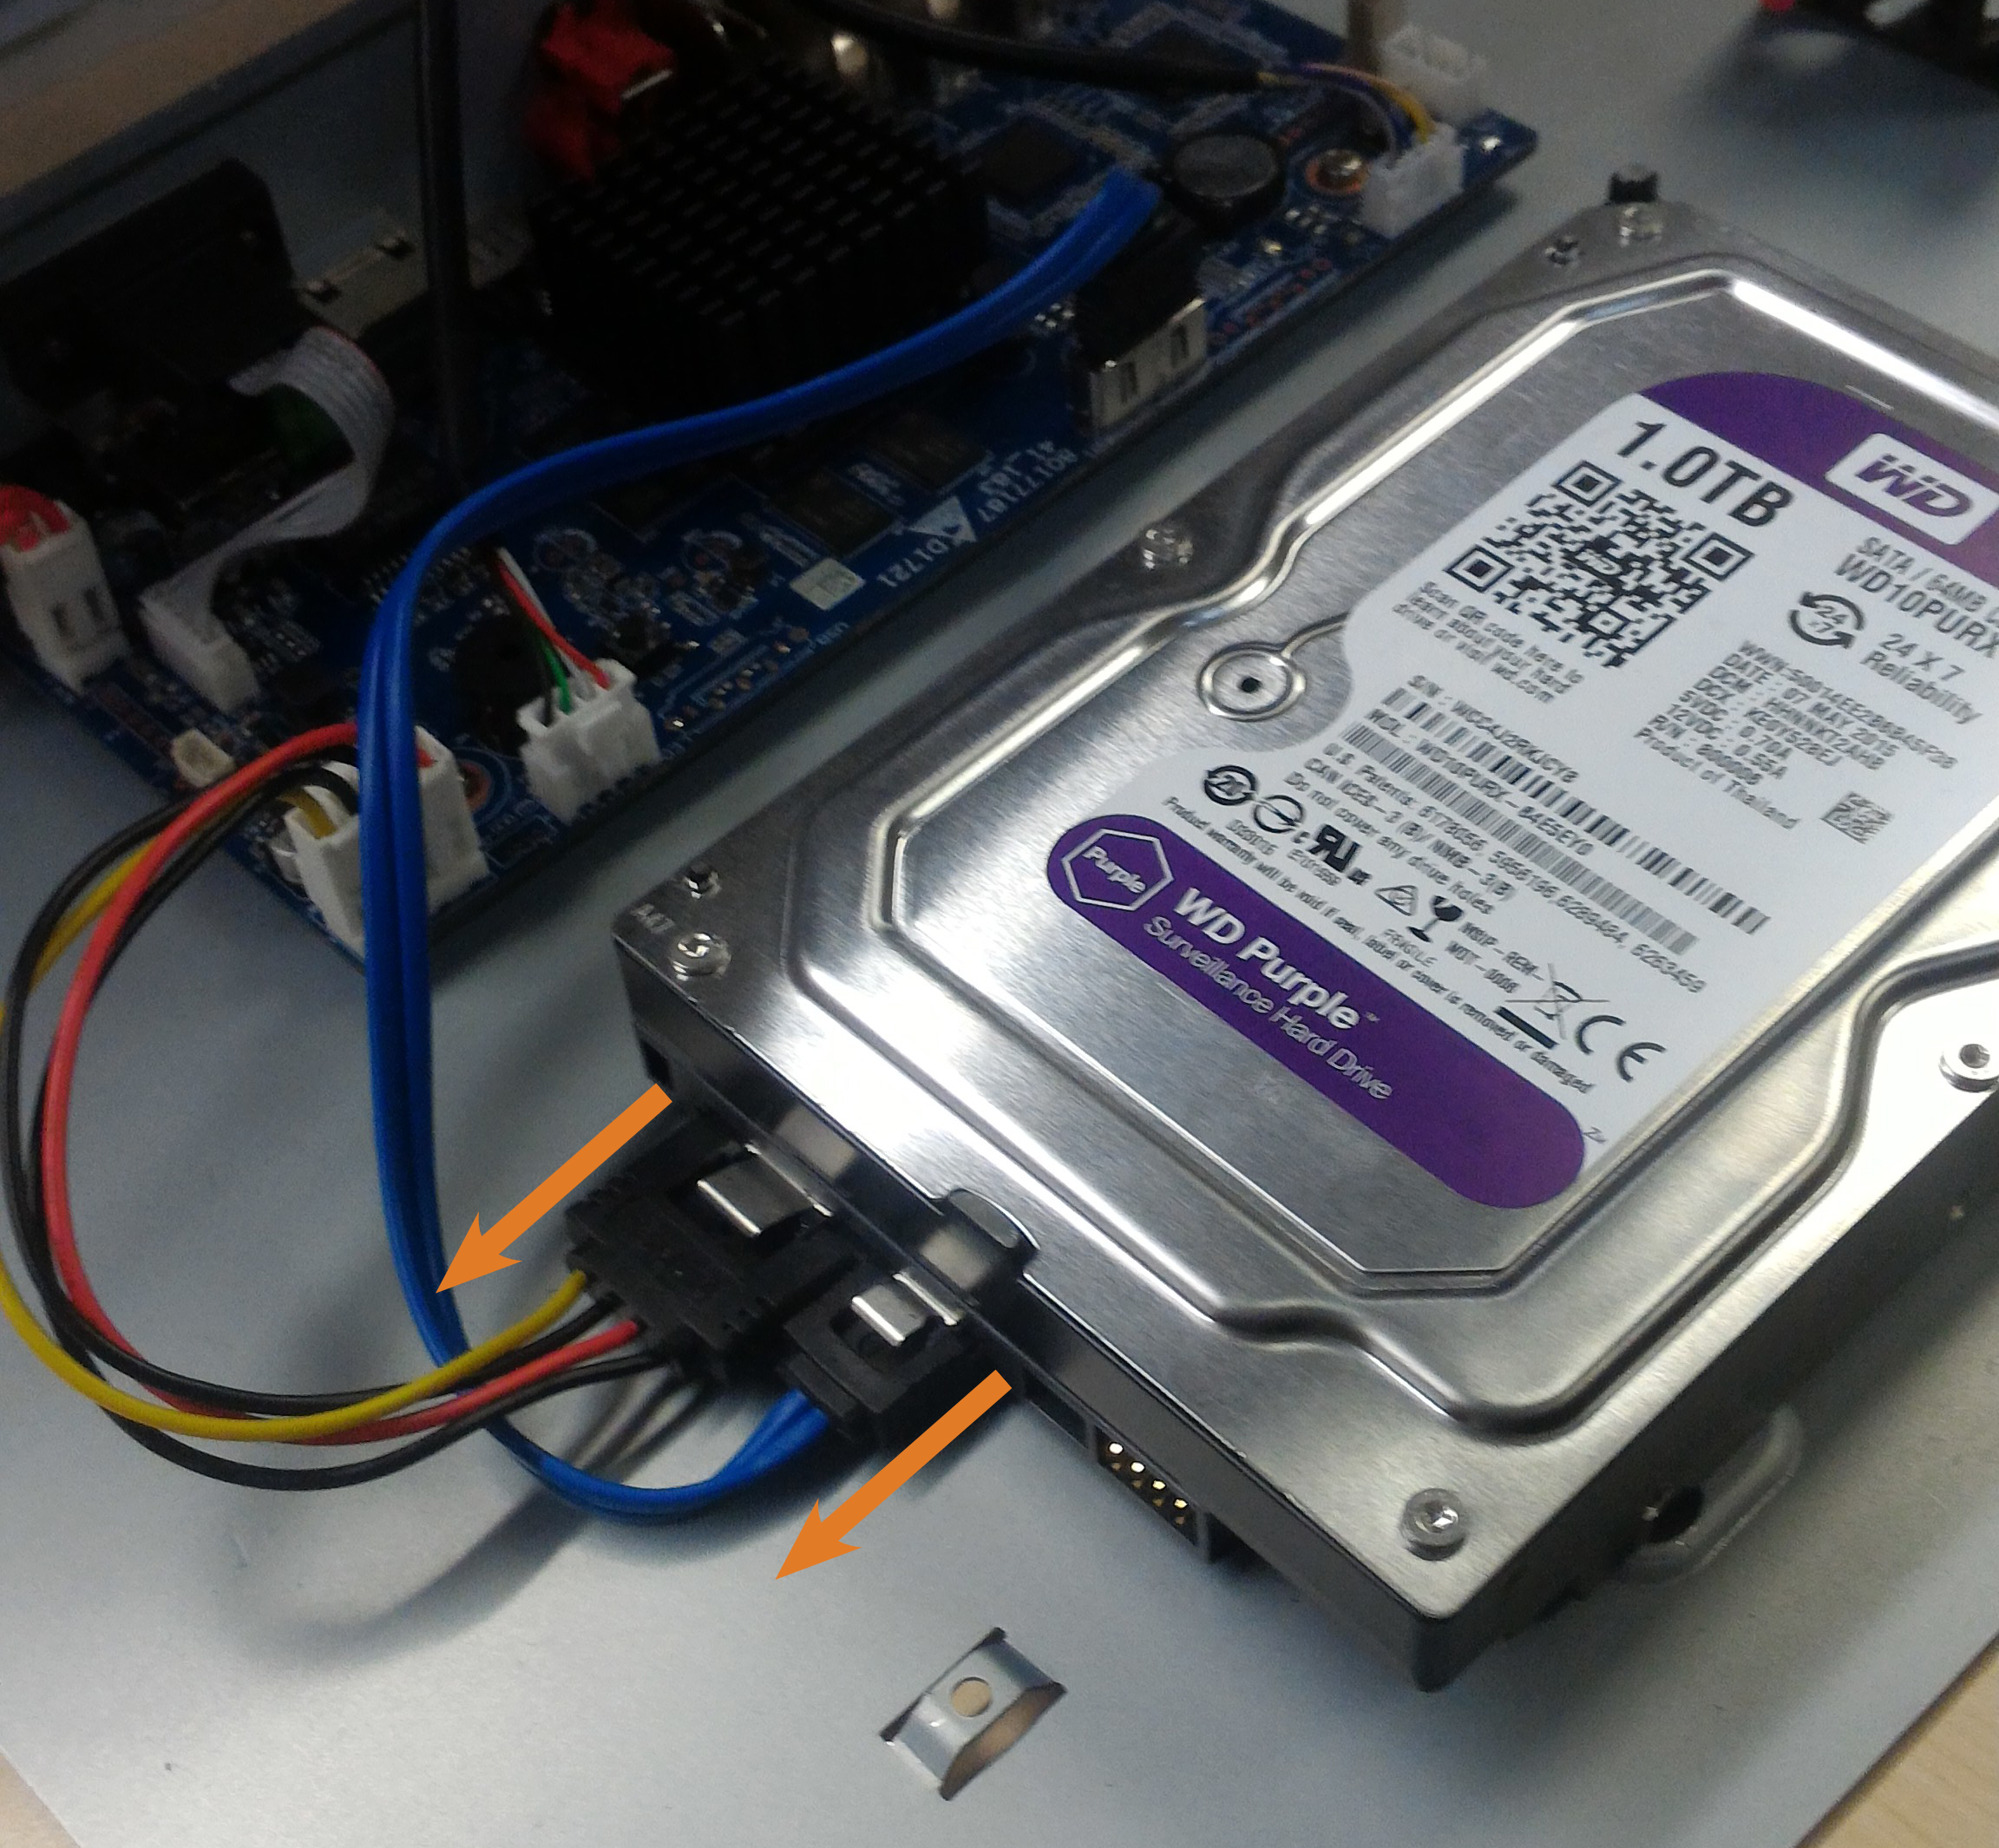
- Slide the hard drive out of the recorder.
- If you are not immediately going to install a new hard drive, replace the top panel and the 4 back panel screws.
To remove the hard drive:
19.2 Installing a New Hard Drive
-
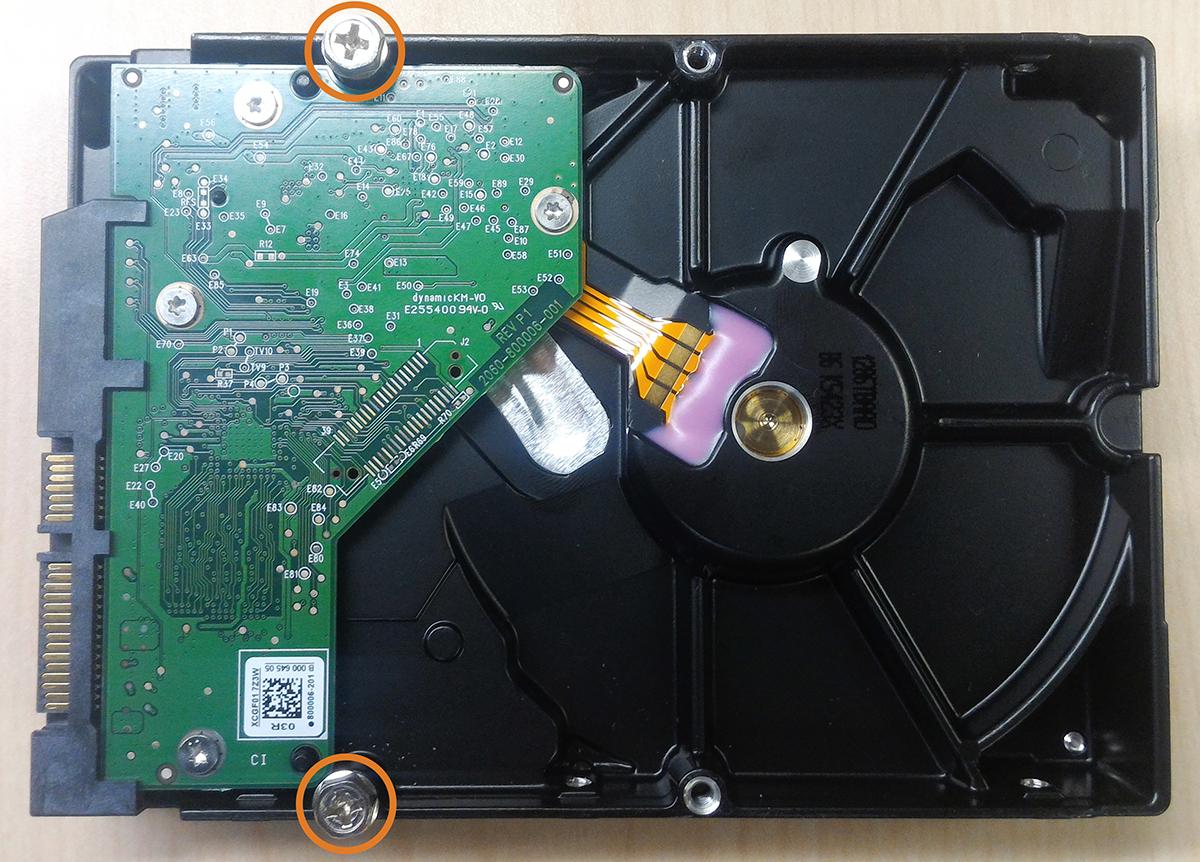
Insert the 2 hard drive screws closest to the SATA and power ports on the hard drive and tighten them half way.
- Power off the system, and unplug all cabling from the system.
-
Remove the back panel screws (4×). Remove the cover by sliding it backwards.
-
Insert the hard drive so the 2 pre-inserted screws line up with the holes in the bottom panel as shown below. Slide the hard
drive in place. Insert the remaining 2 hard drive screws, and tighten all 4 screws tightly.
-
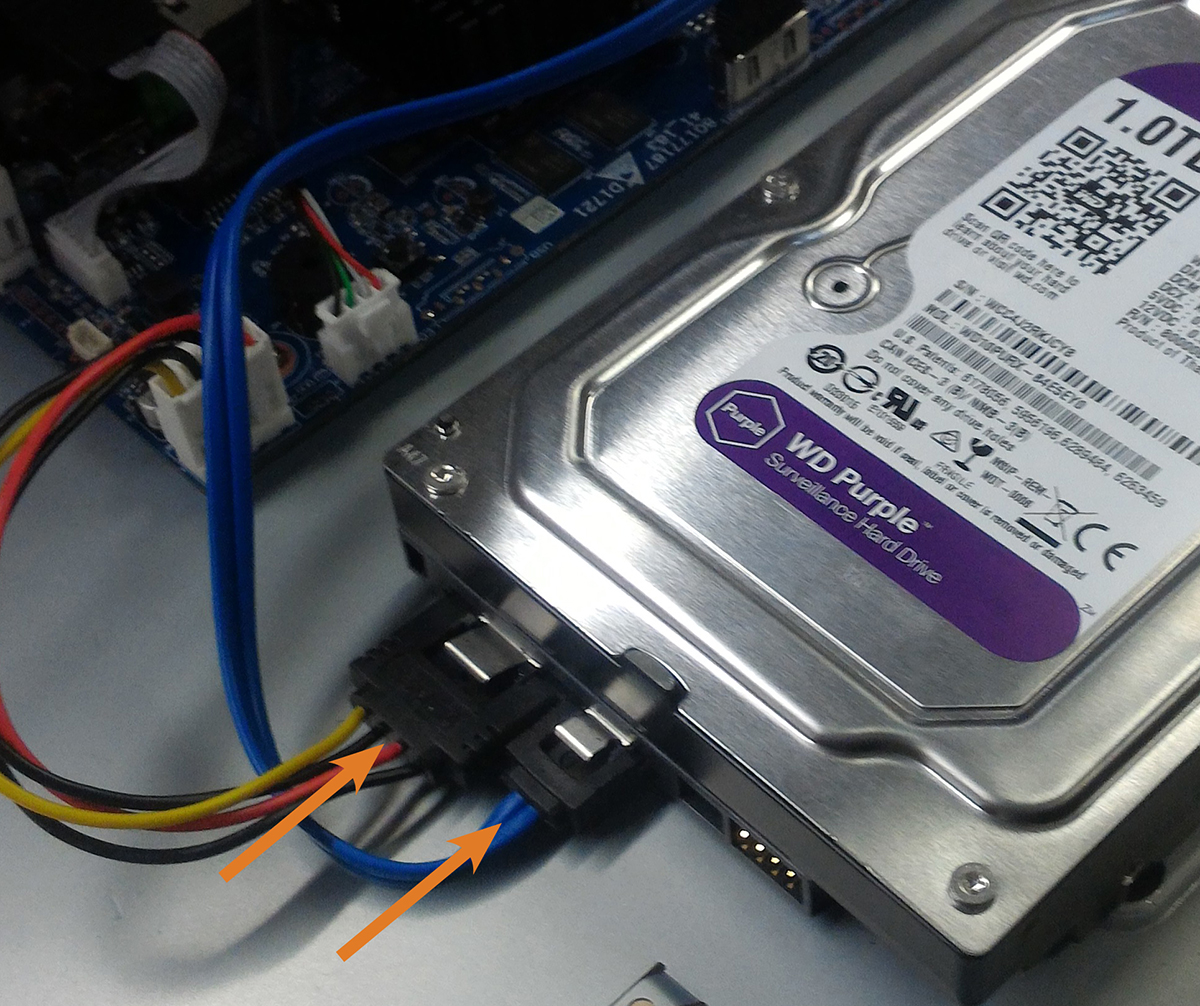
Connect the power and SATA cables to the hard drive.
- Replace the top panel and the 4 back panel screws.
To install a new hard drive: