5 Basic Setup (NR900X Series)
5.1 Step 1: Connect the IP Cameras
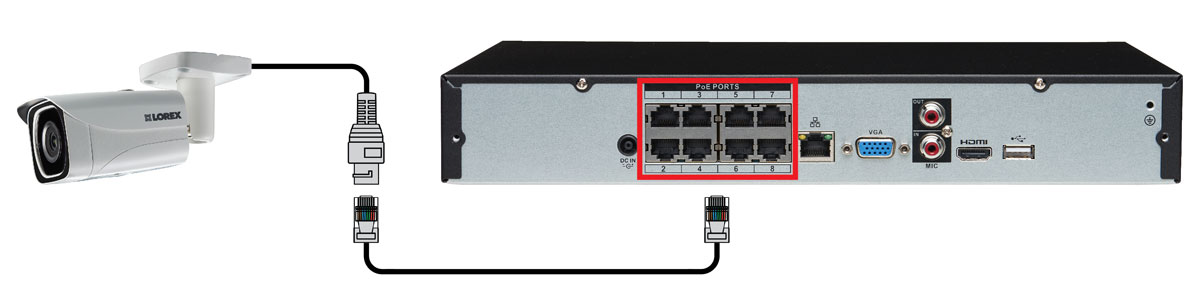
Option 1: Direct Connection to NVR
-
Connect cameras to the PoE Ports on the rear panel of the NVR using Cat5e or higher grade Ethernet cable. The cameras will appear on the NVR without any additional
configuration when the system starts up.
Option 2: Connect Cameras to Local Network
You can also connect your IP cameras to your local network for flexible installations. For details, see
5.11 Connecting Cameras to the Local Area Network (LAN)
.
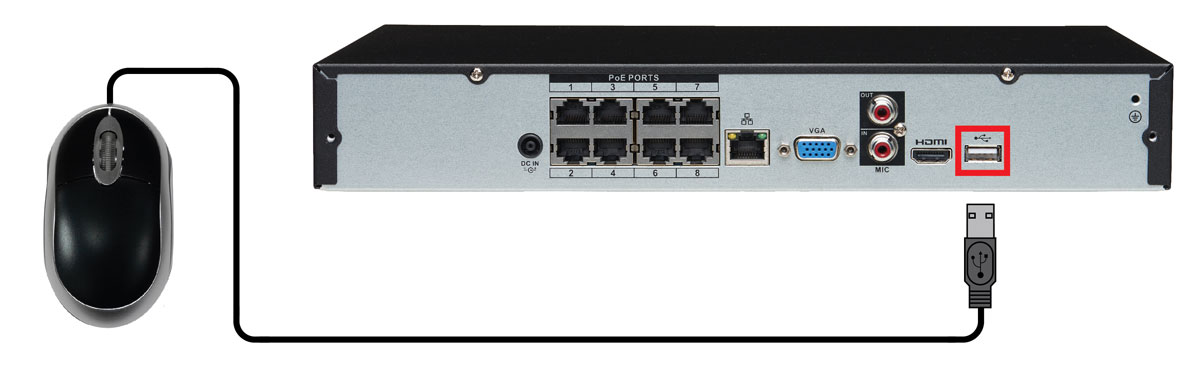
5.2 Step 2: Connect the Mouse
-
Connect a USB mouse (included) to one of the USB ports.
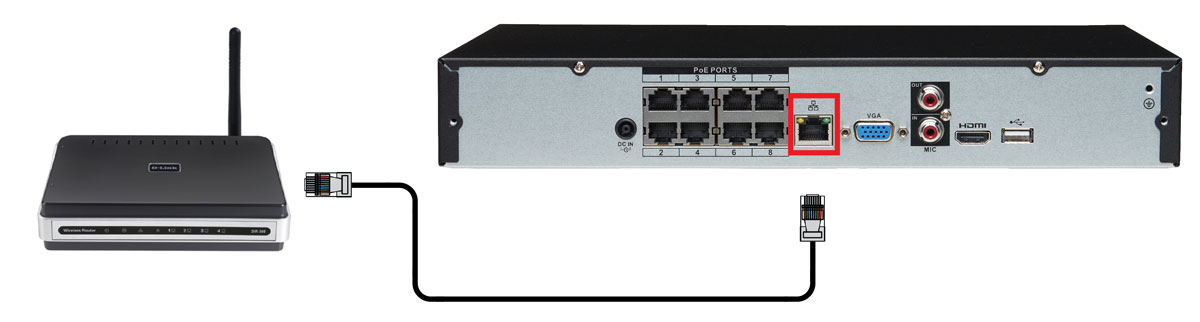
5.3 Step 3: Connect the Ethernet Cable
-
Connect an Ethernet cable (included) to the LAN port on the rear panel of the system. Connect the other end of the Ethernet cable to a router on your network.
5.4 Step 4: Connect the Monitor
-
Connect the included HDMI cable from the HDMI port to the TV or monitor (recommended).
OR
-
Connect a VGA cable (not included) from the VGA port to the monitor.
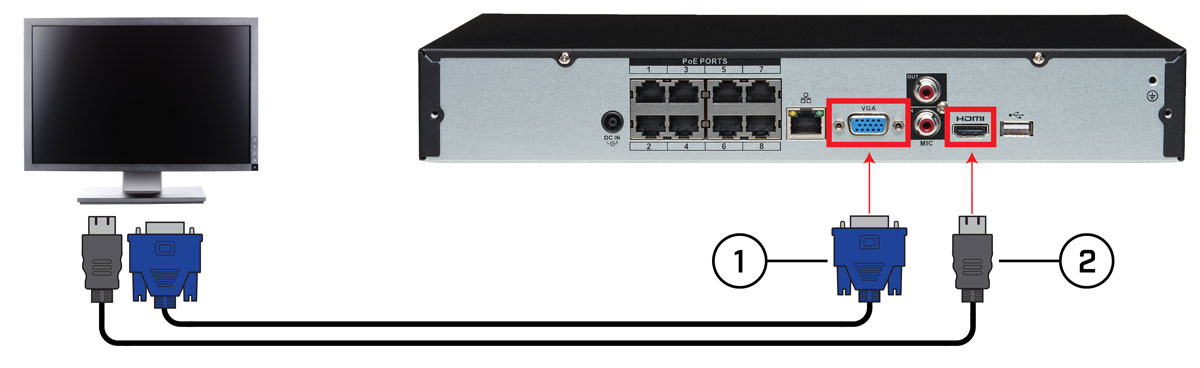
- VGA cable (not included — maximum resolution 1080p)
- HDMI cable (included — maximum resolution 4K)
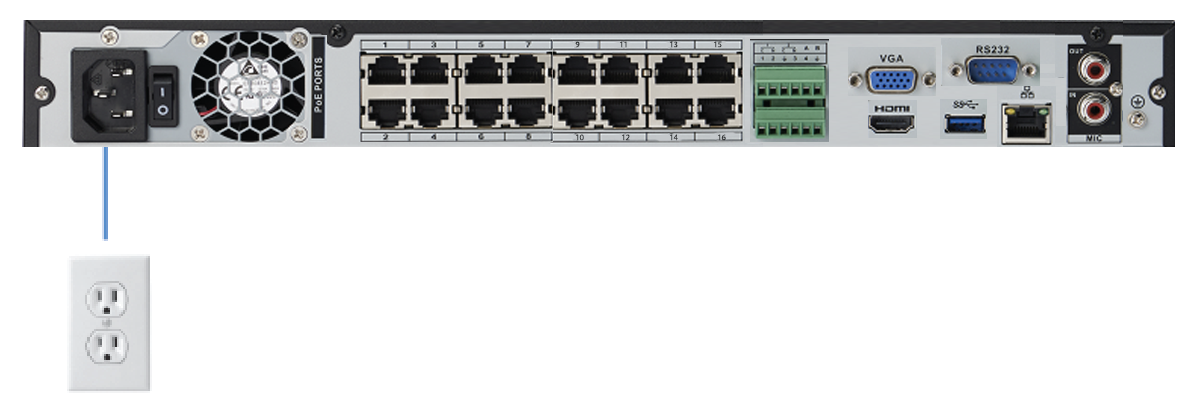
5.5 Step 5: Connect the Power Adapter to Power the NVR
-
Connect the included power adapter to the NVR and connect the other end to a power outlet or surge protector. Then turn the
power switch to l to power on the NVR.
At startup, the system performs a basic system check and runs an initial loading sequence. After a few moments, the system
loads a live display view.
5.6 Step 6: Creating a New, Secure Password
When using your system for the first time, you will be prompted to create a new, secure 6-32 character password. When the NVR turns on, create and confirm your new, secure password. This password will be used to connect to your system
from now on.
5.7 Step 7: Upgrade Firmware to Latest Version (if Available)
If a firmware upgrade is available, you will be asked to install it. It is required to upgrade your system firmware and client
software or mobile apps to the latest version to enable remote connection to the system.
- A notification will appear asking you to upgrade the firmware. Click OK to upgrade.
- Enter the system user name (default: admin) and new, secure password and click OK.
- The firmware update will begin. Wait for the firmware update to complete. The system will restart once the firmware has been upgraded.
If a firmware upgrade is available:
5.8 Step 8: Verify Camera Image
- Power on the cameras, and then verify the camera video quality before mounting the cameras to a permanent location.
- Mount the cameras under a sheltered location. Always verify the outdoor rating of your camera before installing it in a permanent location.
5.9 Step 9: Set the Time
- Set the system time and date for accurate video time stamps. Videos with inaccurate times may not be valid as surveillance evidence.
- For details on setting the system time, see 9 Setting The Time .
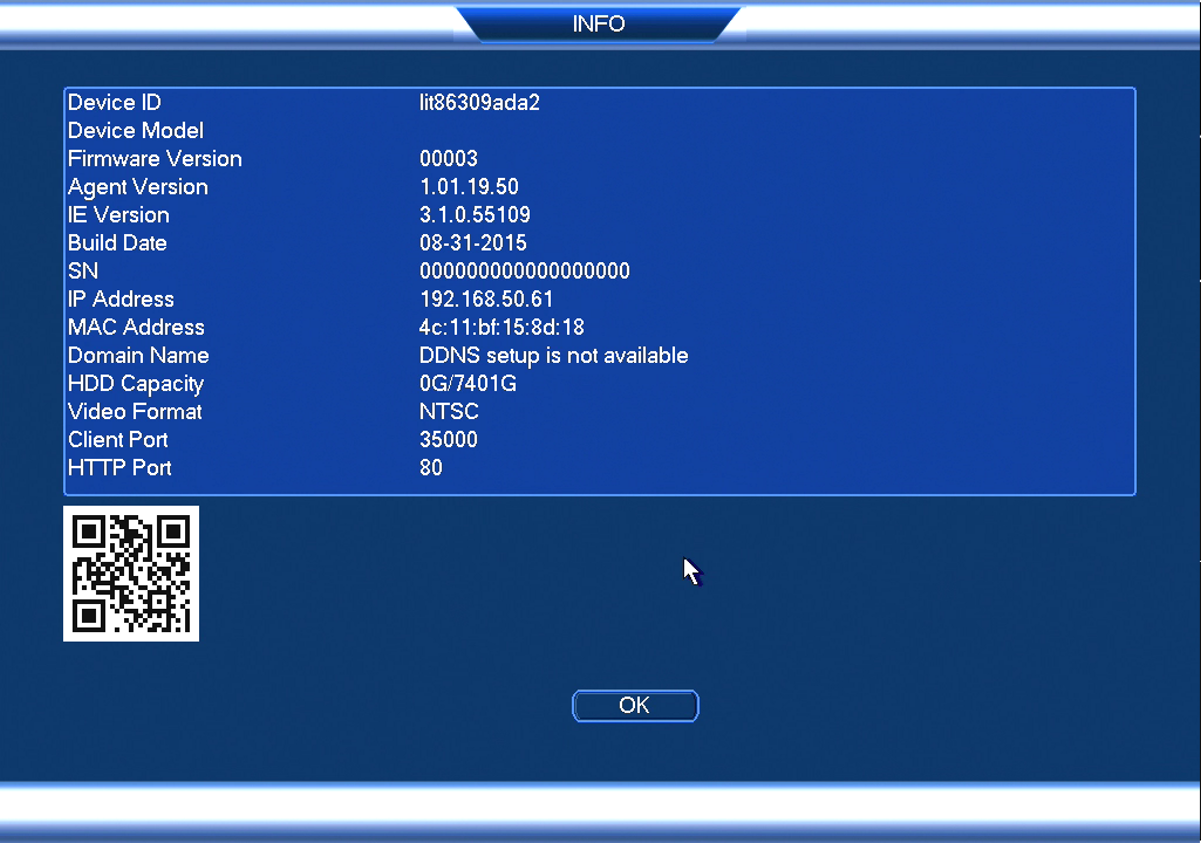
5.10 Quick Access to System Information
INFO Screen:
5.11 Connecting Cameras to the Local Area Network (LAN)
For flexibility, you may also connect IP cameras to the same Local Area Network (LAN) as the NVR. This is accomplished by
connecting the cameras to the same router as the NVR.
For these installations, an external PoE switch (sold separately) or power adapter (sold separately) must be used to provide
power to each IP camera. You also must add the cameras on the NVR before they will show a picture on the monitor or be recorded
by the NVR.
Follow the steps below to connect the cameras to the NVR over the LAN.
Step 1 of 2 — Option A: Connecting cameras to your local network using a PoE switch:
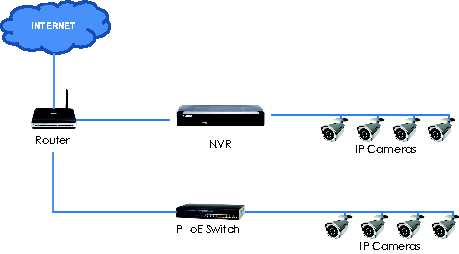
- Connect an Ethernet cable from the LAN port on an external PoE switch (sold separately on www.lorex.com ) to your router using a CAT5e or higher Ethernet cable. Connect the power cable to the PoE switch and to a power outlet or surge protector.
- Connect the IP cameras to the PoE switch using the Ethernet extension cables. The PoE switch will provide power and video transmission the same way as your NVR.
Step 1 of 2 — Option B: Connecting cameras to your local network using power adapters:
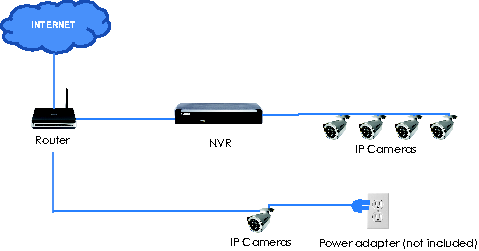
- Connect each camera to a compatible power adapter (visit www.lorex.com for compatible power adapters for your cameras).
- Connect the camera to your router using a CAT5e or higher Ethernet cable.
Step 2 of 2: Add the cameras to your NVR:
- Right-click and select Device Search.
- Log in using the admin account (default User Name: admin ) and your new, secure password.
- Click Device Search. The system searches the network for compatible cameras.
- Check the camera(s) you would like to add.
-
Click Add. The Status indicator turns green to show the camera is successfully connected.
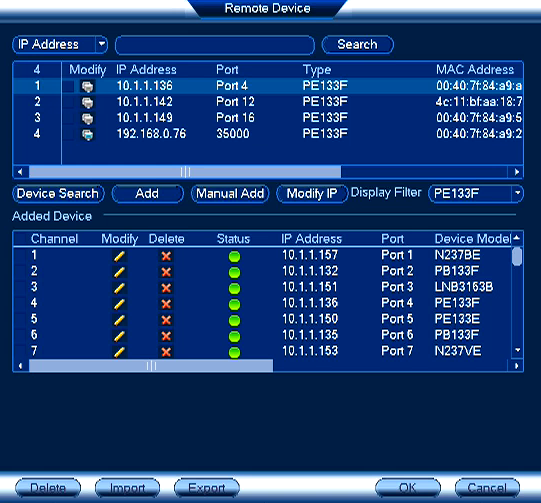
- Click OK to save changes.