4 Basic Setup
4.1 STEP 1: Initial Setup
Before you begin, you will need to prepare the wire-free cameras and battery packs. The camera battery comes partially charged
(due to safety regulations). Please, fully charge the battery before use and setup. You can charge the battery pack inside
or outside of the camera.
-
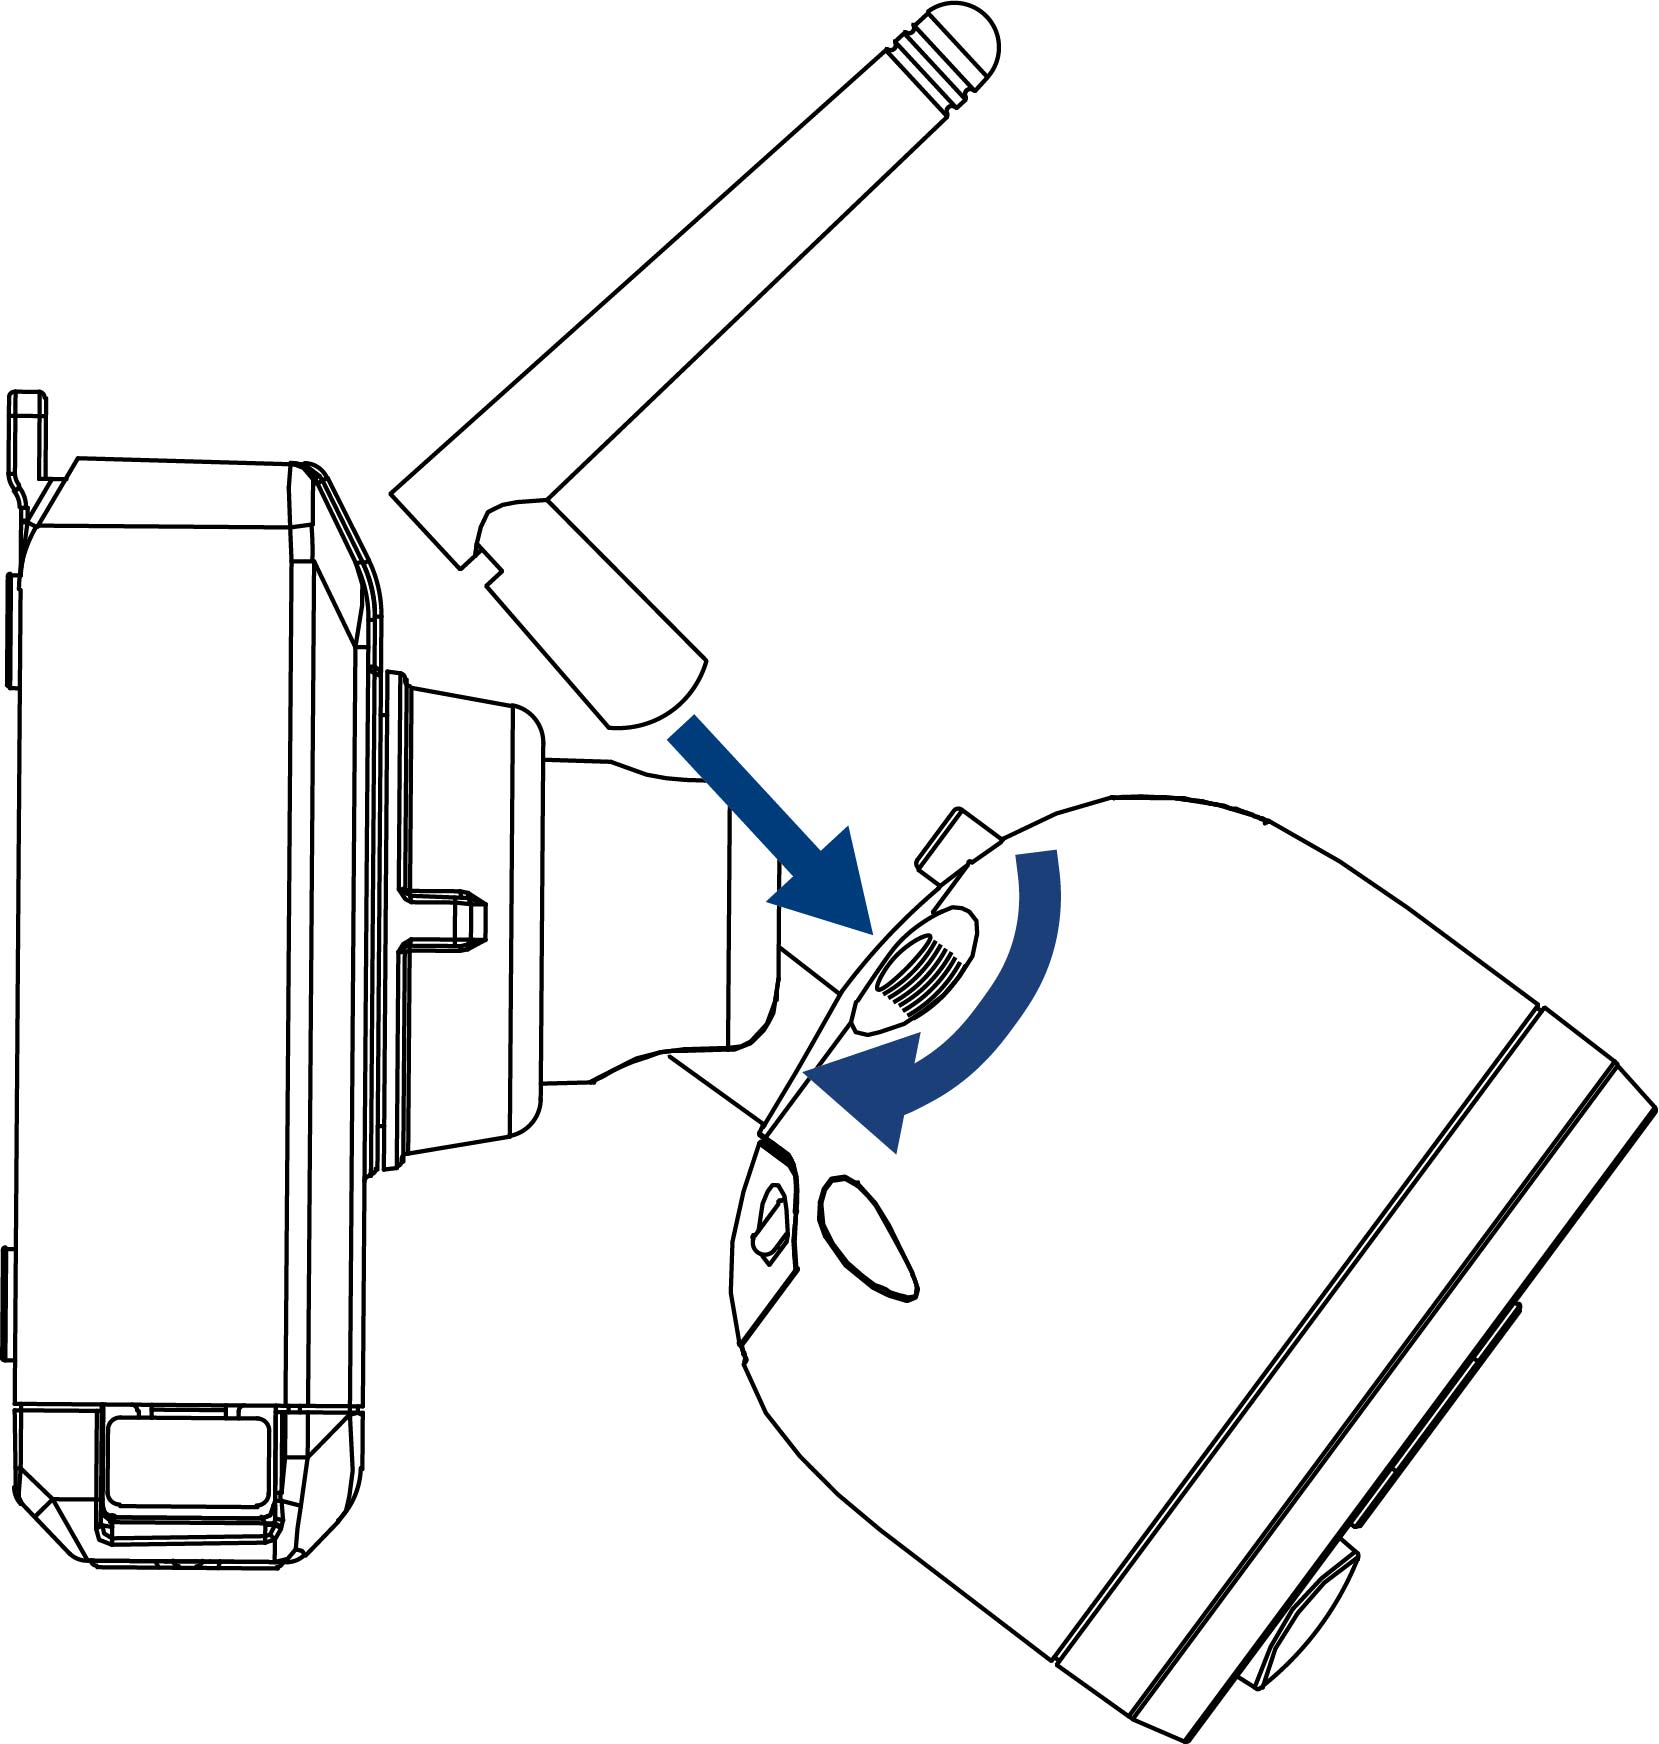
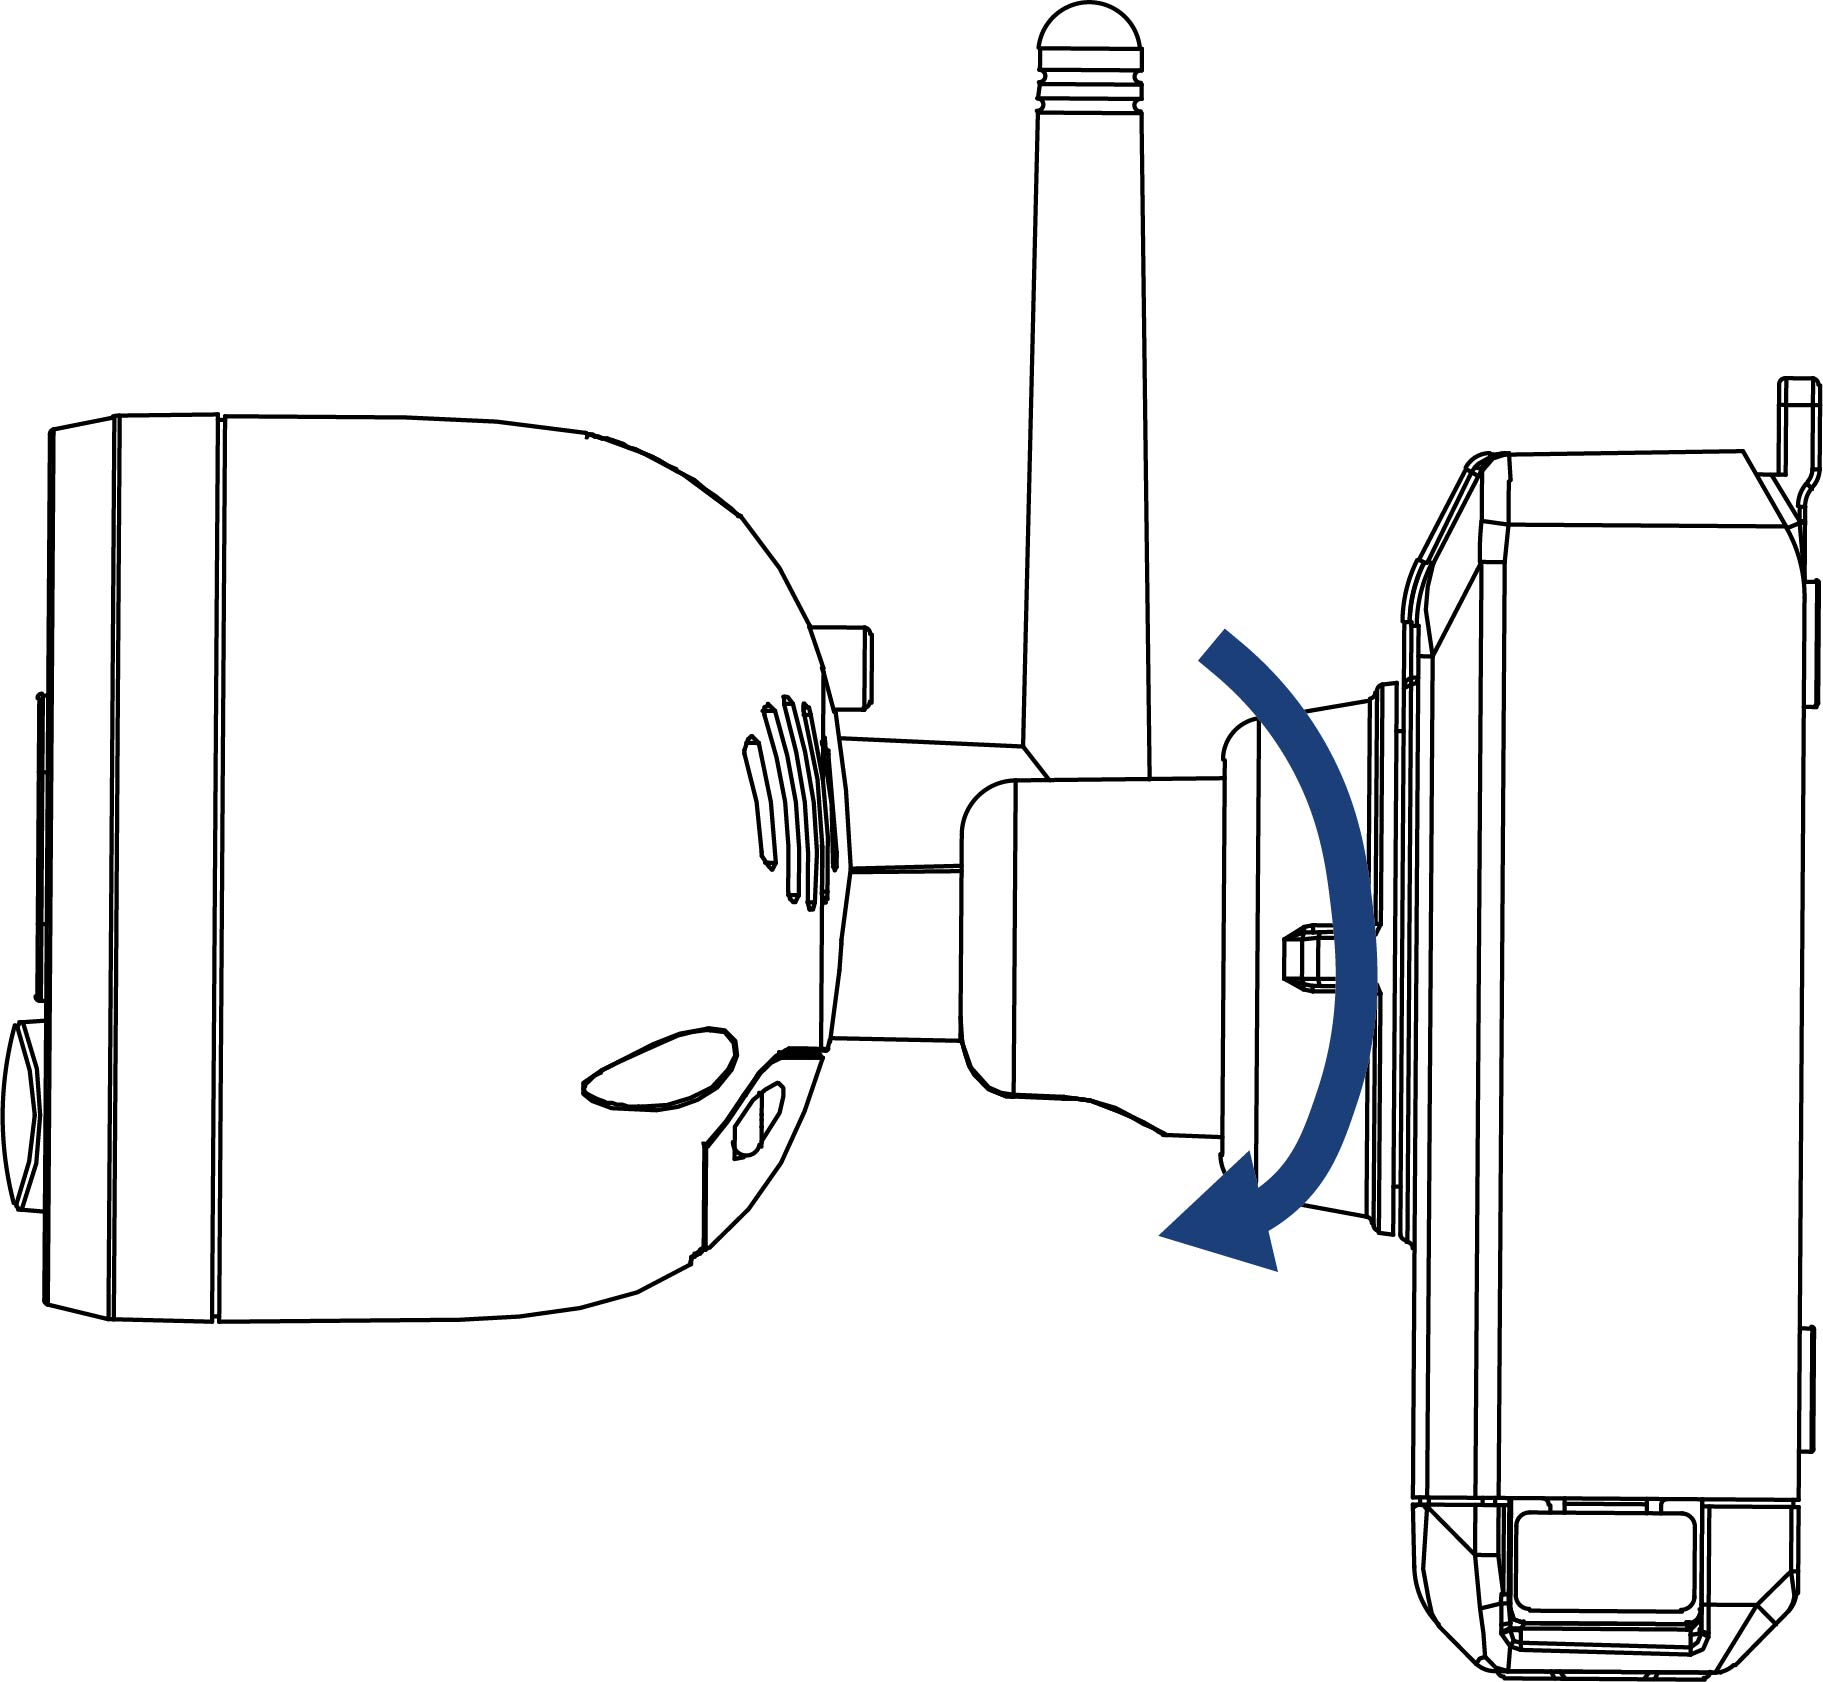
Turn the adjustment ring counter-clockwise to loosen and angle the camera.
U424AA Series

-
Screw in the antenna.
U424AA Series
-
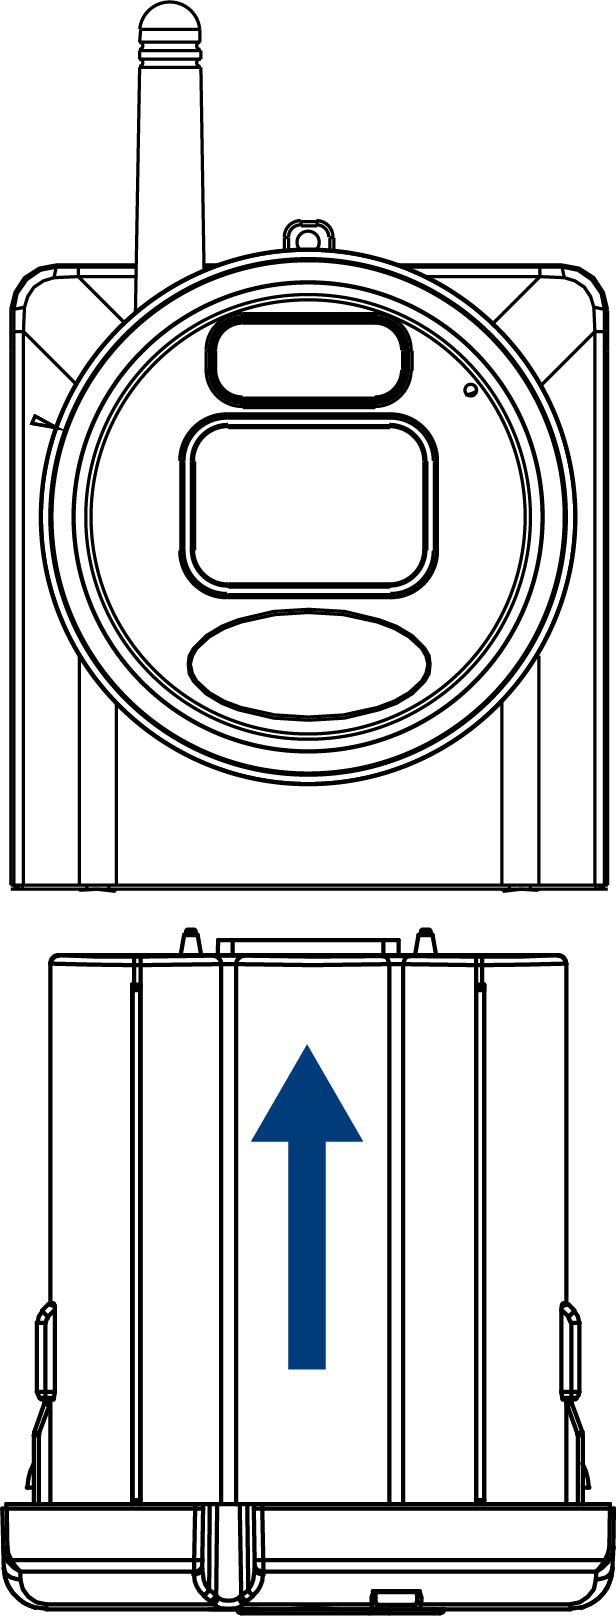
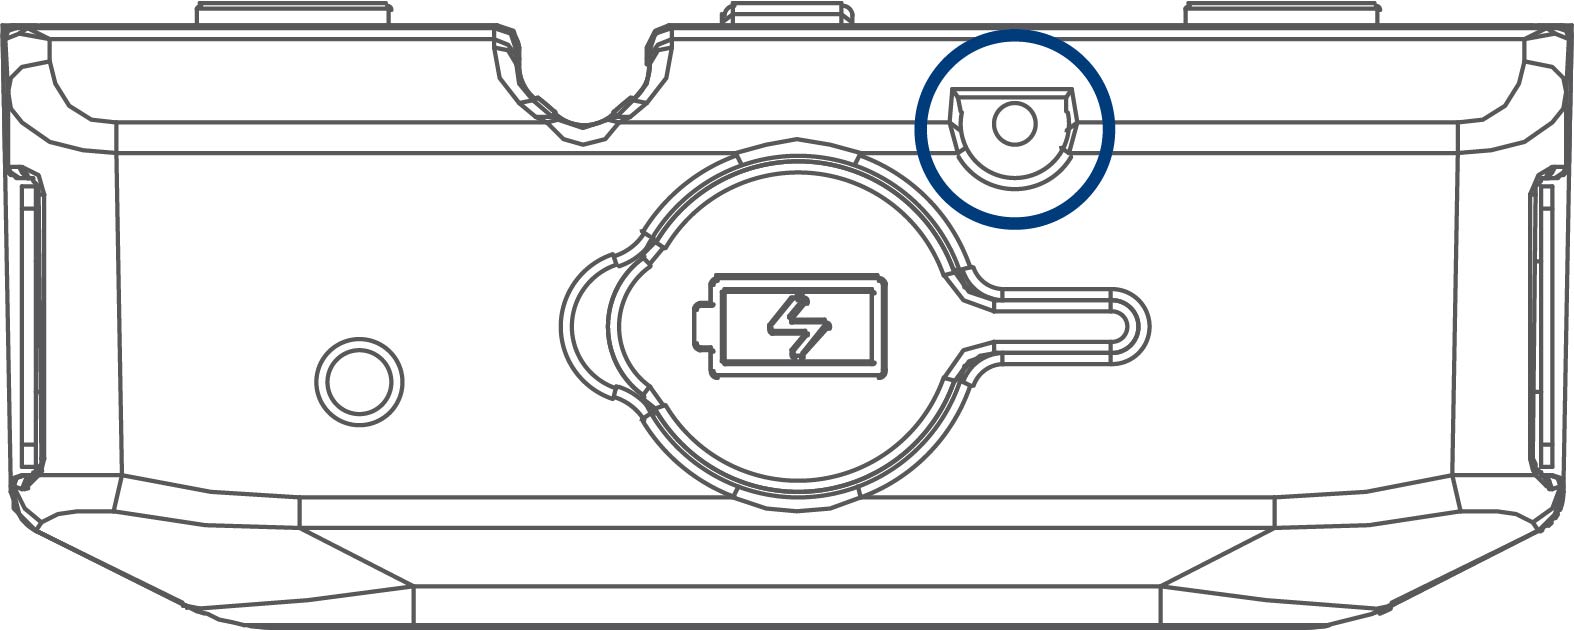
Insert the battery pack into the bottom of the camera.
U424AA Series
To prepare the cameras:
- Remove the protective film on the battery contacts and camera lens.
-
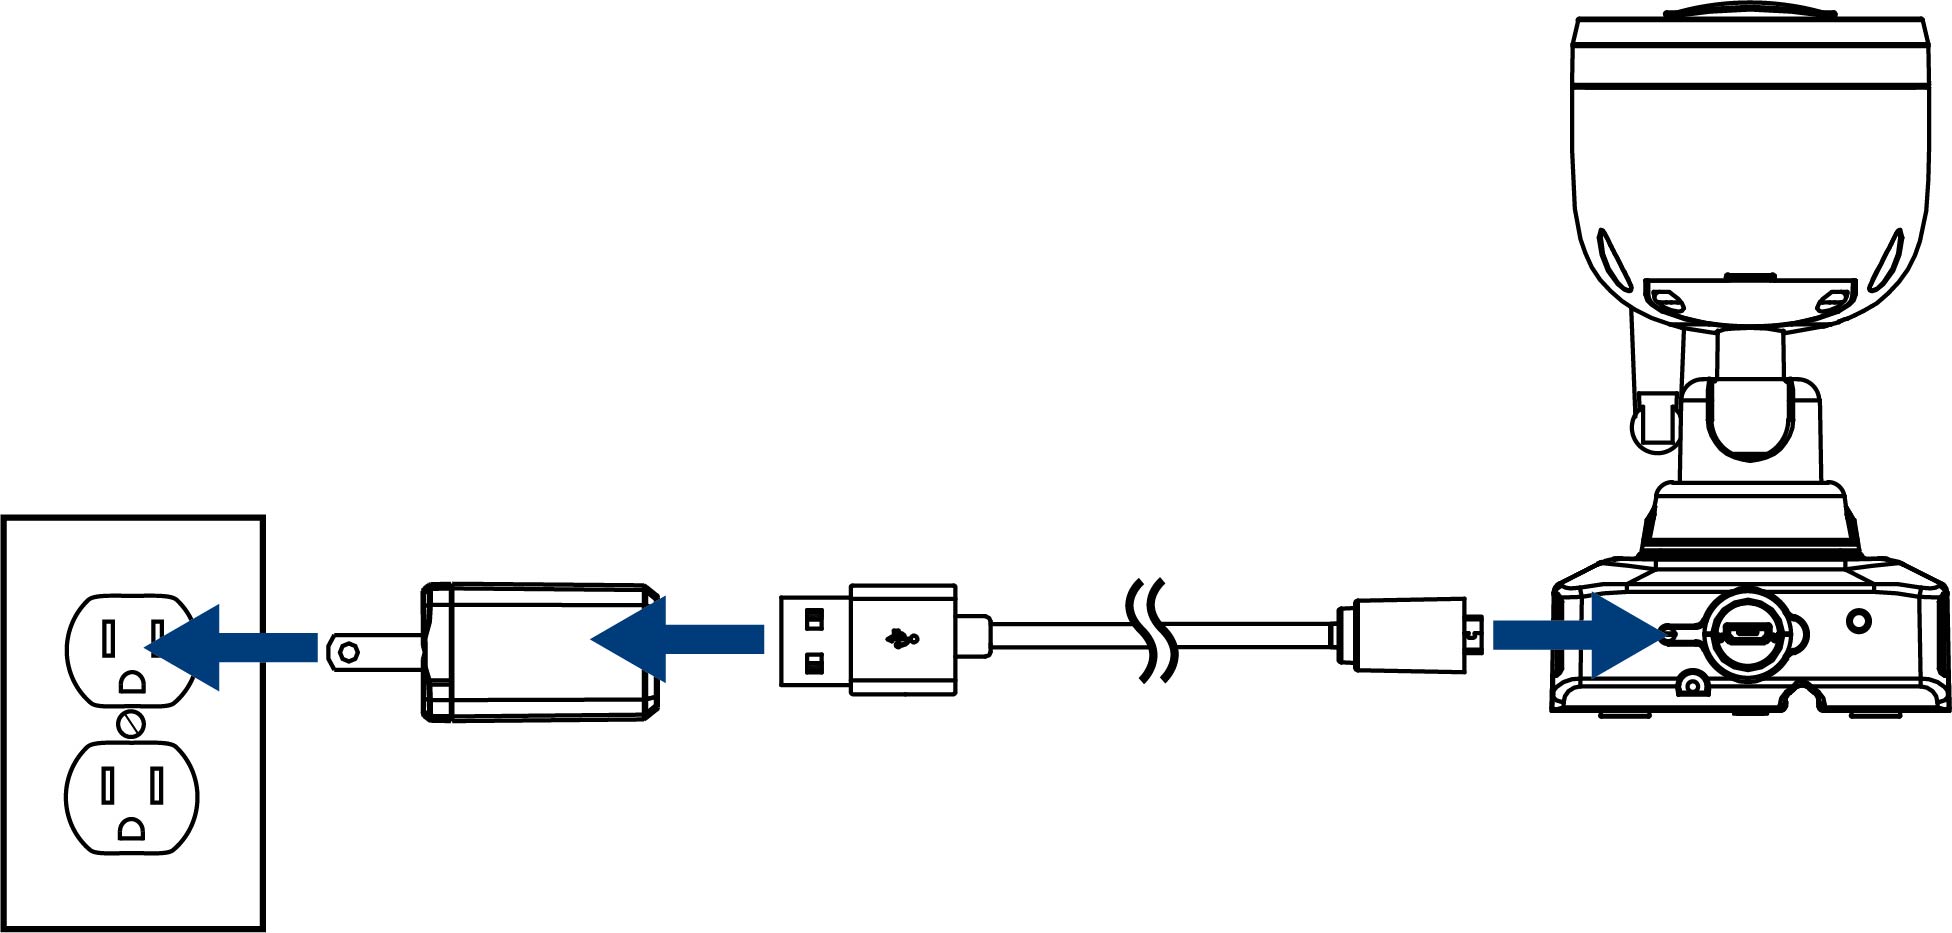
Using the provided battery charging adapter and cable, connect the camera to a nearby outlet.
U424AA Series
-
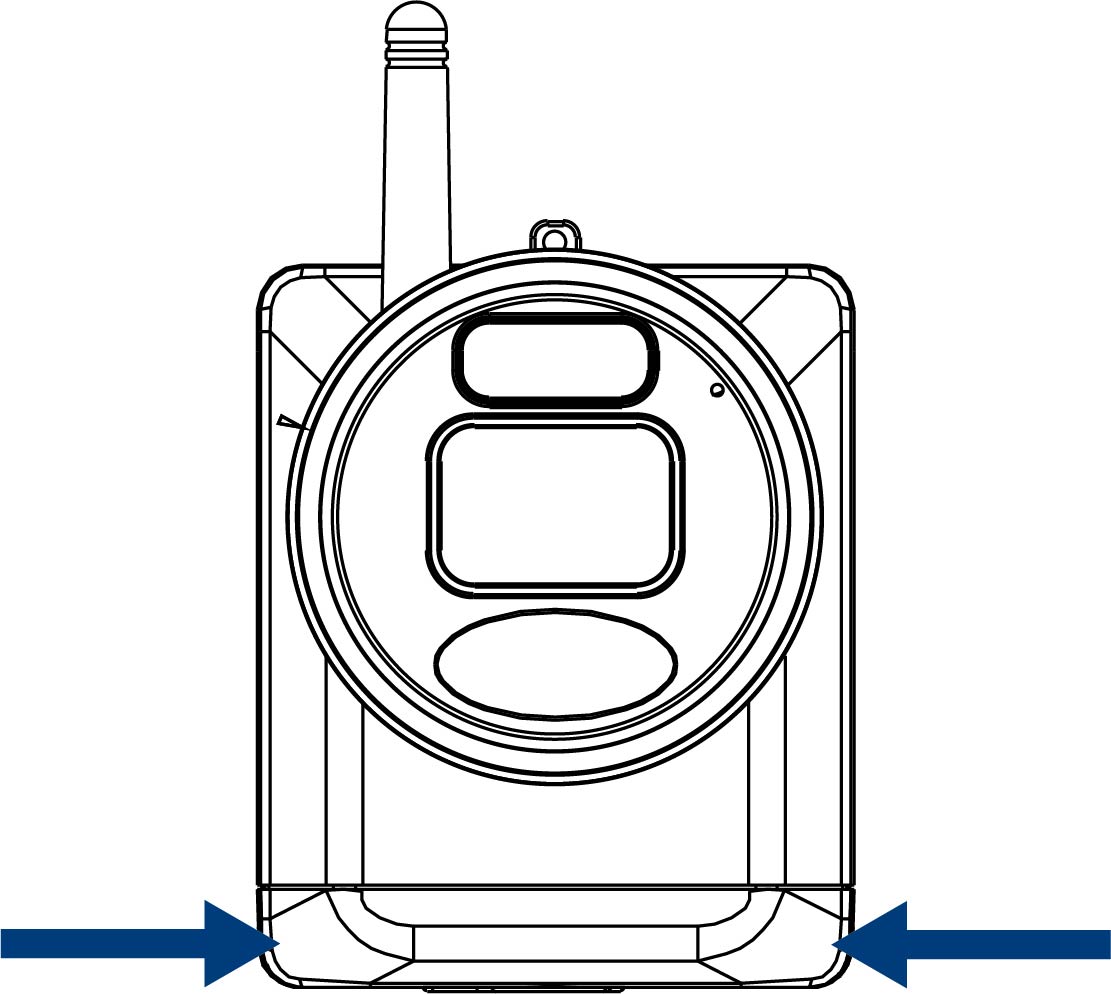
(OPTIONAL) Push in on the battery release tabs to remove the battery pack from the camera and then connect the battery to a nearby outlet.
U424AA Series
To charge the camera battery pack:
4.2 STEP 2: Setting Up the Recorder
To set up the recorder:


4.3 STEP 3: App Setup
Connect to your system using the free Lorex Cirrus app for smartphones and tablets (iOS and Android).
To connect to the Lorex Cirrus app:
-
Download the Lorex Cirrus app by scanning the QR code.


- Open the Lorex Cirrus app.
-
Tap
 to open the menu, then tap Devices.
- Tap the + icon, then follow the in-app instructions.
-
Enter the following:
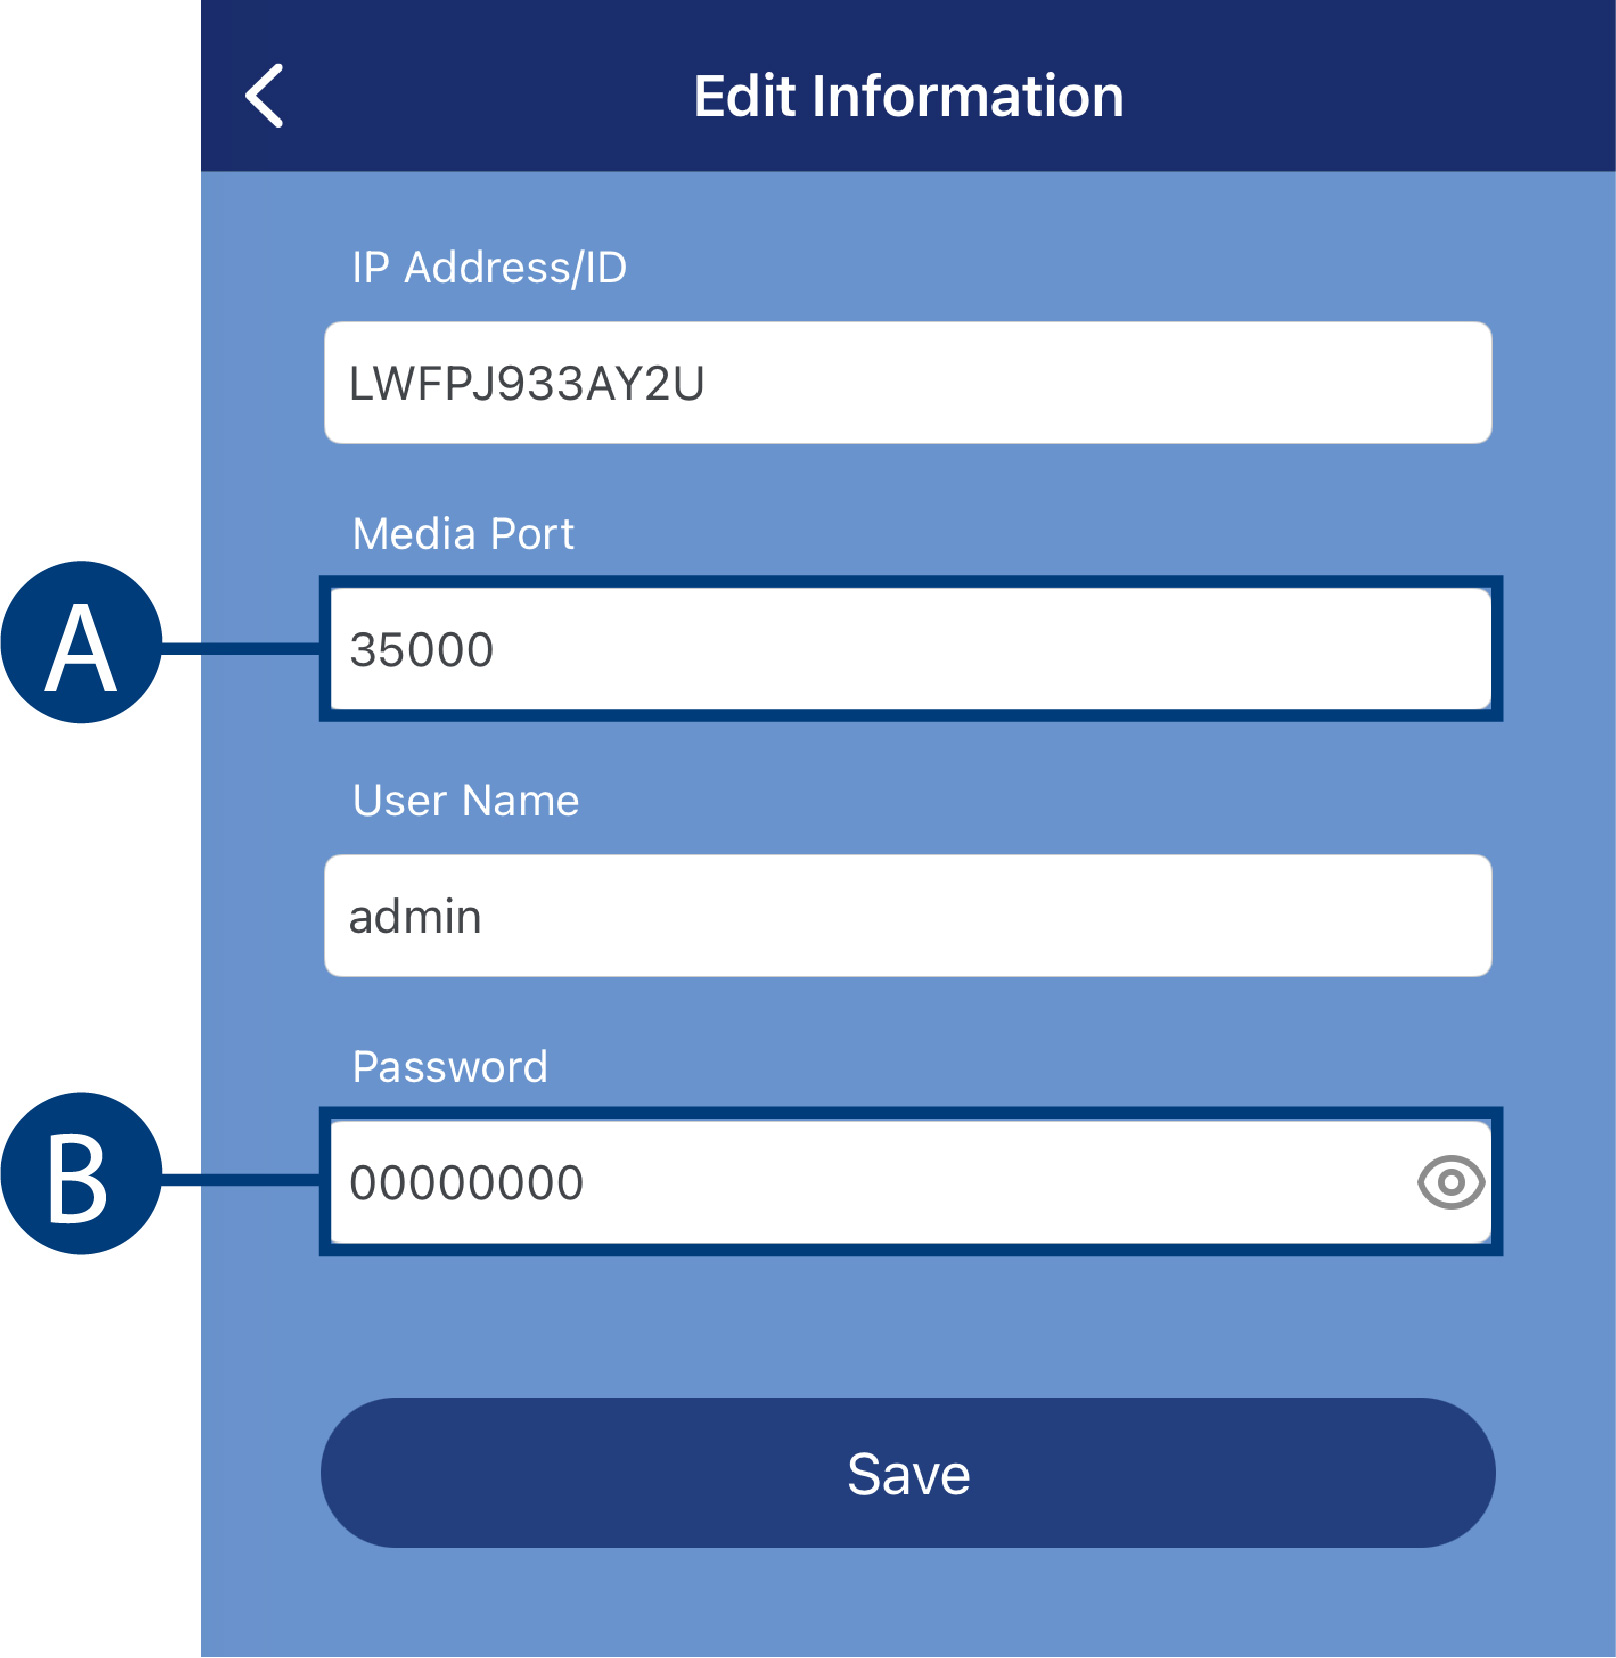
- Tap Save.
- Add the cameras to the recorder through the Lorex Cirrus app or the recorder interface. See 11.1 Pairing Cameras with Lorex Cirrus or 11.2 Pairing Cameras using the Recorder Interface , for full details.
-
Your cameras will appear on the Home screen of the app. Tap the play button (
 ) to stream live video on channels that are in sleep mode.
4.4 STEP 4: Installing the Cameras
4.4.1 Installation Guidelines
Install the camera on a wall per the guidelines below to optimize motion detection and battery life.
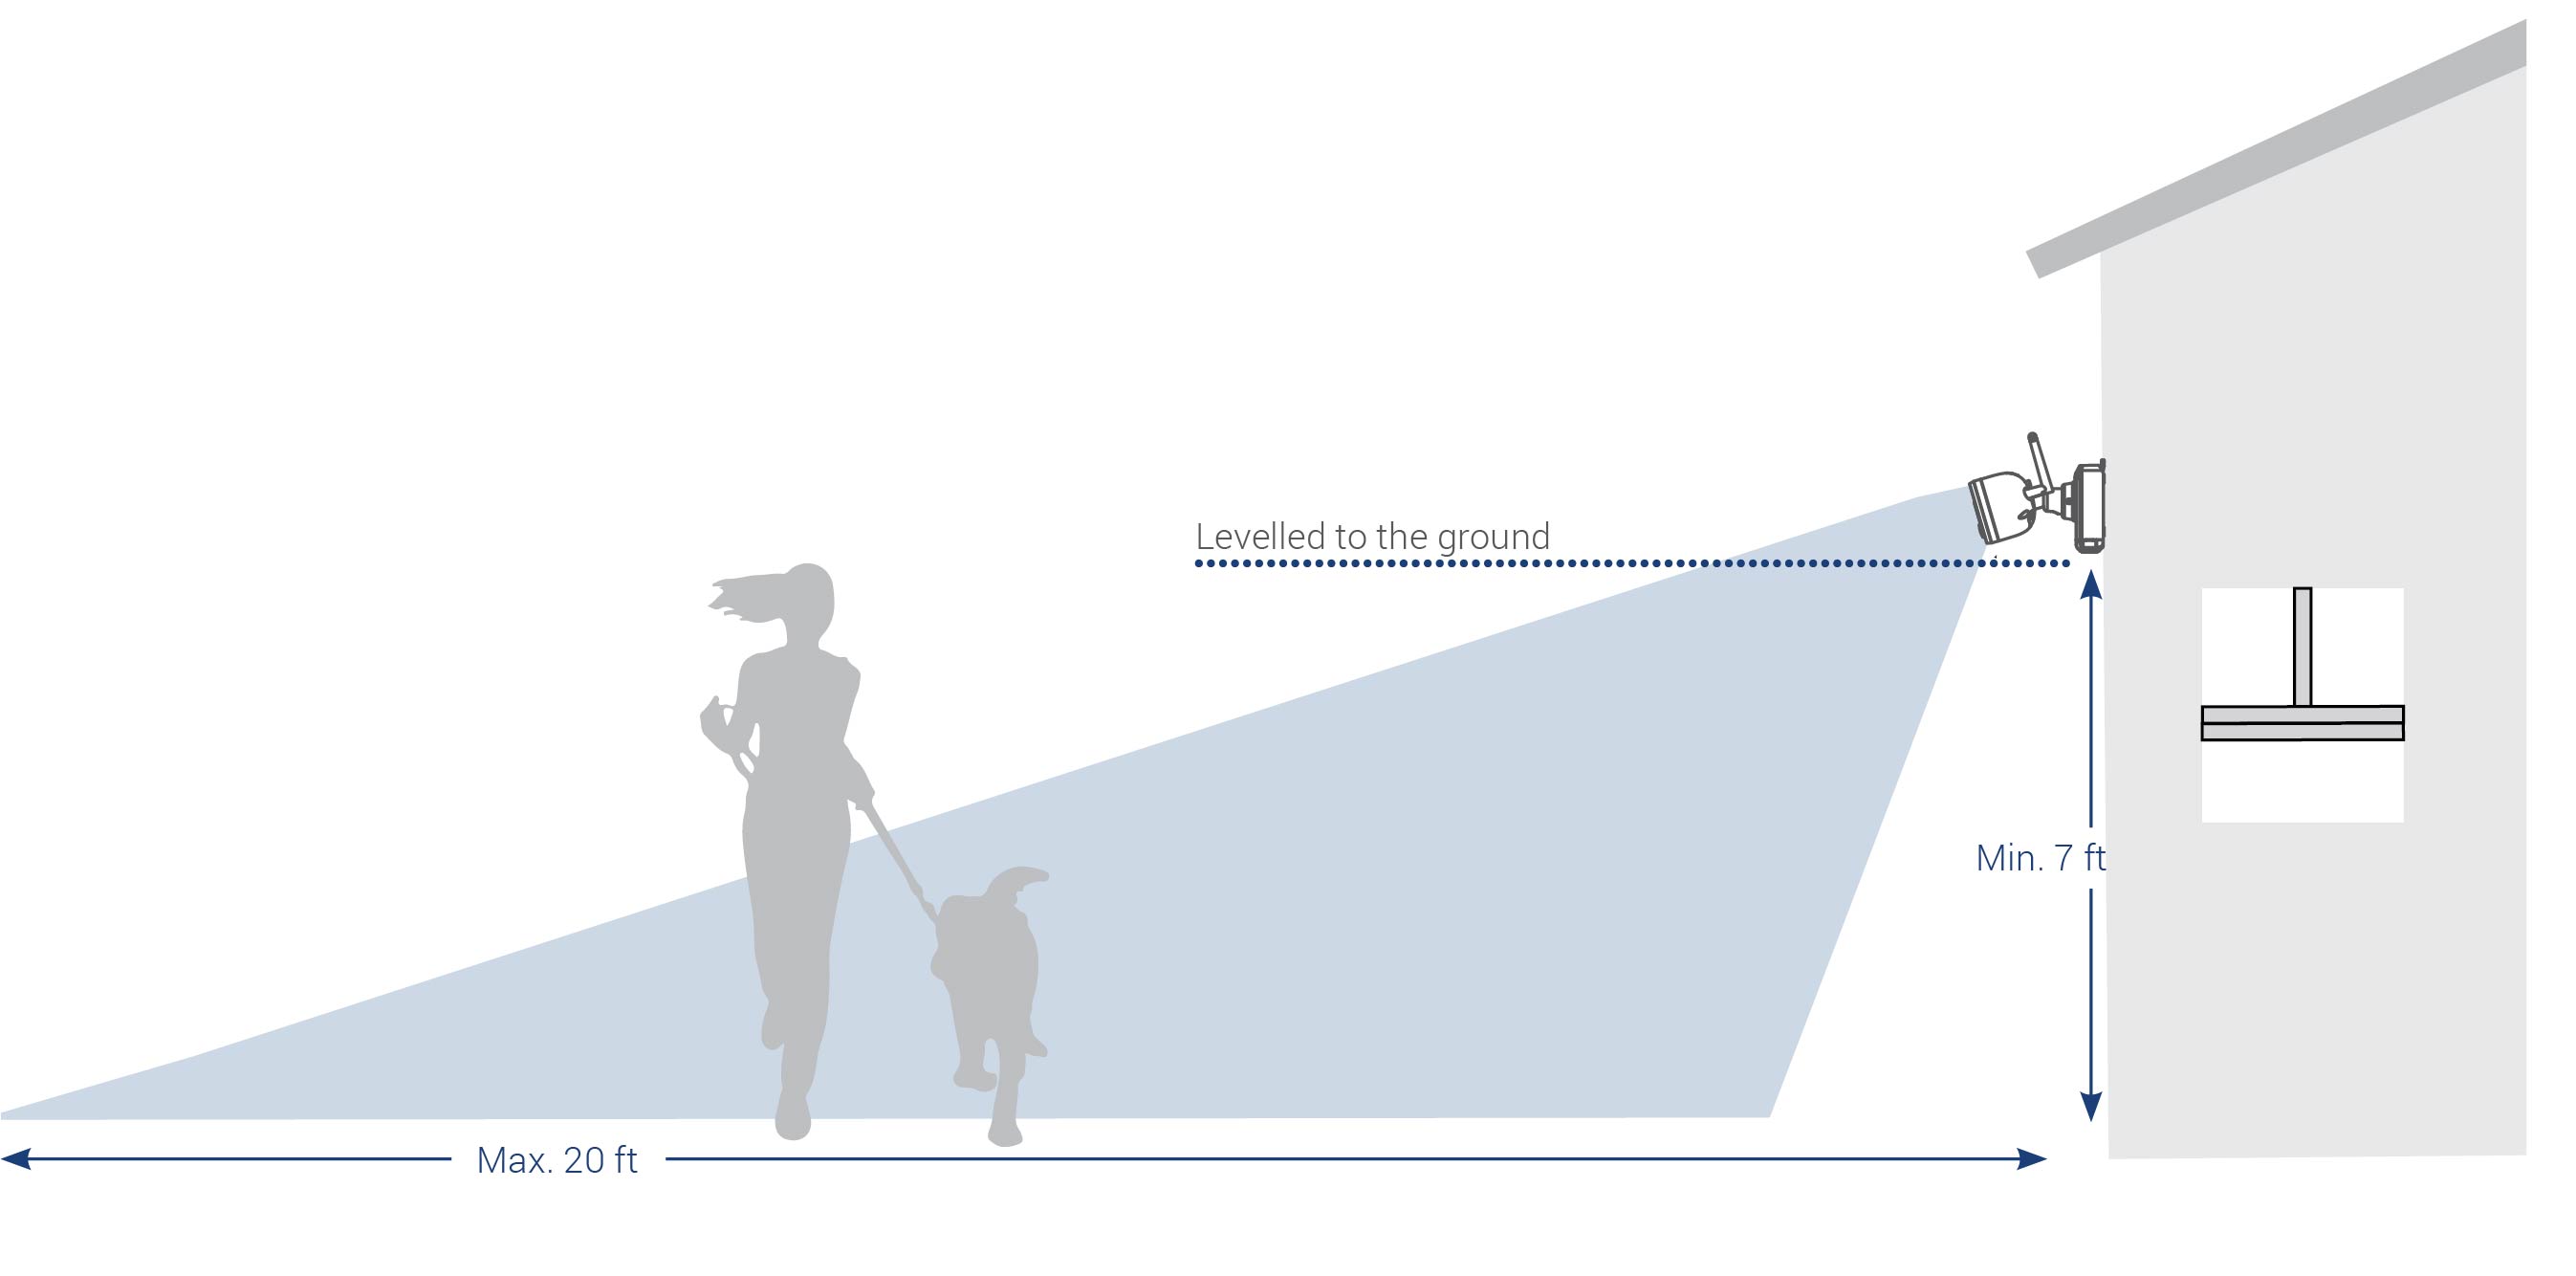
- It is recommended to place your camera at least 7ft (2.1m) above the ground and angle it slightly downward toward the monitoring area, excluding any busy areas (e.g., sidewalks or roadways).
- Position the camera no more than 20ft (6.1m) away from the area you wish to monitor.
- Install the camera within range of the wireless receiver (noted in the camera’s specifications).
- For best performance, position the camera so that objects of interest will move from side-to-side across the camera image, rather than moving towards or away from the camera.
- Ensure the camera image is free of obstructions (i.e., tree branches).
- This camera is weather resistant for outdoor use (IP66 rated). Installation in a sheltered location is recommended.
- It is recommended that you customize motion settings for each camera on your system. See 4.4.3 Optimizing Motion Detection for full details.
- Battery life will vary based on temperature, settings and number of events.
4.4.2 Mounting the Cameras
Follow the instructions below to mount the cameras.
To mount your cameras:
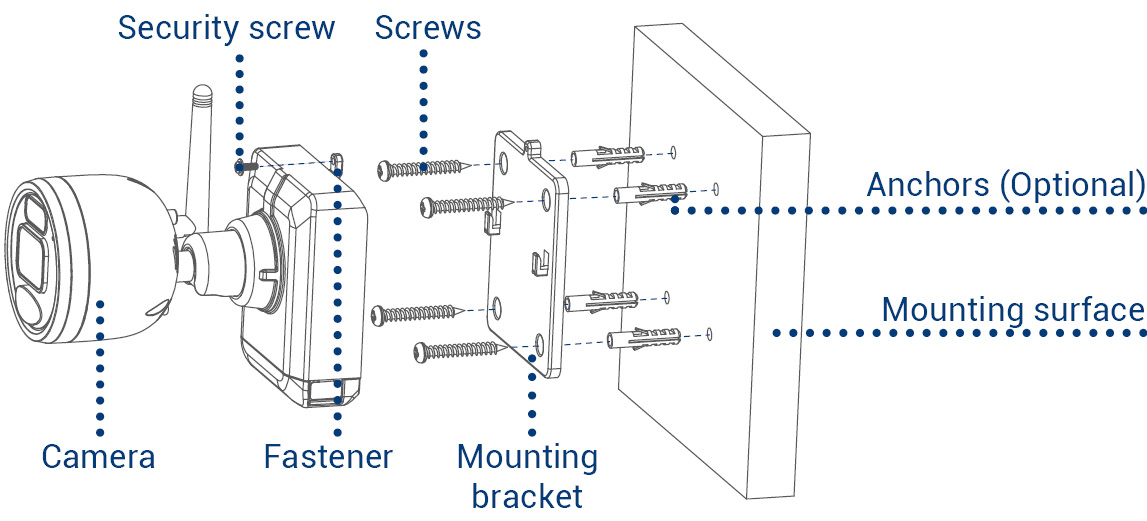
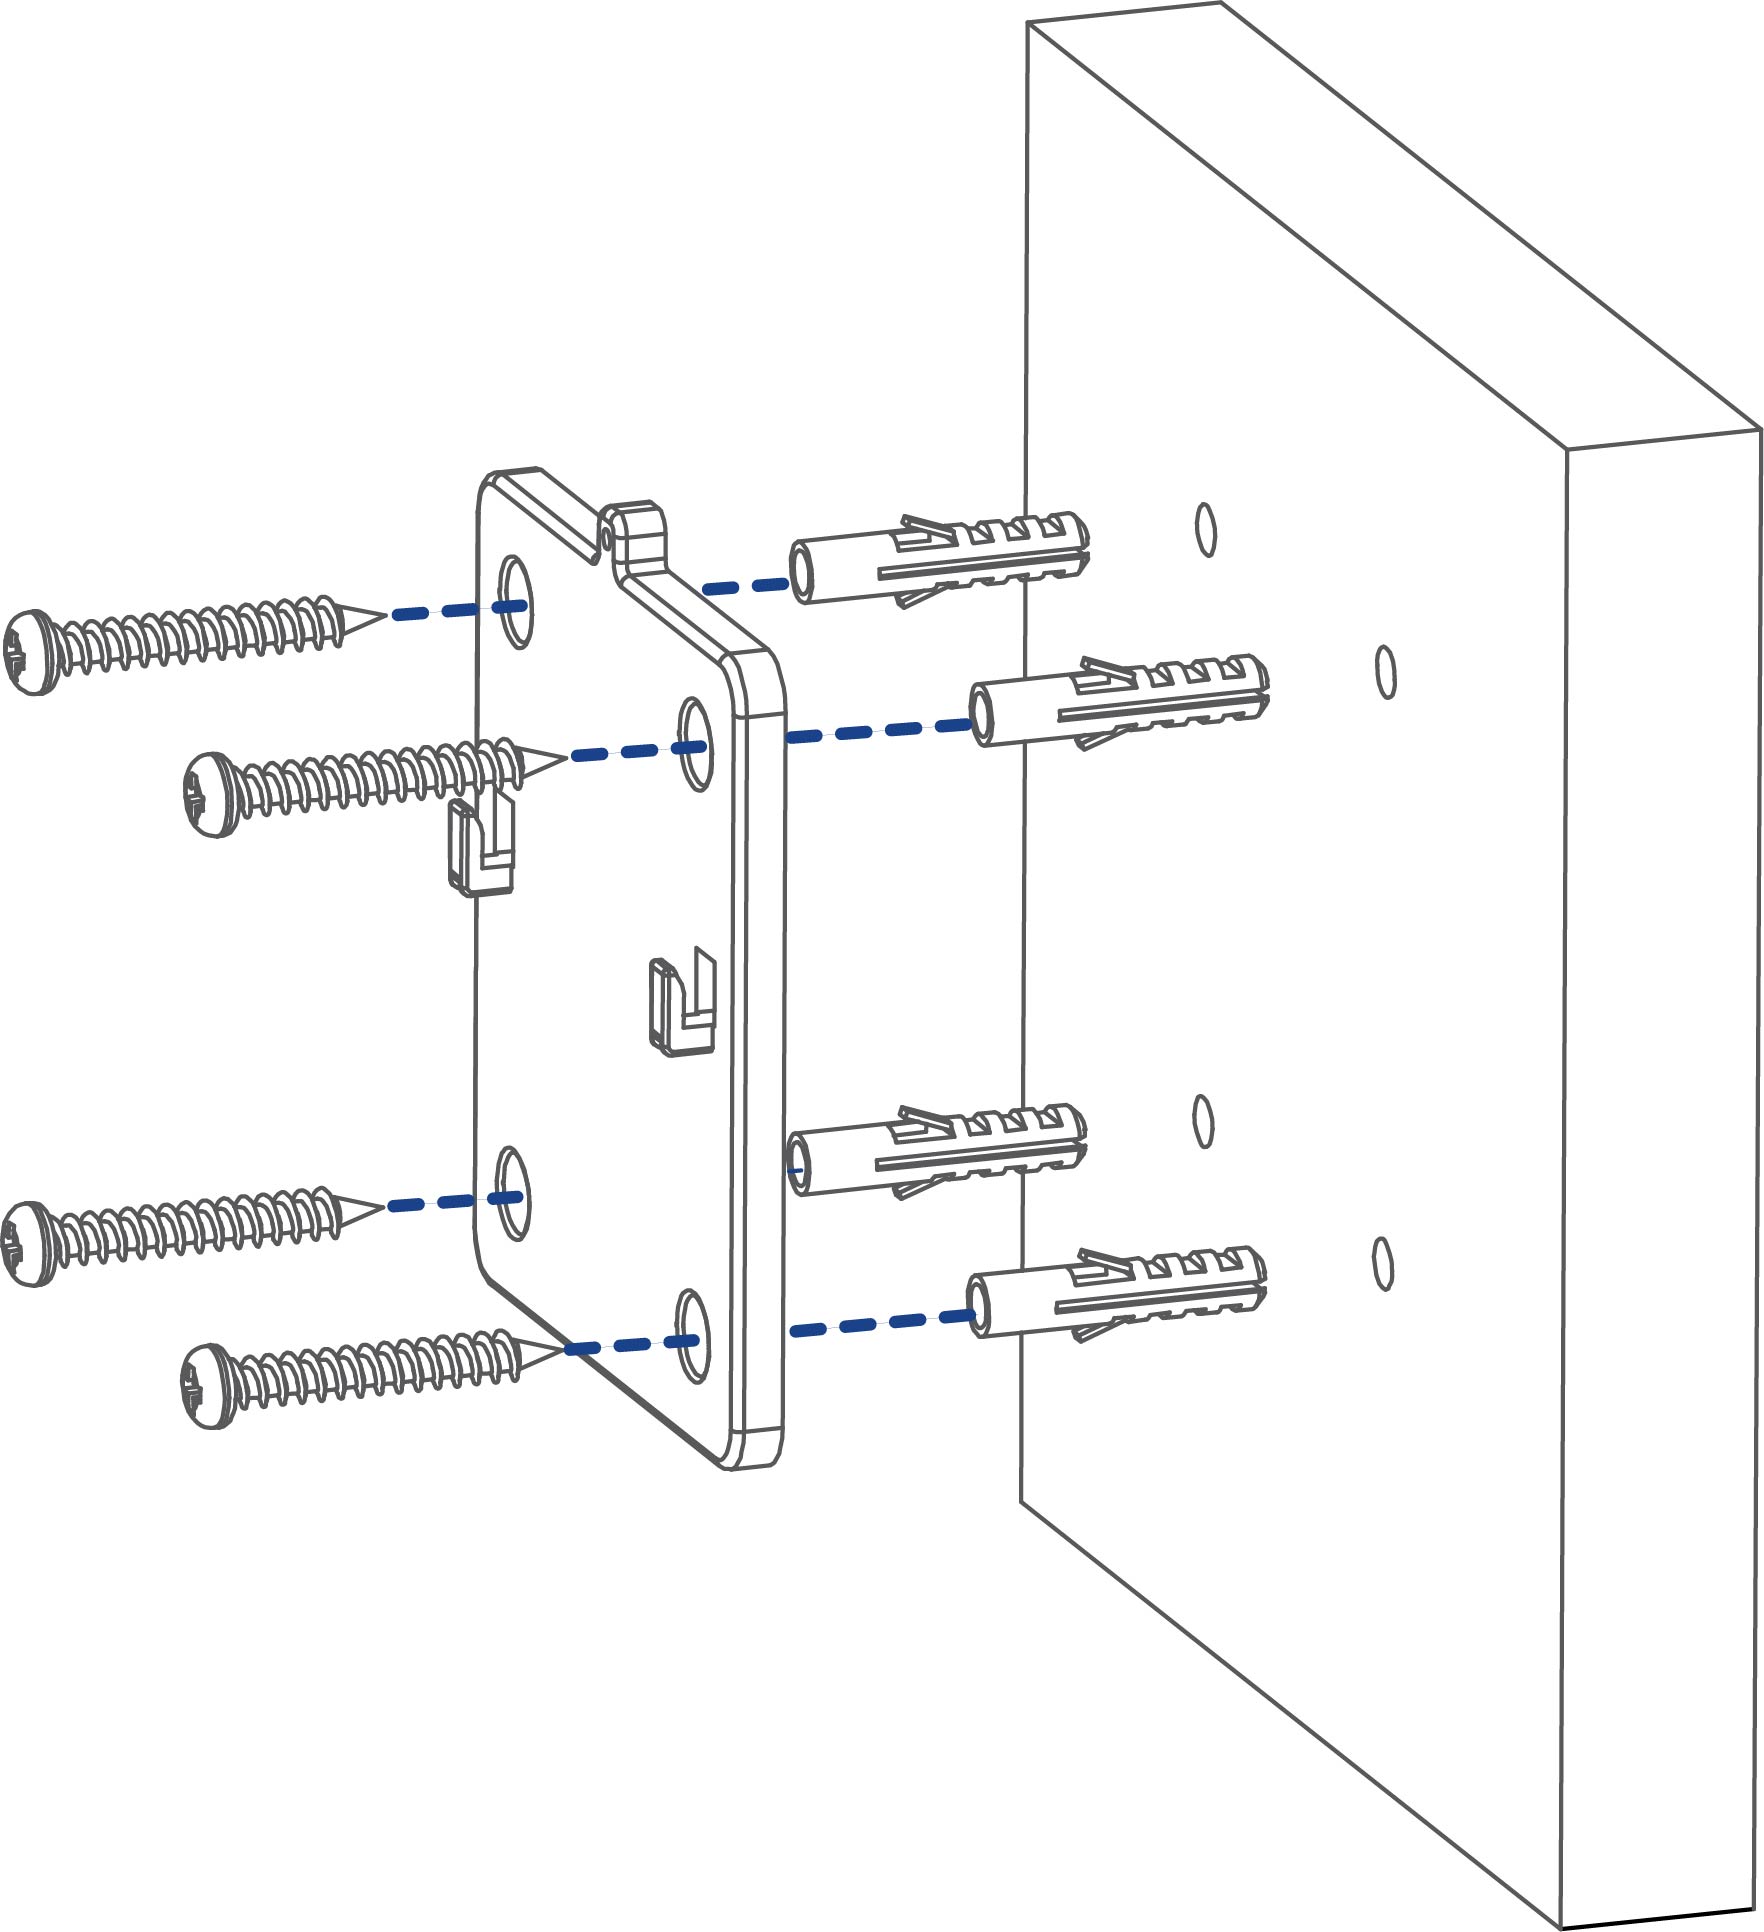
- Set the mounting bracket to the desired mounting position.
- Mark holes through the mounting bracket
- Using the included drill bit, drill holes where marked.
-
Using the included screwdriver, secure the bracket with the provided mounting screws.
-
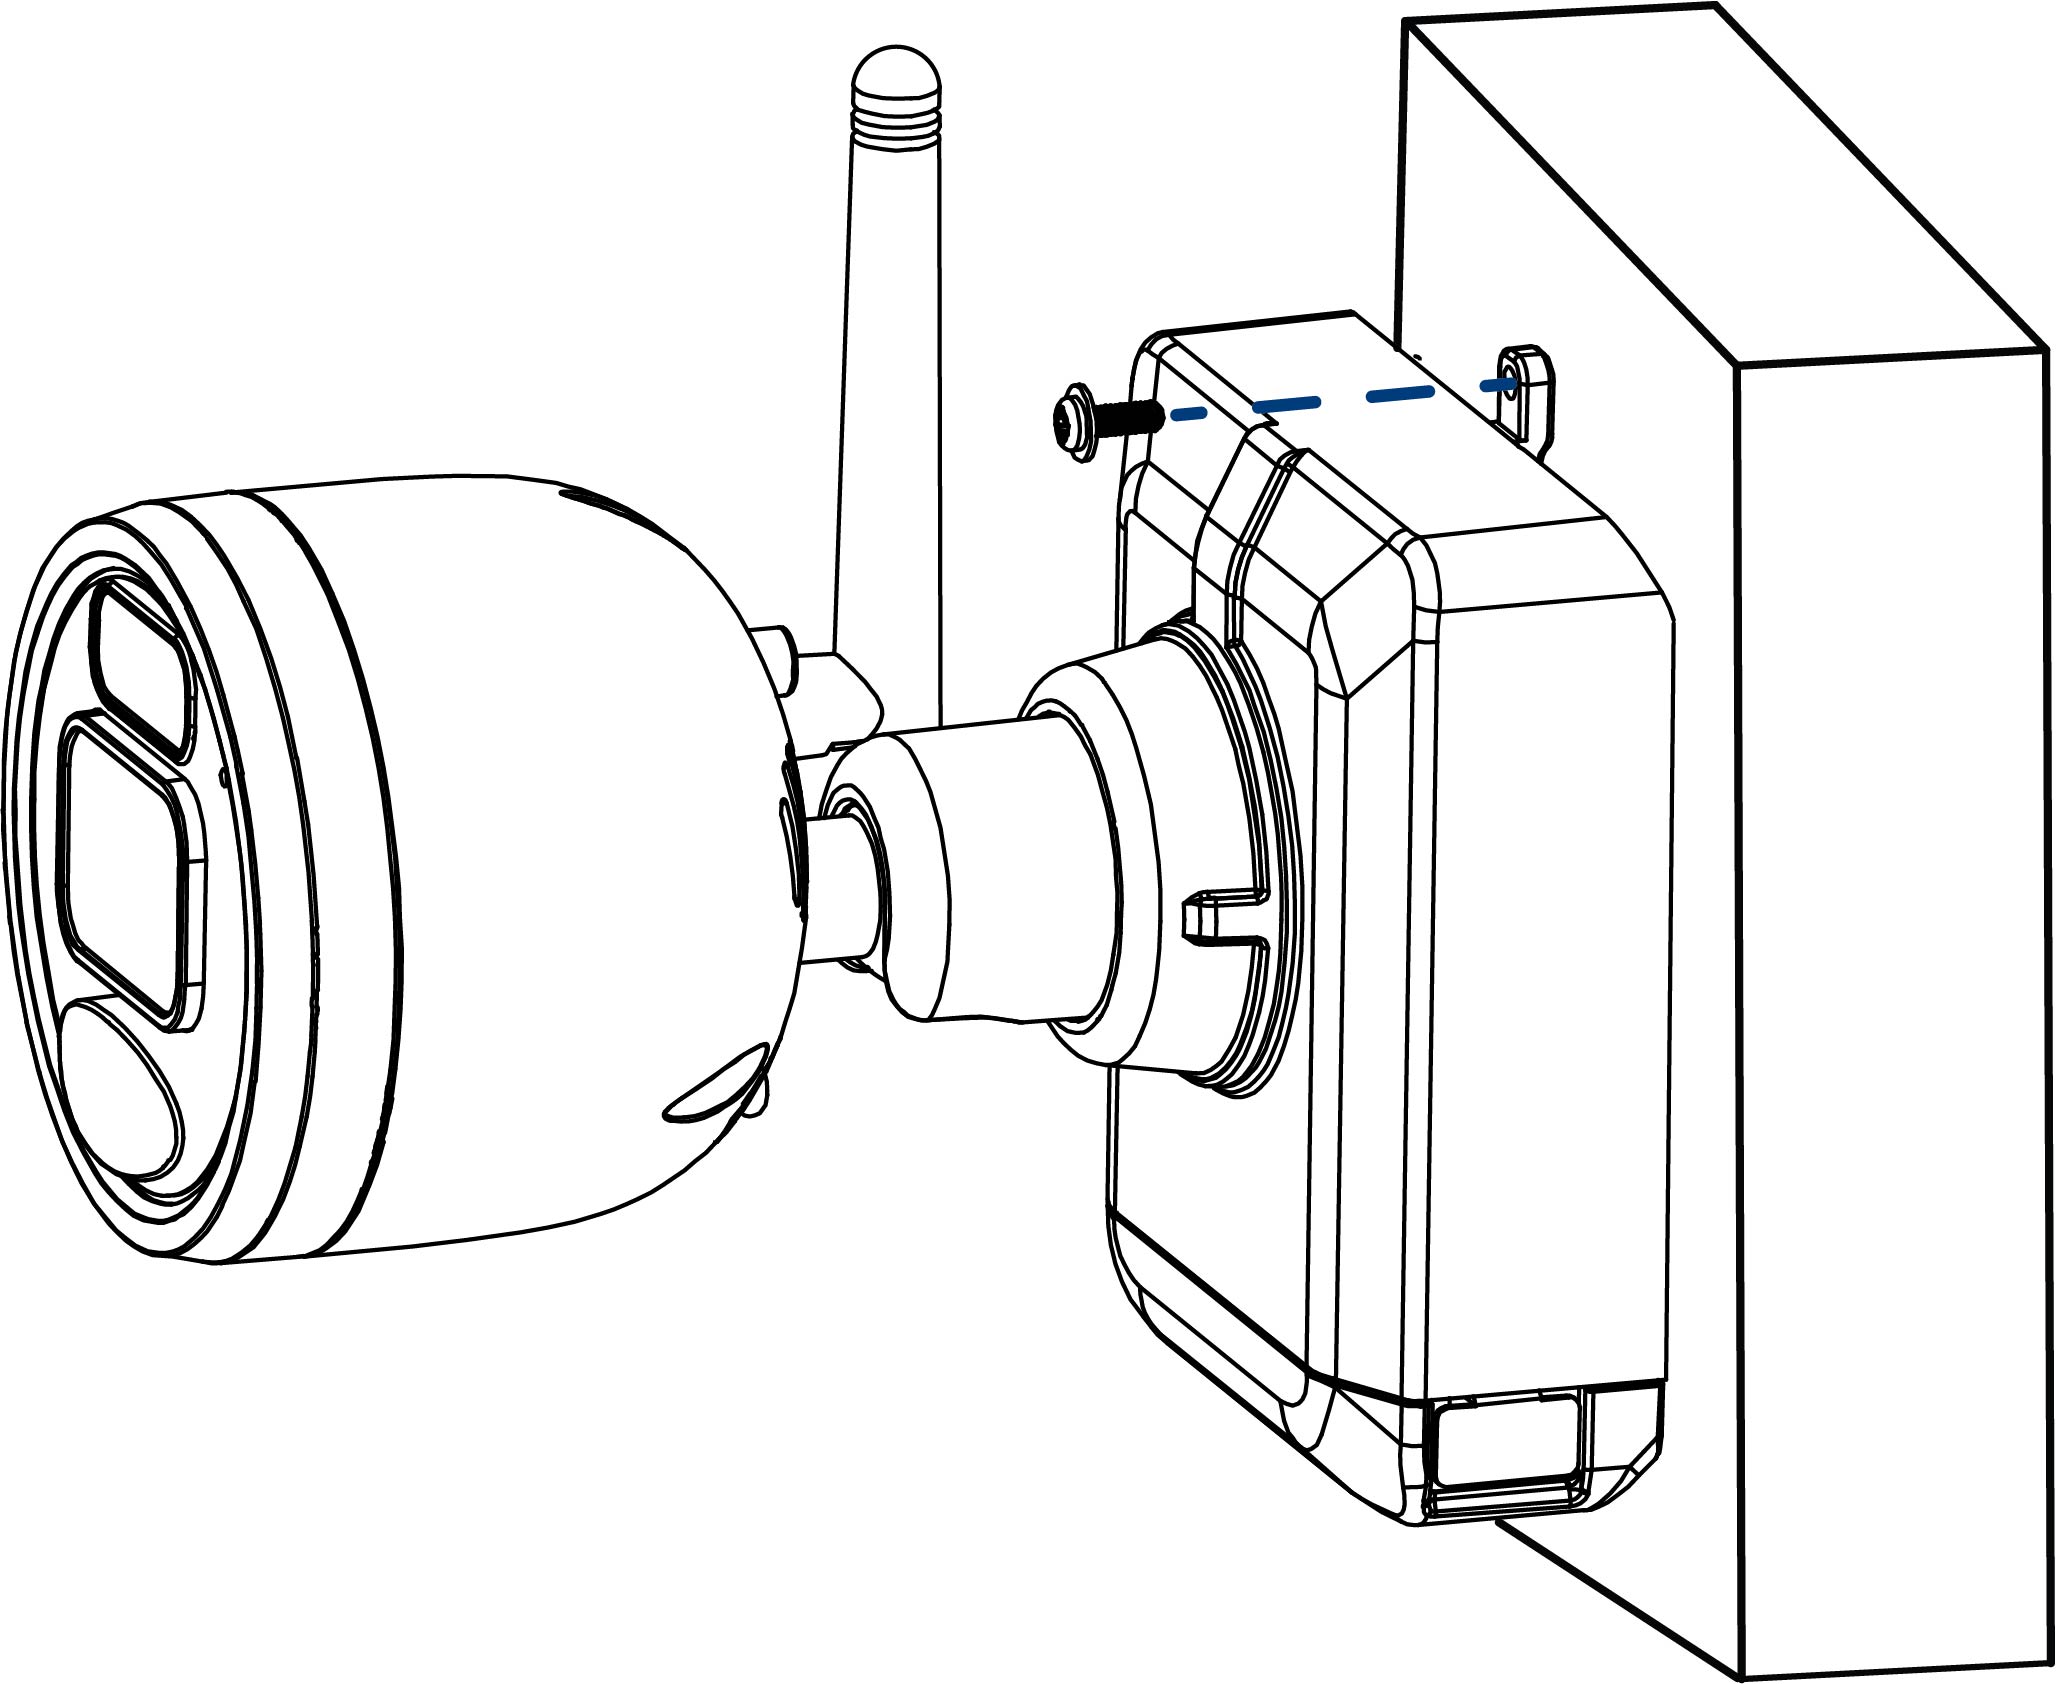
Orient the camera fastener upwards, then align the camera’s mounting plate slots to the tabs in the mounting bracket. Push
in and slide down to secure in place.
U424AA Series
-
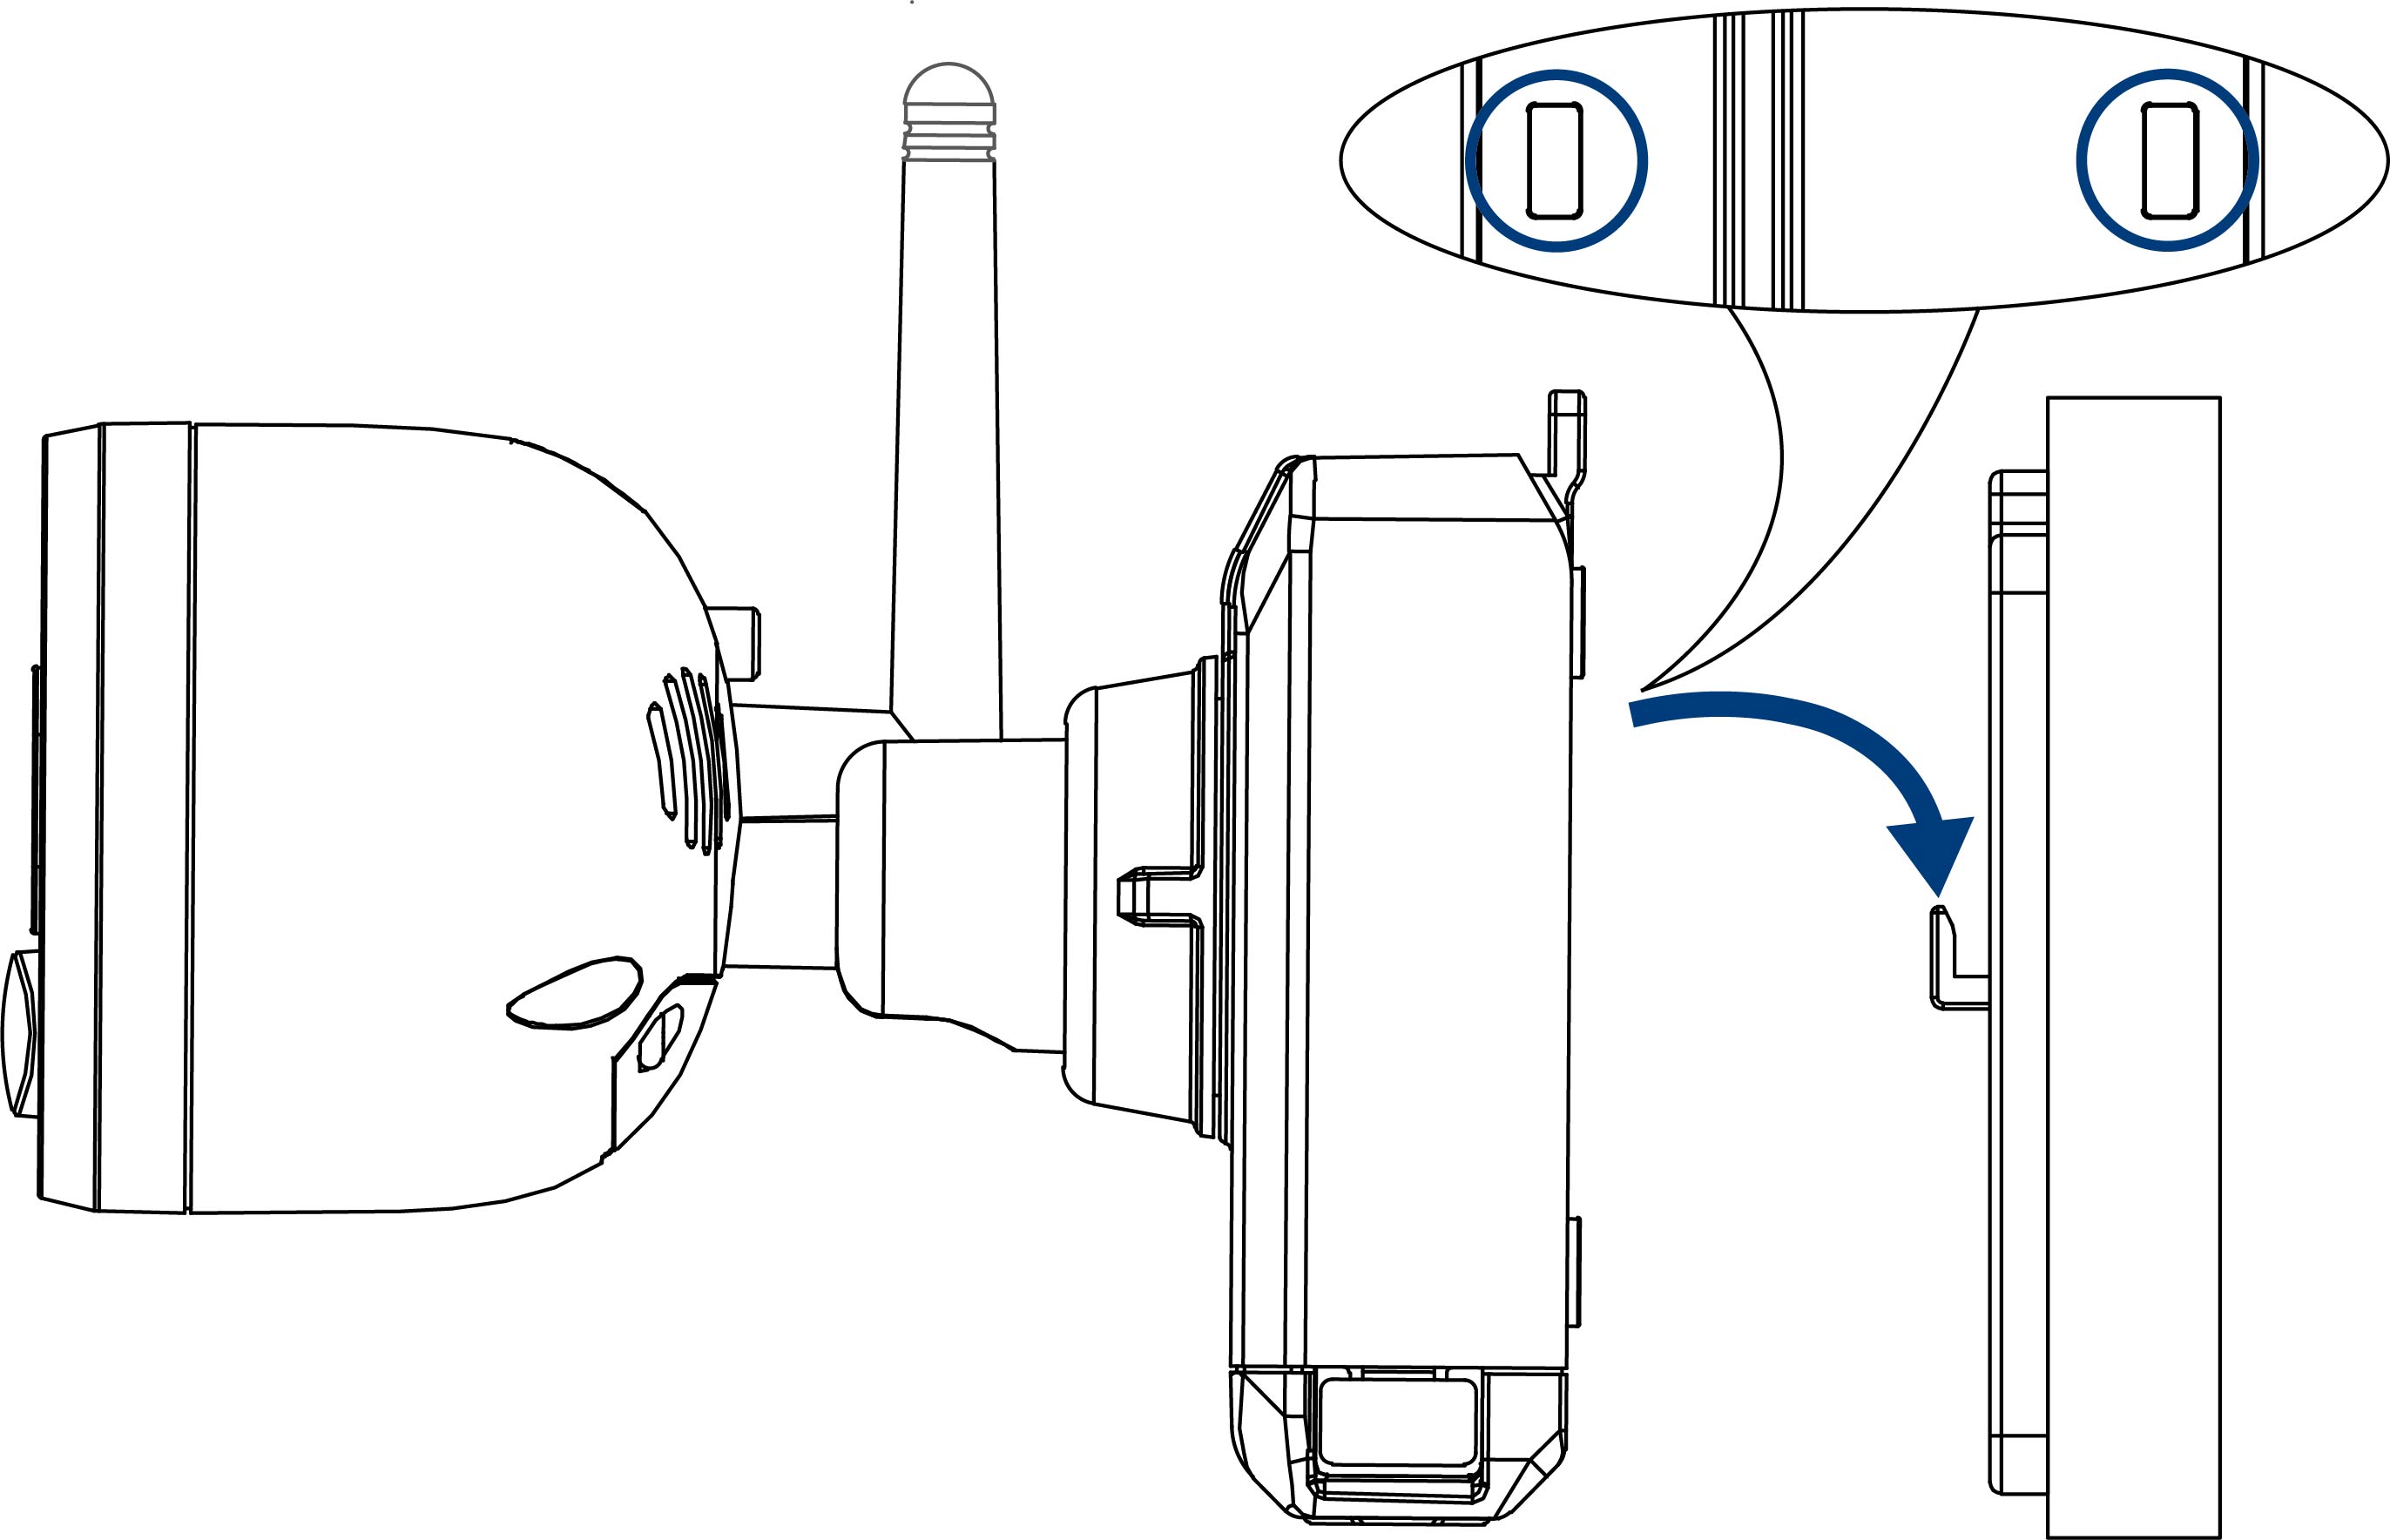
Insert the security screw through the fastener on the top of the camera base and mounting bracket, then tighten with the screwdriver.
U424AA Series
-
Tighten the pre-installed locking screw using the screwdriver.
-
Adjust the angle of the camera to the desired position. Tighten the adjustment ring clockwise when finished.
U424AA Series
4.4.3 Optimizing Motion Detection
Customize motion detection settings to ensure motion events are being recorded and reduce false alarms.
To optimize motion detection:
- Open the Lorex Cirrus app.
- Select your recorder from the list of devices.
- From the Live View, tap to select a channel.
-
Tap
 , then tap Motion Detection Settings.
-
Configure the following as needed:
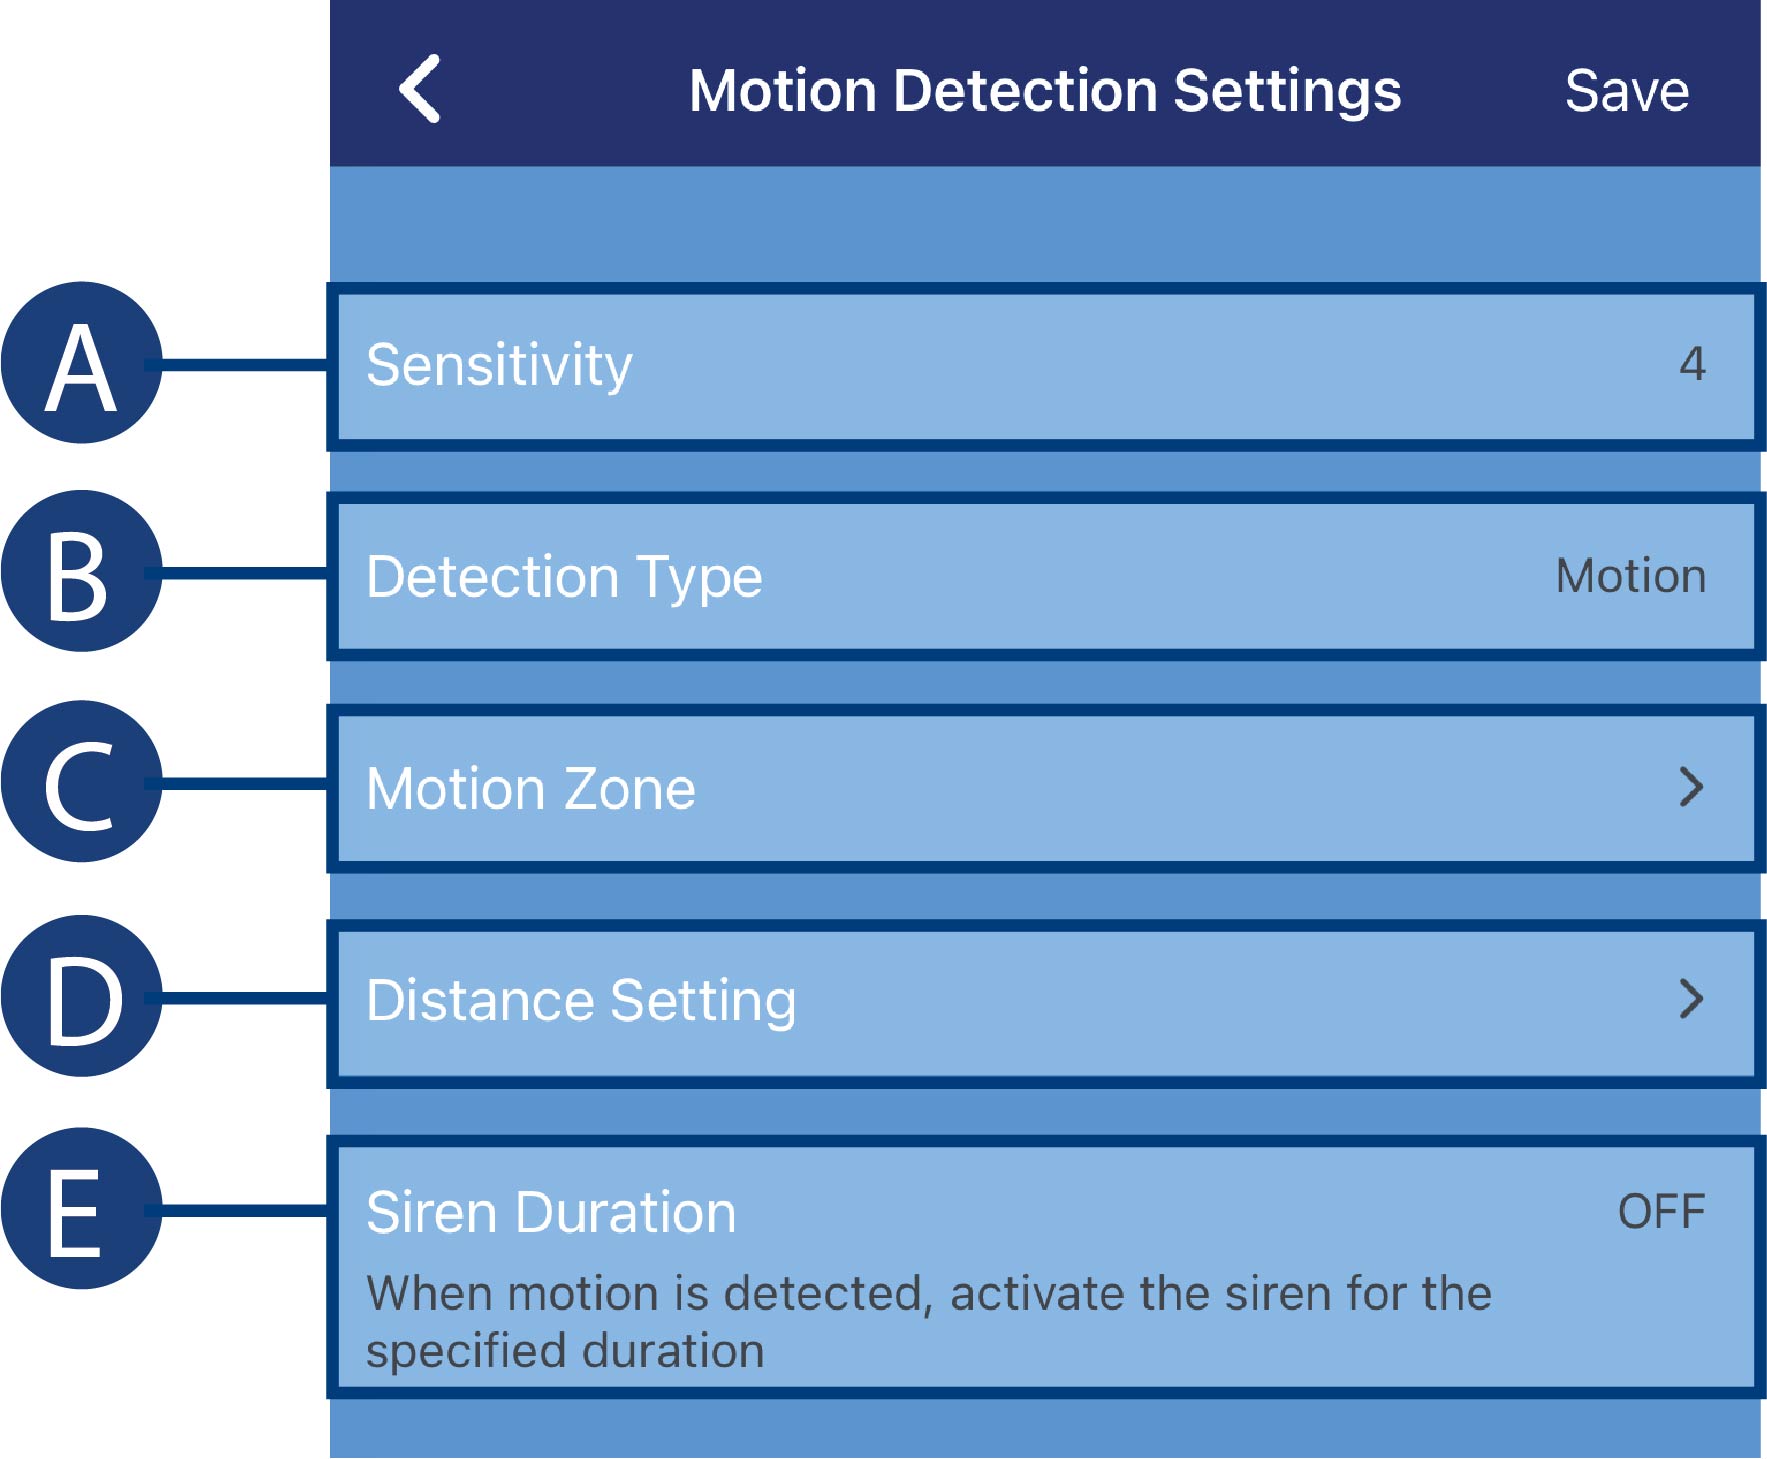
- Sensitivity: The amount of motion needed to trigger recording (e.g., higher sensitivity number requires less motion to trigger recording).
- Detection Type: Enable/disable motion detection or person detection per channel.
-
Motion Zone: Tap to configure the motion zone. Motion will only be detected in areas highlighted in blue.
- Tap to configure which areas of the camera image will be enabled for motion detection. A blue grid will appear over the camera’s live view, letting you know that motion detection is active for the entire image.
- Tap-and-drag over areas of the image to remove the blue grid overlay, which removes that part of the image from the active area.
- Distance Setting: Configure distance setting for motion detection. Change the distance setting if motion detection is being triggered by unwanted events.
- Siren Duration: Set the recorder to sound an alarm for a specified duration when motion is detected.
- Tap Save when finished. Repeat for other cameras on the system.
4.5 Quick Access to System Information
To quickly open a window with system information:
-
Right-click to open the Taskbar at the bottom of the screen, then click
 on the recorder’s Taskbar.