4 Basic Setup

4.1 STEP 1: Connect the IP cameras
Connect IP cameras to the LAN ports on the rear panel of the NVR.

4.2 STEP 2: Connect the mouse
Connect the included USB mouse to one of the USB ports.

4.3 STEP 3: Connect the Ethernet cable
Connect the included Ethernet cable to the WAN port on the rear panel of the NVR. Connect the other end of the Ethernet cable to a router on your network.

4.4 STEP 4: Connect the monitor or TV
Connect the included HDMI cable to the HDMI port, then to a TV or monitor (recommended).
OR
Connect a VGA cable (not included) to the VGA port, then to a monitor.

- VGA cable (not included) — supports up to 1080p output.
- HDMI cable (included) — supports up to 4K output.
4.5 STEP 5: Connect to power
Connect the included power cord to the rear panel of the NVR. Connect the end of the power cord to a wall socket or surge protector. Flip the ON/OFF switch to the ON position to power
up the NVR.

- Connect the included power cord to the rear panel as shown above.
- Flip the ON/OFF switch to the ON position to power up the NVR.
4.6 STEP 6: Upgrade firmware to latest version (if available)
If a firmware upgrade is available, you will be asked to install it once the NVR starts up. It is required to upgrade your system firmware and client software / mobile apps to the latest version to enable
remote connection to the system.
If a firmware upgrade is available:
-
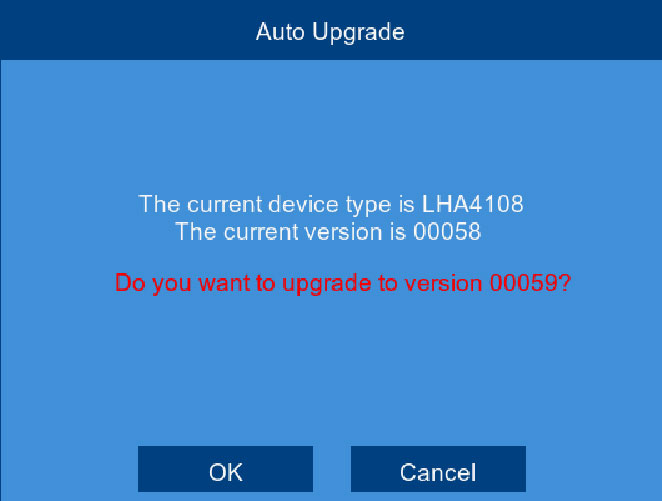
After startup, a notification will appear asking you to upgrade the firmware. Click OK to upgrade.
![Graphic]()
- Enter the system user name (default: admin) and password (default: 00000000) and click OK. Wait for the firmware update to complete. The system will restart once the firmware has been upgraded.

4.7 STEP 7: Create a secure password
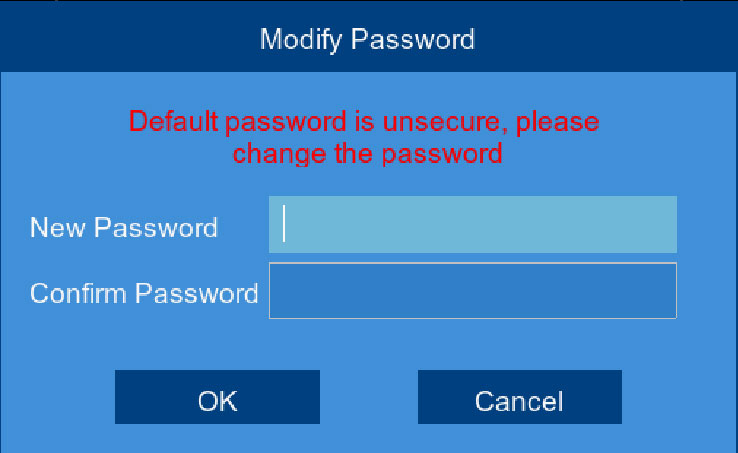
The first time you power up your system, you will be asked to create a new, secure password that is 8–15 characters long.
- Enter the system user name (default: admin) and password (default: 00000000)
-
You will be asked to create a new, secure 8–15 character password. Enter your new password in the New Password and Confirm Password fields, then press OK to confirm.
![Graphic]()
4.8 STEP 8: Complete the Setup Wizard
After setting a secure password, the NVR Setup Wizard launches. The wizard helps you set your language, region, and confirm the correct date and time for the system.
-
The setup wizard launches. Click Next to begin.
![Graphic]()
-
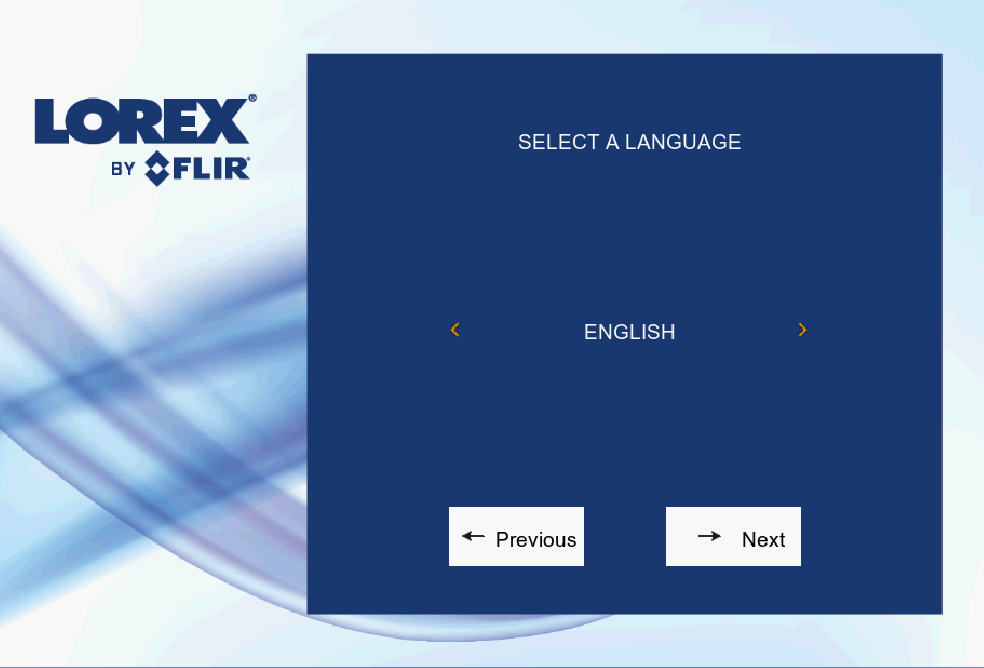
Click the arrow keys to select your preferred language for the on-screen display. Click Next to confirm.
![Graphic]()
-
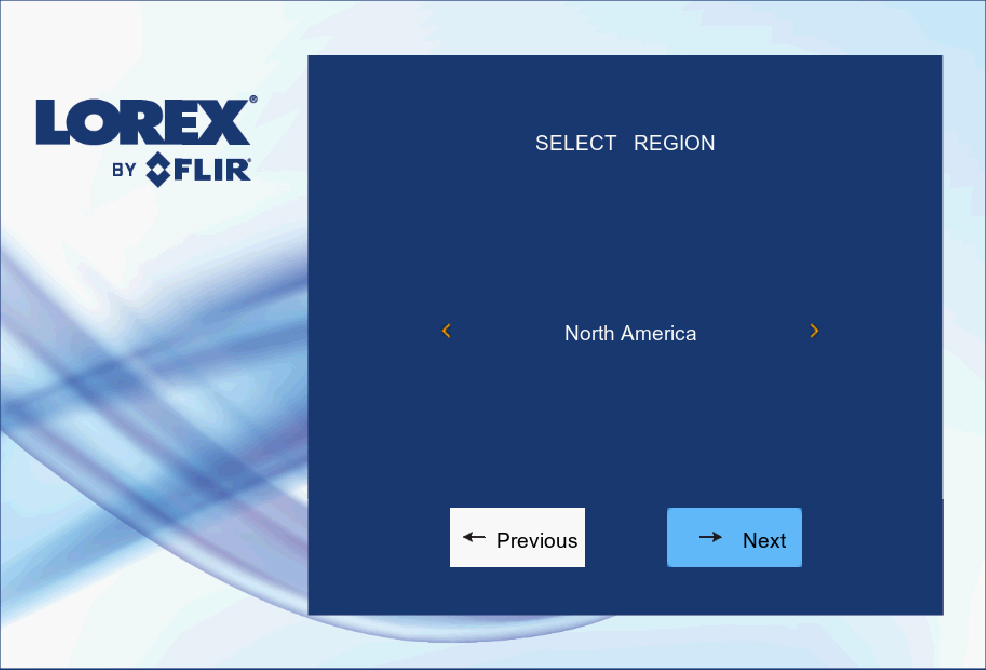
Click the arrow keys to select your correct region. Click Next to confirm.
![Graphic]()
-
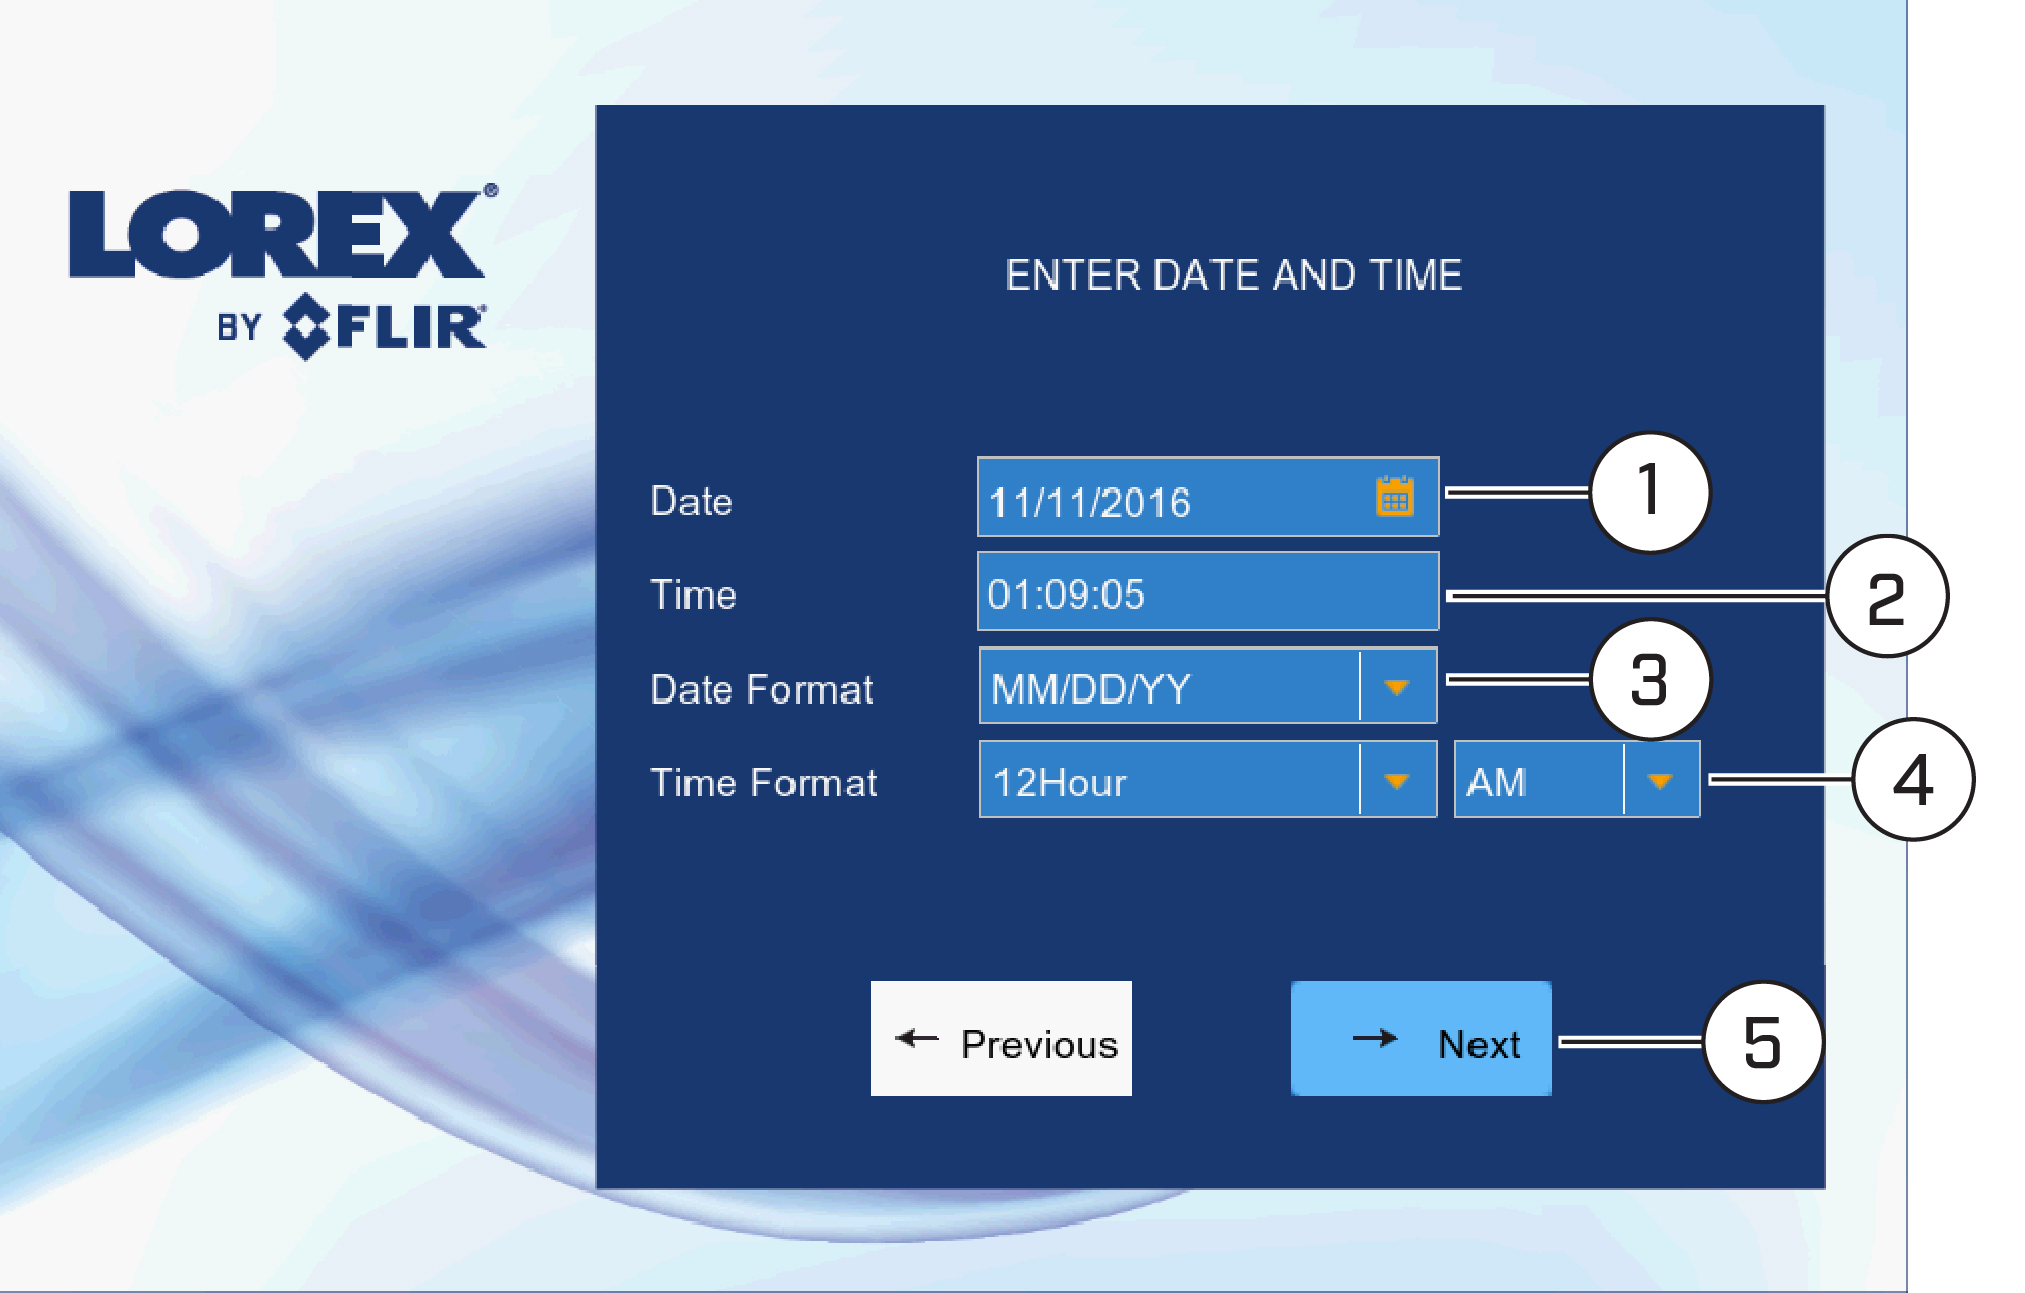
Configure all fields related to date and time:
![Graphic]()
- Click to select the correct date from the calendar.
- Click to enter the correct time.
- Select your preferred date format from the dropdown. This determines how the date will appear in date stamps.
- Select your preferred time format from the dropdown. This determines how the time will appear in time stamps. If you select 12Hour format, select AM or PM.
- Click Next.
-
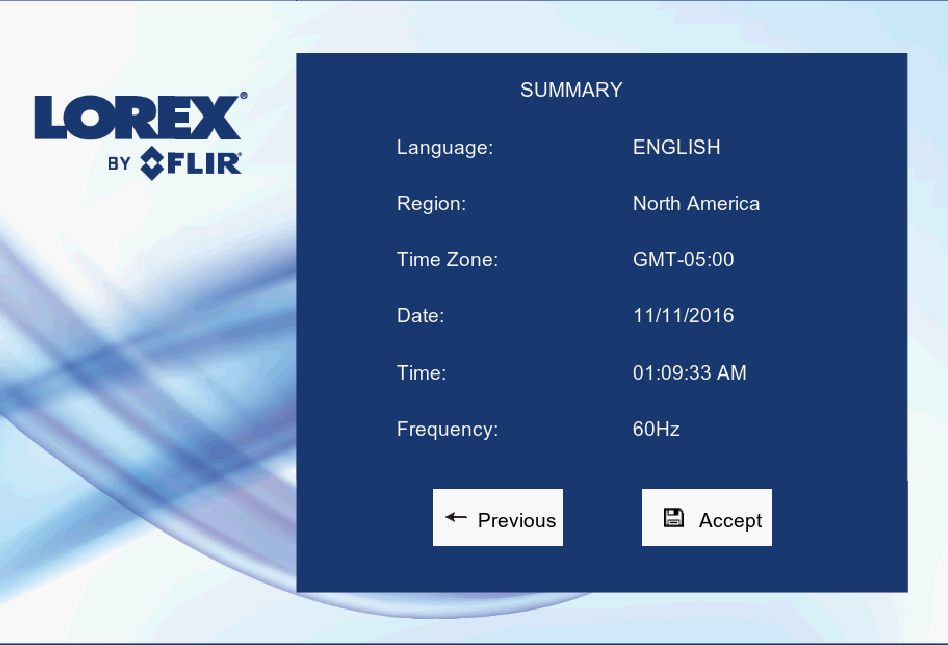
Review the information on the final screen of the wizard. Click Accept to confirm that all information is correct, or click Previous to go back to a previous screen in the wizard.
![Graphic]() Once you have completed the wizard, the date and time of the system is updated. You can make changes at any time to the date, time or region. See 12.5.1 Changing the Date and Time for details.

4.9 STEP 9: Verify camera image
- Power on the cameras, and then verify the camera video quality before mounting the cameras to a permanent location.
- Mount the cameras under a sheltered location. Always verify the outdoor rating of your camera before installing it in a permanent location.
4.9.1 Camera Installation Tips
- Mount the camera where the lens is away from direct and intense sunlight.
- Plan your cable wiring so that it does not interfere with power lines or telephone lines.
- Ensure that the camera wiring is not exposed or easily cut.
- Mount the camera in an area that is visible, but out of reach.
- Avoid pointing the camera at a glass window to see outside, as this may result in a poor image caused by glare from indoor / outdoor lighting conditions.
- Adjust the camera angle so that it covers an area with high traffic.
- In "high-risk" locations, have multiple cameras point in the same area. This provides camera redundancy if a vandal attempts to damage the camera.
4.10 Connecting to Your NVR Over the Internet
The system features FLIR Cloud Services. This is a cloud service that allows you to connect with your system over the Internet via a secure handshake with FLIR servers.
This means you can easily connect to your system without requiring any port forwarding or other network configuration.
- For details on connecting to your NVR using a smartphone or tablet, see 14 Connecting to Your System Using Smartphone or Tablet Apps .
- For details on connecting to your NVR using a PC or Mac computer, see 13 FLIR Client 12 for PC / Mac .
4.11 Quick Access to System Information
To quickly open a window with system information:
-
Click
![icon]() on the NVR’s Taskbar.
OR
-
Press the
![icon]() button on the included remote control.
 on the
 button on the included remote control.
4.12 Connecting Cameras to the Local Area Network (LAN)
For flexibility, you may also connect IP cameras to the same Local Area Network (LAN) as the NVR. This is accomplished by connecting the cameras to the same router as the NVR.
For these installations, an external PoE switch (sold separately) or power adapter (sold separately) must be used to provide
power to each IP camera. You also must add the cameras on the NVR before they will show a picture on the monitor or be recorded by the NVR.
Follow the steps below to connect the cameras to the NVR over the LAN.
4.12.1 Step 1: Connecting Cameras to your Network
Option A: Connecting Cameras using a PoE Switch

- Connect an Ethernet cable from the LAN port on an external PoE switch (sold separately on lorextechnology.com ) to your router using a CAT5e or higher Ethernet cable. Connect the power cable to the PoE switch and to a power outlet or surge protector.
- Connect the IP cameras to the PoE switch using the Ethernet extension cables. The PoE switch will provide power and video transmission the same way as your NVR.
Option B: Connecting Cameras using a Router (Power Adapters Required)

- Connect each camera to a compatible power adapter (visit lorextechnology.com for compatible power adapters for your cameras).
- Connect the camera to your router using a CAT5e or higher Ethernet cable.
4.12.2 Step 2: Add Cameras to your NVR
-
From live view, hover over a blank channel. Click
 in the center of the channel to add an IP camera from the LAN.

-
The Quick Add menu opens and scans the network for compatible cameras. Click the camera you would like to add, then click
Add.
